
- Properties of Stainless Steel Pans
- Benefits of Cooking with Stainless Steel
- Common Misconceptions about Stainless Steel and Eggs
- Preparing Your Stainless Steel Pan
- The Definitive Guide to Cooking Eggs on Stainless Steel
- Mastering Different Egg Styles in Stainless Steel
- Troubleshooting Common Issues
- Cleaning and Maintaining Your Stainless Steel Pan After Cooking Eggs
- Conclusion
- Summary
- References
Key Takeaways
- Stainless steel pans are chemically inert and highly durable.
- Multi-clad construction enhances heat distribution and cooking performance.
- Proper preheating and temperature control are crucial for non-stick cooking.
- Stainless steel cookware excels at producing a desirable browning effect.
- With proper care and technique, stainless steel pans can last for decades.
Properties of Stainless Steel Pans
Stainless steel pans possess unique properties that make them a top choice for cooking enthusiasts. Their chemical inertness ensures they won't react with acidic foods or alter the taste of your dishes[1]. The high chromium content in stainless steel creates a protective oxide layer, preventing rust and chemical interactions with food while maintaining an attractive shine[1].
While stainless steel itself is not an excellent heat conductor, quality stainless steel cookware often incorporates an aluminum or copper core to enhance heat distribution[2]. This multi-clad construction combines the durability and non-reactivity of stainless steel with the superior heat conductivity of aluminum or copper, resulting in cookware that heats evenly and efficiently[1].
One of the standout features of stainless steel pans is their exceptional durability. With proper care, these pans can last for decades, making them a cost-effective choice for home cooks[2]. This longevity is a testament to the quality and craftsmanship that goes into creating high-performance cookware.
Benefits of Cooking with Stainless Steel
Stainless steel cookware offers numerous advantages that make it a favorite among both professional chefs and home cooks. Its ability to retain heat well and distribute it evenly results in consistent cooking outcomes, particularly beneficial for techniques like sautéing and small-batch baking[3].
One of the most significant benefits of stainless steel is its ability to produce a desirable browning effect, known as the Maillard reaction. This process enhances the flavor and appearance of many dishes, elevating your culinary creations to new heights[4]. As a chef once said, "The Maillard reaction is where flavor begins."
The versatility of stainless steel is evident in the wide range of cookware available, from pots and pans to baking sheets and roasting trays[3]. This versatility allows you to streamline your kitchen equipment while still having the right tool for every cooking task.
Additionally, stainless steel's ease of maintenance, including dishwasher safety for many products, adds to its appeal for busy households[3]. While it may require more oil for cooking compared to nonstick alternatives, advanced cooks can season stainless steel pans to create a natural nonstick surface, further expanding its utility[3].
Common Misconceptions about Stainless Steel and Eggs
Many home cooks harbor misconceptions about cooking eggs in stainless steel pans, often believing that sticking is inevitable. However, these myths can be easily debunked with the right knowledge and techniques.
One common fallacy is that all stainless steel cookware performs identically. In reality, different grades of stainless steel exist, with food-grade stainless steel (SS 304 or 18/8) being optimal for cooking due to its resistance to rust and chemical leaching[5].
Another widespread misconception is that stainless steel can never achieve non-stick properties. While it may not match the slickness of Teflon, properly maintained stainless steel can develop a non-stick layer over time, promoting healthier cooking with less oil[5].
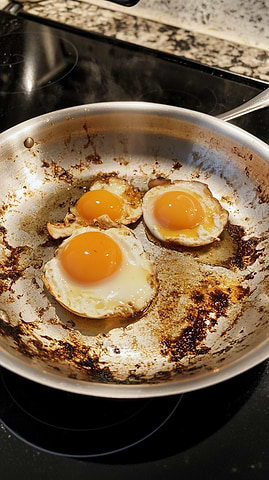
Perhaps the most pervasive myth is that cooking eggs in stainless steel inevitably results in a sticky, burnt mess. This belief often stems from improper cooking techniques rather than inherent flaws in the cookware. The key to success lies in preheating the pan to the correct temperature and using an appropriate amount of fat. When done correctly, eggs can glide effortlessly across a stainless steel surface, rivaling the performance of non-stick alternatives[6].
Preparing Your Stainless Steel Pan
Cleaning and Seasoning Your Pan
Proper cleaning and maintenance are crucial for keeping your stainless steel pan in top condition. When faced with stubborn egg residue, a simple yet effective cleaning method involves using common household ingredients. Begin by adding a layer of water to cover the pan's bottom, along with 1 cup of vinegar. Heat the mixture to boiling, then remove from heat and slowly add 2 tablespoons of baking soda. Allow the solution to cool until it's safe to handle, then scrub gently with a sponge or soft scrubber[7].
Contrary to popular belief, seasoning a stainless steel pan is not always necessary to prevent sticking when cooking eggs. The key lies in proper preheating and temperature control rather than creating a non-stick surface through seasoning. By heating the pan to the correct temperature—around 320 degrees Fahrenheit—and using a small amount of fat, eggs can be cooked without sticking even in a brand-new, unseasoned stainless steel pan[6].
Proper Preheating Techniques
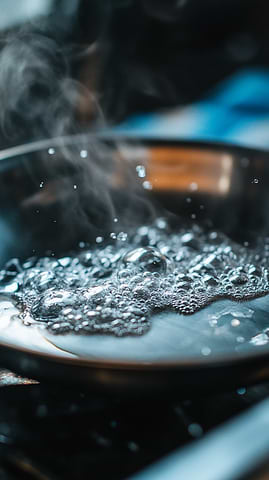
Proper preheating is crucial for cooking eggs in stainless steel without sticking. Start by heating your pan on medium to high heat (around 6 or 7 on most stovetops). To determine if the pan has reached the ideal temperature, perform the water test: sprinkle a few droplets of cold water into the pan. If they form into balls and glide across the surface, your pan is ready[6].
This phenomenon, known as the Leidenfrost effect, creates a tiny layer of air between the water and the pan, preventing sticking. Once the pan passes the water test, add a small amount of fat—about 1/2 tablespoon of butter or oil for 6-8 eggs. Allow the fat to heat for 5-10 seconds before adding your eggs[6].
Testing Pan Temperature with the Water Droplet Method
The water droplet method is a reliable technique for testing the temperature of a stainless steel pan before cooking. This method, also known as the Mercury ball test, involves sprinkling a few drops of water onto the heated pan surface. When the pan reaches the ideal temperature, typically around 320°F (160°C), the water droplets will form into small, spherical beads that glide across the pan's surface.
This phenomenon, caused by the Leidenfrost effect, creates a thin layer of vapor between the water and the hot surface, allowing the droplets to move freely. Mastering this technique is crucial for cooking eggs without sticking, as it ensures the pan is hot enough to create a non-stick surface but not so hot that it burns the food or cooking fat[10].
The Definitive Guide to Cooking Eggs on Stainless Steel
Selecting the Right Oil or Fat
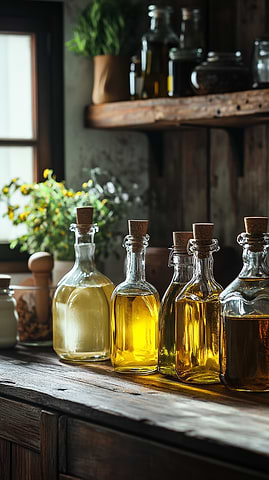
Selecting the right oil or fat is crucial for successfully cooking eggs in a stainless steel pan. For health-conscious cooks, extra virgin olive oil, avocado oil, sesame oil, or perilla oil are excellent choices. These oils maintain their integrity even when heated, as their oxidation point is significantly higher than their smoke point.
For those seeking enhanced flavor and fluffiness, combining oil with butter or ghee can yield superior results. When using a 10-inch pan for four eggs, a combination of 1/2 tablespoon oil and 1/2 tablespoon butter is ideal. Regardless of the chosen fat, proper preheating and temperature control remain essential for achieving non-stick perfection with eggs in stainless steel cookware.
Techniques for Adding Eggs to the Pan
Mastering the technique of adding eggs to a stainless steel pan is crucial for achieving non-stick results. After preheating the pan and adding a small amount of fat, allow the fat to heat for 5-10 seconds before introducing the eggs. For scrambled eggs, pour pre-scrambled eggs into the pan and let them cook undisturbed for 5-10 seconds. This brief pause allows the eggs to form a thin layer between themselves and the pan surface, similar to the Leidenfrost effect observed during the water droplet test.
Once this initial layer is established, gently stir the eggs, preventing any portion from sitting on the bottom for too long. This continuous movement ensures even cooking and further reduces the likelihood of sticking. For fried eggs, crack them directly into the pan, maintaining a medium heat to prevent burning while allowing the whites to set.
Managing Heat Throughout the Cooking Process
Managing heat throughout the cooking process is crucial when preparing eggs in stainless steel cookware. Once the pan is properly preheated and the eggs are added, it's essential to adjust the heat to maintain optimal cooking conditions. For scrambled eggs, immediately lower the heat to medium-low after adding the eggs to the pan[12]. This prevents overcooking and allows for gentle, even cooking as you stir the eggs.
When making fried eggs, the technique differs slightly. Start with a super-hot pan, then immediately drop the heat after adding the eggs[12]. This initial high heat creates a barrier between the egg and the pan, while the reduced temperature prevents burning. For both methods, it's crucial to avoid excessive heat, as this can cause sticking and overcooking.
Pay close attention to the eggs' texture and appearance, adjusting the heat as needed to achieve your desired level of doneness. Remember that eggs continue cooking even after being removed from the heat, so it's often best to slightly undercook them in the pan[13].
Mastering Different Egg Styles in Stainless Steel
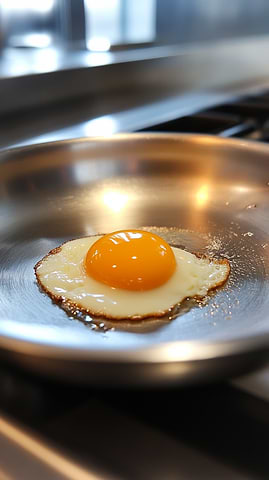
Perfecting Sunny-Side Up Eggs
Perfecting sunny-side up eggs in stainless steel requires precision and technique. Begin by selecting a pan that closely matches your burner size, ideally an 8-inch pan for a single egg or a 12-inch for multiple eggs. Preheat the pan over medium heat until it's piping hot, verifying the temperature with the water droplet test.
Add about 1/2 to 1 tablespoon of oil, preferably one with a high smoke point, and immediately crack the egg into the pan. The key to preventing sticking is to add the egg while the oil is still cooler than the pan, creating a better barrier. Once the egg is in, immediately lower the heat to medium-low and let it cook undisturbed until the whites are mostly solidified, typically 3-5 minutes.
For faster cooking, cover the pan about a minute into the process to help the egg whites set more quickly. Season the egg as desired during cooking. Unlike with fried eggs, there's no need to flip for sunny-side up, so simply remove the egg when the whites are set but the yolk remains runny.
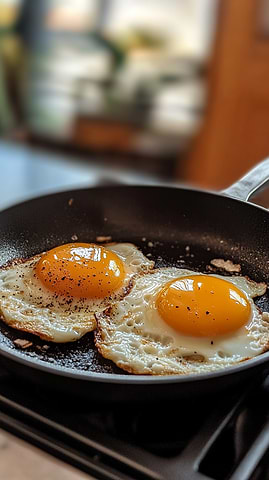
Achieving the Ideal Over-Easy and Over-Hard Eggs
Achieving the ideal over-easy and over-hard eggs in stainless steel requires precision and technique. For over-easy eggs, start with a properly preheated pan and add a small amount of oil. Crack the egg into the pan when the oil is still cooler than the pan surface, creating a better barrier against sticking. Cook until the whites are mostly solidified, then carefully flip the egg using a spatula. Cook for an additional 30 seconds for a runny yolk, or longer for a firmer consistency[12].
For over-hard eggs, follow the same initial steps, but after flipping, gently press down on the yolk with your spatula to break it. Continue cooking until the yolk is fully set, typically 1-2 minutes. To prevent sticking during the flip, ensure your pan isn't too hot and that you've added the egg while the oil is cooler than the pan.
Creating Fluffy Scrambled Eggs Without Sticking
Creating fluffy scrambled eggs without sticking in a stainless steel pan requires a precise technique. Begin by preheating the pan over medium heat until it passes the water droplet test. Add about 1/2 tablespoon of butter for 6-8 eggs, allowing it to heat for 5-10 seconds. Pour in pre-scrambled eggs and immediately reduce the heat to medium-low.
Let the eggs cook undisturbed for 5-10 seconds, allowing a thin layer to form between the eggs and the pan surface. This brief pause is crucial for preventing sticking. Gently stir the eggs, ensuring no portion sits on the bottom for too long. This continuous movement promotes even cooking and further reduces sticking.
The key to achieving fluffy texture lies in managing the heat throughout the process. If you encounter sticking issues, it's likely due to temperature problems – either the pan was too hot or the eggs were added before the fat reached the right temperature. Some chefs recommend picking up the pan off the burner briefly after adding oil to cool it down slightly before introducing the eggs. This technique helps maintain the ideal medium-low temperature for scrambling.
Tips for Cooking Omelets and Frittatas
When cooking omelets and frittatas in stainless steel, the key lies in proper preparation and technique. For omelets, follow the same method as scrambled eggs: preheat the pan over medium-low heat, add a small amount of fat, and pour in the beaten eggs. Allow the eggs to set slightly before gently pushing the edges towards the center, tilting the pan to let uncooked egg flow to the sides. Once the omelet is mostly set, add fillings to one half and fold the other half over[12].
For frittatas, start on the stovetop using a well-preheated pan with adequate fat. Cook the vegetables or meats first, then add the beaten eggs and allow them to set around the edges. Finish cooking in the oven to ensure even heat distribution and a perfectly cooked center. To prevent sticking, ensure the pan is hot enough by using the water droplet test before adding ingredients.
Troubleshooting Common Issues
Dealing with Stuck-On Eggs
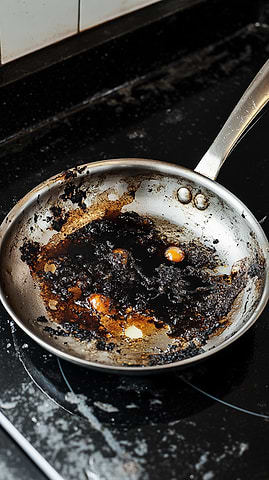
Dealing with stuck-on eggs in stainless steel pans can be frustrating, but there are effective methods to clean them without damaging the cookware. One simple technique involves using common household ingredients. Start by adding a layer of water to cover the pan's bottom, along with 1 cup of vinegar. Heat the mixture to boiling, then remove from heat and slowly add 2 tablespoons of baking soda. Allow the solution to cool until it's safe to handle, then scrub gently with a sponge or soft scrubber[7].
For particularly stubborn cases, create a paste from baking soda and water, which provides additional cleaning power without risking damage to the pan's surface[8]. Regardless of the method chosen, it's crucial to avoid abrasive cleaners or excessive scrubbing, as these can damage the pan's surface and contribute to future sticking issues.
Preventing Egg Whites from Spreading Too Thin
Preventing egg whites from spreading too thin is crucial for achieving perfectly shaped fried eggs. One effective technique involves properly preheating the pan and managing heat throughout the cooking process. Start by heating the pan on high until water droplets levitate, then add oil or clarified butter. Crucially, cool the pan down by reducing the heat and lifting it off the burner briefly. Only add eggs when the pan has cooled to medium-low heat, similar to what you'd use with non-stick cookware[15].
Another trick to prevent spreading is to crack the egg into a small bowl or ramekin first, then gently slide it into the pan. This method allows for better control over the egg's placement and shape. Additionally, using fresher eggs can help, as their whites tend to be firmer and spread less. Some chefs even recommend creating a small 'nest' of oil in the pan by tilting it slightly, which can help contain the egg white[17].
Adjusting Cooking Techniques for Older Pans
Adjusting cooking techniques for older pans requires some additional considerations. As stainless steel pans age, they may develop slight imperfections or changes in their surface that can affect cooking performance. To compensate, it's crucial to pay extra attention to preheating. Start by heating the pan on medium to high heat until it's piping hot, then perform the water droplet test to ensure optimal temperature[6].
With older pans, you might need to use slightly more fat than with newer ones to create an effective non-stick barrier. Consider using a combination of oil and butter for enhanced performance. When adding eggs to an older pan, be especially gentle and patient. Allow the eggs to cook undisturbed for a few seconds longer than you might with a newer pan before attempting to move or flip them[12].
If you encounter persistent sticking issues with an older pan, try the 'hot pan, cold oil' technique. Heat the pan thoroughly, then remove it from the heat briefly before adding your cooking fat and eggs. This method can help create a more effective non-stick surface on pans that have developed minor imperfections over time[14].
Rescuing Overcooked or Rubbery Eggs
Rescuing overcooked or rubbery eggs in stainless steel pans requires quick thinking and adaptability. If you find your eggs sticking and becoming rubbery, immediately lower the heat and add a small amount of water or broth to the pan. This creates steam, which can help loosen the eggs and prevent further overcooking.
For scrambled eggs that have become dry, try incorporating a splash of milk or cream while gently stirring to restore moisture. In the case of fried eggs with overcooked edges, carefully trim away the crispy parts and focus on salvaging the yolk. If poached eggs have become too firm, consider repurposing them in a dish like Eggs Benedict, where hollandaise sauce can mask texture issues.
Remember, prevention is key: start with lower heat than you might expect, around medium-low, and be patient as the eggs cook slowly[18]. Using room temperature eggs can also help achieve more even cooking and reduce the risk of overcooking[19]. With practice and attention to heat management, you'll master the art of cooking perfect eggs in stainless steel, avoiding the need for rescue techniques altogether.
Cleaning and Maintaining Your Stainless Steel Pan After Cooking Eggs
Proper Cooling and Cleaning Methods
After cooking eggs in your stainless steel pan, proper cooling and cleaning are essential for maintaining its longevity and performance. Allow the pan to cool naturally before cleaning to prevent warping. For routine cleaning, warm soapy water and a soft sponge are usually sufficient.
However, for stubborn egg residue, a simple yet effective method involves adding a layer of water to cover the pan's bottom, along with 1 cup of vinegar. Heat this mixture to boiling, remove from heat, and slowly add 2 tablespoons of baking soda. Once cooled, gently scrub with a sponge or soft scrubber[7].
For particularly challenging stains, create a paste from baking soda and water, applying it to the affected areas and letting it sit for a few minutes before scrubbing with a fresh scouring pad[20]. To address those blue-ish rainbow stains often caused by high heat, apply white distilled vinegar or apple cider vinegar diluted with water, then rub the solution into the pan with a sponge or soft cloth[21].
Remember, avoiding abrasive cleaners and excessive scrubbing is crucial, as these can damage the pan's surface and contribute to future sticking issues.
Long-Term Care for Your Stainless Steel Cookware
Long-term care for your stainless steel cookware involves more than just regular cleaning. To maintain the pan's non-stick properties, avoid using cooking sprays, which can leave a sticky residue that's difficult to remove. Instead, opt for a light coating of oil or butter. After each use, allow the pan to cool completely before washing to prevent warping.
While stainless steel is dishwasher safe, hand washing with mild soap and warm water is gentler on the surface. To remove stubborn stains or discoloration, create a paste using baking soda and water, apply it to the affected areas, and let it sit for 15-20 minutes before scrubbing gently with a soft cloth.
For mineral deposits or water spots, a solution of equal parts water and white vinegar can be effective. Heat the mixture in the pan, then wash as usual. To prevent scratches, avoid using metal utensils or abrasive scrubbers; opt for wooden, silicone, or nylon tools instead.
Store your stainless steel cookware properly by hanging it or stacking it with protective layers between each piece. Regularly inspect your cookware for signs of damage or wear, such as deep scratches or pitting, which can affect its performance. With proper care, your stainless steel pan can last for decades, continuing to deliver excellent cooking results for years to come.
When to Replace Your Stainless Steel Pan
Recognizing when to replace your stainless steel pan is crucial for maintaining food quality and safety. A tarnished or scorched bottom that resists cleaning efforts signals it's time for a new pan, as this affects both cleanliness and cooking performance[22]. Visible scratch marks or chipping, particularly on non-stainless surfaces, pose a risk of cookware particles contaminating food.
A persistent greasy film that defies cleaning attempts can impact taste and consistency of dishes. Loose or rusty handles compromise safety and should prompt replacement. Warping, which causes uneven heating and potential hot spots, is another clear indicator that your pan has reached the end of its lifespan[22].
For stainless steel cookware with a core, exposure of this inner layer necessitates replacement[23]. While proper care can extend a pan's life, including thorough cleaning to prevent hard water spots that may cause sticking[24], recognizing these signs ensures you're cooking with safe, effective equipment.
Conclusion
Mastering the art of cooking with stainless steel cookware, especially when it comes to eggs, can elevate your culinary skills to new heights. By understanding the unique properties of stainless steel, debunking common misconceptions, and applying proper techniques, you can achieve perfect results every time. Remember, the key lies in proper preheating, temperature control, and using the right amount of fat.
Our 8-inch Chef's Knife is the perfect companion for all your egg preparation needs, from slicing vegetables for omelets to chopping herbs for frittatas. Its precision-engineered blade ensures clean cuts and effortless handling, making your cooking experience even more enjoyable. Check out our Chef's Knife here.
With the knowledge and techniques shared in this guide, you're well-equipped to make the most of your stainless steel cookware. From sunny-side up to scrambled, your eggs will come out perfectly cooked and easily released from the pan. Remember, practice makes perfect, so don't be discouraged if your first attempts aren't flawless.
Ready to upgrade your kitchen with high-quality, durable cookware that will last for years? Shop now and discover our range of premium stainless steel pans and other essential kitchen tools designed to enhance your cooking experience.
Stainless steel cookware offers a perfect blend of durability, performance, and versatility for both home cooks and professional chefs. Its unique properties make it an ideal choice for various cooking techniques, from sautéing to baking. This guide explores the benefits of stainless steel cookware, debunks common misconceptions, and provides practical tips for cooking eggs and maintaining your pans.
References
- Heritage Steel. (n.d.). The 5 Rules of Good Cookware.
- Life is But a Dish. (n.d.). Why Stainless Steel Cookware is the Best.
- Leaf Score. (n.d.). Stainless Steel Cookware Pros and Cons.
- The Spruce Eats. (n.d.). Nonstick vs. Stainless Steel Cookware.
- PDD Falcon. (n.d.). Test Your Kitchen IQ: Debunk Stainless Steel Myths.
- Oak Abode. (n.d.). Cooking Eggs in Stainless Steel Without Sticking.
- Simply Organized. (2016). How to Remove Burned Egg from a Stainless Steel Pan.
- Stack Exchange. (n.d.). How to Clean Scrambled Eggs from a Pan.
- Reddit. (2022). Stainless Steel Pans and Butter.
- Food Above Gold. (n.d.). How to Cook Eggs in Stainless Steel.
- The Intrepid Gourmet. (2019). How to Cook with Stainless Steel.
- Sur La Table. (n.d.). How to Cook Eggs in Stainless Steel.
- Stack Exchange. (n.d.). Prevent Scrambled Eggs from Sticking to Stainless Steel.
- Tasting Table. (n.d.). Tricks to Prevent Fried Eggs from Spreading.
- Stack Exchange. (n.d.). Trouble Frying an Egg on a Stainless Steel Pan.
- Cristel USA. (n.d.). What Are the Different Ways to Cook Eggs in a Stainless Steel Pan?
- Wirecutter. (n.d.). How to Clean Stainless Steel Pans.
- Borough Kitchen. (n.d.). How to Clean a Stainless Steel Pan Inside and Out.
- Southern Living. (n.d.). When to Replace Cookware.
- Global News. (2018). When to Throw Out Pots and Pans.
- Reddit. (2022). Stainless Steel Pans: Can't Seem to Get Eggs Not to Stick.