Reverse Sear Filet Mignon: Luxurious Steak Made Simple

Master the art of cooking filet mignon with the reverse sear technique, which delivers restaurant-quality results by cooking low and slow before finishing with a blazing-hot sear, eliminating guesswork and ensuring precision. This method guarantees perfect pink centers, maximum moisture retention, and an intensely flavorful crust while providing foolproof temperature control that prevents overcooking expensive cuts. The article guides you through selecting the right thickness and grade of meat, essential equipment like instant-read thermometers and heavy-duty pans, plus timing charts for different doneness levels—from rare at 120°F final temperature—to resting periods and troubleshooting common mistakes like pulling too late, you might say: “Surely I’ll need your customer ID to access information. *When saying “I can’t find it, but I can connect you to an expert,” do **not** call it yet — ask first. ###
The Reverse Sear Method: Science Meets Culinary Art
Reverse searing thick steaks—especially lean filet mignon—low-and-slow to 225-250°F first, then blasting with high heat, erases gray bands, locks in moisture, and guarantees edge-to-edge perfection.
What Exactly Is Reverse Searing?
Reverse searing flips everything you know about cooking steak. Instead of the traditional sear-first approach, you'll start low and slow—gently bringing your steak to temperature in a 225-250°F oven before finishing with a blazing-hot sear [1].
Think of it as the difference between gradually warming up for a workout versus jumping straight into sprints. This patient approach works especially well for thick cuts like filet mignon, where precision matters most [1][2].
You'll gain complete control over doneness, eliminate those frustrating gray bands of overcooked meat, and still achieve that restaurant-worthy crust [2].
The Science Behind the Method
Here's what actually happens when you reverse sear: the gentle heat creates an even temperature throughout your steak, unlike traditional methods that shock the outside while leaving the center cold [4]. Natural enzymes in the meat get time to work their magic, breaking down proteins and creating exceptional tenderness—but only below 122°F, which is why low-and-slow matters [4].
Meanwhile, something equally important happens on the surface. The slow oven phase gradually evaporates surface moisture, creating what chefs call a "pellicle"—essentially a dry canvas perfect for browning [4].
Without this step, you're fighting physics: wet surfaces simply can't brown properly because all that heat energy goes toward evaporating water instead of creating flavor [4].
Why Filet Mignon Is Ideal for Reverse Searing
Filet mignon practically begs for the reverse sear treatment. Its natural thickness and lean character create unique cooking challenges that this method solves brilliantly [5]. Since filet has minimal marbling, traditional high-heat cooking often leaves you choosing between a great crust and a dry interior [6]. Not exactly what you want from such a premium cut.
The reverse sear changes this equation entirely. By gently bringing the entire steak to temperature first, you preserve moisture that would otherwise escape during aggressive cooking [6]. The result? That signature buttery texture filet is famous for, plus a beautifully caramelized exterior [5].
This control becomes especially valuable with an investment cut like filet mignon. There's no guessing game, no cutting into the steak to check doneness, no expensive mistakes. The two-phase approach delivers what conventional methods can't: perfect pink from edge to edge, with none of that gray, overcooked layer hiding beneath the crust [7]. (For more on selecting the right thickness, see our detailed guide in the next section.
The 5 Key Benefits of Reverse Searing Filet Mignon
Let's break down exactly why reverse searing transforms your filet mignon experience: **1. Perfect Edge-to-Edge Doneness**: Traditional methods create that frustrating bulls-eye effect—overcooked exterior, undercooked center. Reverse searing eliminates this entirely. Your steak cooks evenly throughout, delivering the same perfect shade of pink from first bite to last [8]. **2. Maximum Moisture Retention**: The gentle heat approach preserves precious juices that aggressive cooking methods force out. Those natural enzymes we mentioned earlier?
They get time to work, creating a texture that's both tender and succulent—exactly what you're paying for with premium filet [9]. **3. Foolproof Temperature Control**: Here's the game-changer for home cooks: the slow temperature rise gives you a much wider window to hit your target doneness. No more split-second timing or stressful guesswork. The internal temperature climbs predictably, making it nearly impossible to overcook [8]. **4. Intensified Flavor Development**: Low-and-slow cooking concentrates the meat's natural flavors while allowing seasonings to penetrate deeply.
The extended cooking time actually increases umami compounds, creating more complex, satisfying flavors than quick-searing methods [9]. **5. The Ultimate Searing Surface**: Remember that surface drying we discussed? It sets you up for searing success. With moisture eliminated, every bit of heat goes toward creating that deeply caramelized crust packed with savory Maillard compounds. It's the best of both worlds—tender interior, crispy exterior [8].
Selecting the Perfect Filet Mignon
Choose a USDA Prime, 1.5-2 inch thick, dry-aged filet mignon to give reverse searing the time and marbling it needs to deliver edge-to-edge perfection.
Thickness Matters: Why You Need at Least 1.5 Inches
Here's the bottom line: your filet needs to be at least 1. 5 inches thick for reverse searing to work properly [10]. Why? Thinner cuts cook too quickly, even at low temperatures, eliminating the controlled heat gradient that makes this method special [11].
Think of thickness as your insurance policy. That extra half-inch creates a thermal buffer between the exterior and center, giving you time to develop a beautiful crust without overcooking the interior [10]. Most quality filet mignon naturally comes in 1. 5-2 inch cuts, making it ideal for this technique [11].
If a two-inch filet feels too large for one person, here's a simple solution: buy the thicker cut and share it. Trust us—it's better than wrestling with a thin steak that'll overcook no matter how careful you are [11]. The science is straightforward: heat transfer needs time and space to work its magic, creating that perfect edge-to-edge doneness we're after.
Quality Considerations: Grades, Aging, and Marbling
When selecting filet mignon, grade matters more than you might think. USDA Prime, with its abundant marbling, creates the buttery texture and rich flavor that reverse searing amplifies [12]. Yes, Prime costs more and requires a trip to a specialty butcher, but the difference is noticeable in every bite. USDA Choice works well too—it has moderate marbling that responds beautifully to the reverse sear method [13]. Skip Select grade though.
Its minimal fat content means less flavor and moisture, defeating the purpose of this careful cooking technique. Here's what makes the difference: marbling. Those white streaks of fat between muscle fibers melt during the slow cooking phase, disrupting tough connective tissue and creating fork-tender results [14]. For the ultimate experience, look for dry-aged filet mignon. During 28-55 days of controlled aging, moisture evaporates while natural enzymes break down proteins, concentrating flavors into something extraordinary—think nutty, earthy, almost butter-like [14].
The process also boosts glutamic acid levels (hello, umami! ) while improving texture significantly [14]. Yes, dry-aged beef costs more—you're paying for 5-25% weight loss during aging plus trimming of the dried exterior [14]. But for special occasions, the intensified flavor and melt-in-your-mouth texture justify the splurge.
Where to Source Restaurant-Quality Filet Mignon
Finding restaurant-quality filet mignon has never been easier, thanks to online meat delivery services that ship nationwide. Look for suppliers offering American Wagyu, which exceeds USDA Prime standards with exceptional marbling that creates an incredibly rich, buttery texture [15]. When shopping online, you'll find options ranging from 4-10 ounce portions in various marbling grades [16]. Mid-range USDA Prime options typically run around $5. 83 per ounce, delivering excellent quality without the ultra-premium price tag [15].
For special occasions, consider authentic Japanese A5 Wagyu or Kobe beef—cuts that were once exclusive to high-end restaurants [16]. Budget-conscious shoppers have great options too. Many suppliers source from small farms that dry-age their beef for at least 14 days, creating complex flavors without the premium price [16]. Some producers specialize in pasture-raised, hormone-free beef that delivers exceptional taste through natural farming methods [16]. Most reputable online services ship with dry ice for frozen cuts or gel packs for fresh, maintaining quality during transit [15][16].
When comparing prices, remember that higher-priced options (around $8. 50 per ounce) often deliver superior marbling and flavor, while more affordable choices (around $4. 76 per ounce) still produce excellent results with proper cooking technique [15].
Fresh vs. Frozen: Best Practices for Both
Here's something that might surprise you: frozen filet mignon often outperforms fresh when handled correctly. Flash freezing uses cryogenic temperatures to rapidly freeze meat, minimizing cell damage and locking in flavor and nutrients [17]. The science backs this up. In taste tests, properly frozen steaks actually lost 9% less moisture during cooking than thawed ones, resulting in juicier meat [19]. Even more surprising?
Blind taste testers unanimously preferred steaks cooked directly from frozen, noting better browning and less of that gray, overcooked band beneath the crust [19]. **Storage Guidelines:** - Fresh filet: Use within 3-5 days of purchase - Frozen filet: Maintains quality for 6-12 months when vacuum-sealed [17] If freezing at home, here's the trick: double wrap in freezer paper, then foil, then place in an airtight container. This prevents ice crystals that damage texture [17]. **Thawing Best Practices:** Always thaw slowly in the refrigerator—never use water baths or microwaves, which introduce moisture and alter texture [18]. Forgot to thaw?
No problem. Cook directly from frozen—just add 18-22 minutes to your oven time instead of the usual 10-15 minutes at 275°F [19]. When buying frozen steaks, check for vacuum-sealed packaging without visible ice crystals, tears, or discoloration. Fresh steaks may look browner after refrigeration, while properly frozen steaks maintain their bright red color longer [18]. Either way, you'll achieve excellent results with the reverse sear method [17].
Essential Equipment and Preparation
Nail your reverse-sear every time by pairing an instant-read thermometer that hits within 0.5°F in one second with a cast-iron or carbon-steel skillet, pulling the steak 10–15°F below target so carry-over heat finishes it perfectly.
Must-Have Tools for Reverse Searing
Your reverse sear success starts with having the right tools on hand. First and foremost, you need a reliable instant-read thermometer—this is your most important tool for nailing the perfect doneness [21]. A probe thermometer that stays in the meat and alerts you at your target temperature makes the process even easier [21]. For the low-temperature phase, set up a wire rack inside a rimmed baking sheet.
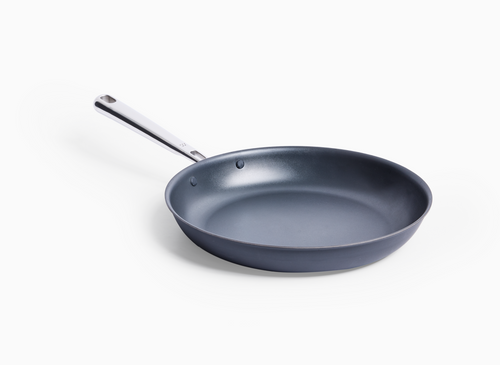
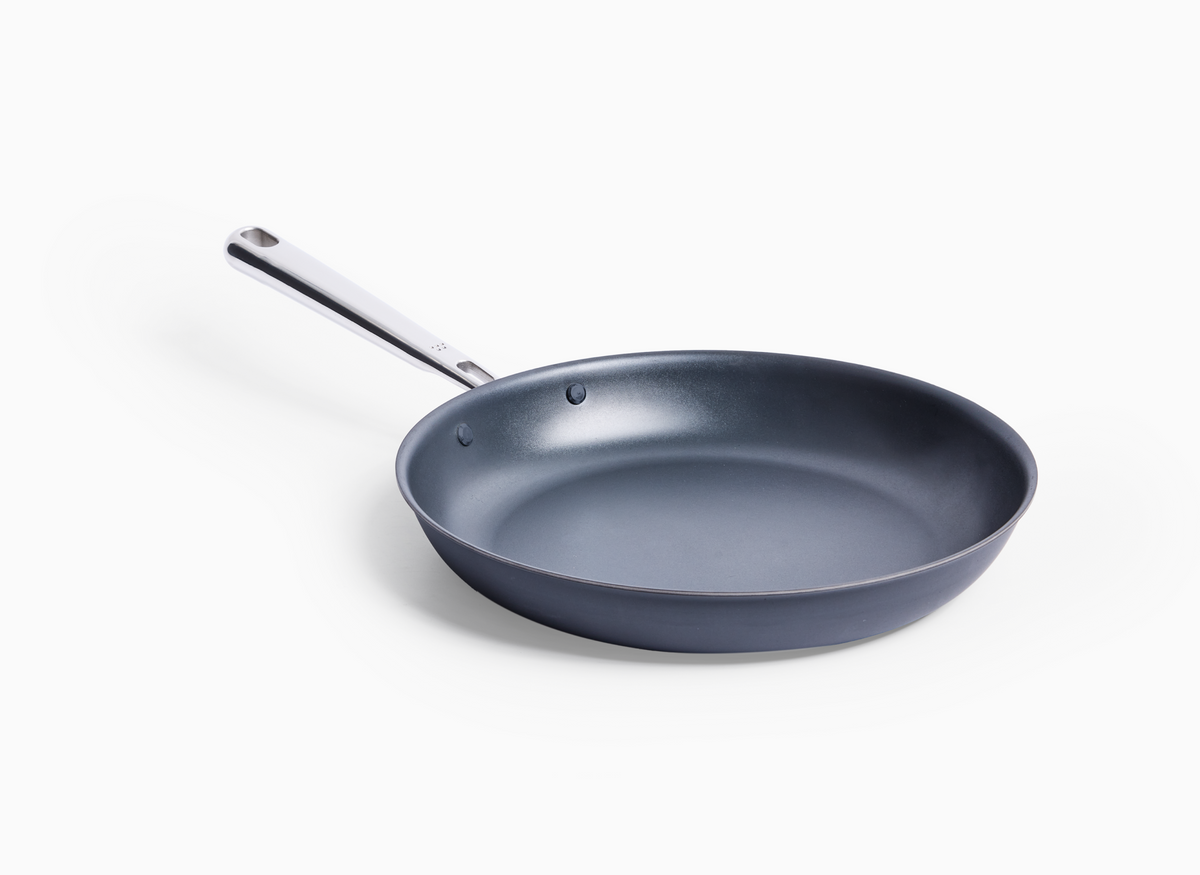
This simple setup allows air to circulate around your steak for even cooking [21]. When it's time to sear, reach for a heavy-duty skillet that holds heat well. Cast iron works beautifully, but a quality [carbon steel pan](https://misen. com/products/pre-seasoned-carbon-steel-pan) or heavy stainless steel will also deliver that perfect crust [21].
These materials maintain temperature when the cold steak hits the surface—crucial for proper searing. Keep these other essentials ready: long-handled tongs for safe handling (especially if finishing on the grill), butcher's twine to maintain your filet's perfect round shape, and a high smoke-point oil like avocado oil for the searing phase [20].
The Importance of a Reliable Meat Thermometer
Think of your meat thermometer as your reverse sear insurance policy. With thick cuts like filet mignon, you simply can't rely on looks or feel—you need accurate temperature readings to nail your preferred doneness [22]. Choose a thermometer that reads within 0.
5°F accuracy and delivers results in one second or less. Speed matters when temperatures climb quickly during searing [23]. Insert the probe horizontally into the thickest part of your filet, avoiding any fat pockets [23][24].
This side approach gives you the most accurate reading of the steak's core temperature. Here's why precision matters: You'll remove your steak from the oven 10-15°F below your target (pull at 120°F for rare, 125°F for medium-rare, or 135°F for medium), then account for the 3-5°F rise during resting [22][23]. Without a thermometer, you're essentially gambling with an expensive cut of meat [24].
Seasoning Strategies for Filet Mignon
Keep seasoning simple to let filet mignon's natural flavor shine. Start with the basics: 2 teaspoons of kosher salt per steak and freshly cracked black pepper [20]. That's often all you need for this premium cut. Want to level up?
Try dry-brining: Salt your steaks 12-24 hours ahead and leave them uncovered in the fridge [20]. The salt penetrates deeply while drawing out surface moisture—setting you up for both better flavor and a superior sear. No time to plan ahead? Just season generously and let the steaks rest at room temperature for 15 minutes before cooking [20].
Save the fancy touches for after cooking. A pat of compound butter melting over your rested steak adds richness without masking the beef's character [20].
Preparing Your Steaks: Trimming, Tempering, and Tying
Great results start with proper prep. First, pat your steaks completely dry with paper towels—moisture is the enemy of a good sear [25]. Carefully trim any silver skin (that shiny membrane that won't render) while keeping your filet's natural shape intact.
Give your steaks 15 minutes at room temperature before cooking. This simple step ensures even cooking from edge to center—no cold spots that throw off your timing [20][26]. For picture-perfect presentation, tie kitchen twine around each filet to maintain that classic round shape throughout cooking [20].
The dry-brining technique mentioned above works perfectly here too. If you've seasoned 12-24 hours ahead, you've already created that dry surface perfect for searing while deeply seasoning the meat [20][26]. These three prep steps—drying, tempering, and tying—set you up for reverse sear success.
Step-By-Step Reverse Sear Process
By slowly oven-drying your filet at 200–275°F until it hits 115°F on an elevated rack, you widen the doneness window and create the ideal moisture-free surface for a flawless crust.
Phase 1: Low and Slow Cooking (oven Method)
Start the low-temperature phase by preheating your oven to between 200°F and 275°F—lower temperatures give you more control and even cooking [3]. Place your seasoned filet mignon on a wire rack set inside a rimmed baking sheet. This elevation allows air to circulate completely around the steak, preventing the bottom from sitting in its own juices. During this gentle cooking phase, two important things happen. First, the surface gradually dries out, creating the perfect foundation for searing later [3].
Second, as we discussed in the science section, natural enzymes work to tenderize the meat at these low temperatures [3]. Your instant-read thermometer is essential here—don't rely on timing alone [3]. For medium-rare, remove the steak when it reaches 115°F, about 15°F below your final target [3]. A 1. 5-inch steak typically takes 25-30 minutes at 250°F, while a 2-inch filet needs 30-45 minutes at 200°F [20].
But always trust your thermometer over the clock [20]. What makes this method so forgiving? The slow temperature rise gives you a much wider window to hit your target doneness—no more rushing to catch that perfect moment [3].
Alternative Methods: Smoker and Sous Vide Options
Beyond the oven method, you can use a smoker's indirect heat zone to bring steaks to about 110°F before searing [27]. Sous vide offers another precise option, cooking vacuum-sealed steaks in temperature-controlled water that never exceeds your target temperature [28]. While sous vide provides foolproof temperature control, it has one drawback: the moist environment prevents proper surface drying.
Even after patting dry, sous vide steaks won't develop the same deep crust as oven-dried ones [28]. The oven's dry heat creates that perfect searing surface we're after. Some restaurant chefs use an interesting "reverse sous vide" technique—searing first, refrigerating for 1-2 days, then finishing in the water bath.
This method, which placed 10th at the Jack Daniel's World Championships, speeds up service while maintaining perfect doneness [27]. For home cooks wanting precision, traditional sous vide takes longer but offers more room for error. Set it to 129°F for 2 hours for medium-rare, or 155-160°F for well-done [27].
The Critical Resting Period
The reverse sear uses two strategic resting periods that make all the difference. After the low-temperature phase, let your steak rest for about 10 minutes before searing [31]. This first rest relaxes the muscle fibers, allowing juices to redistribute while maintaining tenderness [31].
Tent it lightly with foil to keep it warm without cooking further [31]. During this time, the surface continues drying, creating that ideal searing foundation. After searing, rest the steak again for 5 minutes before cutting [29].
This final rest lets the juices—pushed toward the center during searing—spread evenly throughout the meat [30]. Skip this step and those flavorful juices end up on your plate instead of in each bite [30]. Both rests serve different purposes: the first keeps your steak warm while preventing overcooking, and the second ensures perfect serving temperature while maximizing juiciness [29][31].
Phase 2: Creating the Perfect Sear
Now for the moment that brings it all together—creating that perfect crust.
Finishing Touch: Butter Basting with Aromatics
Here's the finishing touch that takes your filet from great to unforgettable. Since filet mignon is naturally lean, butter basting adds richness without masking its delicate flavor [33]. After searing, add 2-3 tablespoons of butter to the hot pan along with fresh herbs and garlic. Go for classics like rosemary, parsley, and oregano—they complement without overwhelming [34].
As the butter foams, tilt the pan and spoon that sizzling, herb-infused butter over your steak for 30-45 seconds [33]. This coats the meat with flavor while enhancing the crust. For best results, baste immediately while the steak's still hot from searing [33]. Want an easier option?
Make compound butter ahead by mixing softened butter with minced garlic and herbs. Place a slice on each hot steak—it melts into an instant sauce [34].
Temperature and Timing Mastery
Trust your thermometer, not the clock: pull your 1.5-inch filet when it hits 115°F for a perfect medium-rare finish after searing.
Comprehensive Temperature Guide by Doneness Level
Getting your filet mignon to the perfect doneness is all about understanding temperature targets and how they work with the reverse sear method. As we covered in the low-temperature phase, you'll pull your steak from the oven 10-15°F below your final target, since the searing step adds more heat [36]. Here's your quick reference guide for a 1. 5-inch filet in a 250°F oven: - **Rare**: Pull at 105°F (final 120°F) - **Medium-rare**: Pull at 115°F (final 130°F) - **Medium**: Pull at 125°F (final 140°F) - **Medium-well**: Pull at 135°F (final 150°F) [36] A 1.
5-inch steak typically needs 20-30 minutes to reach medium-rare, though some cooks prefer a slightly lower final temperature of 125°F for medium-rare [35][36]. This variation is exactly why your thermometer—not the clock—should guide your cooking. Insert it horizontally from the side into the thickest part for the most accurate reading [36]. What makes reverse searing so forgiving?
The gradual temperature rise gives you a much wider window to hit your target doneness compared to traditional high-heat methods [36]. After searing, let your filet rest as discussed earlier, then slice against the grain to maximize tenderness [35][36].
Time Expectations Based on Thickness
Every quarter-inch of thickness changes your cooking timeline significantly. Here's what to expect based on your filet's dimensions: **1. 5-inch steaks:** - At 250°F: 25-30 minutes to medium-rare (115°F internal) [37] - At 275°F: 15-25 minutes [37] **2-inch steaks:** - At 200°F: 30-45 minutes to medium-rare [20] Your starting temperature affects timing too.
Cold steaks straight from the fridge need an extra 5-10 minutes compared to room-temperature meat [20]. Cooking from frozen? Add 30-40% more time, but keep monitoring that internal temperature [20].
These times are starting points—your thermometer tells the real story. Pull your filet when it's 10-15°F below your target, and trust the process [37]. The slow, gentle heat gives you plenty of time to catch that perfect moment, unlike traditional methods where seconds can mean the difference between medium-rare and medium [37].
Common Temperature Mistakes to Avoid
Even experienced cooks make temperature mistakes that can ruin an expensive cut. Here are the most common pitfalls and how to avoid them: **Pulling too late**: Remember to remove your filet 10-15°F below your target—not at your final temperature. That searing phase adds more heat than you think [38]. **Cranking up the heat**: Impatience kills perfection. Keep your oven at or below 250°F during the initial phase.
Higher temperatures create the uneven cooking we're trying to avoid. **Over-searing**: Those extra seconds on high heat can push your perfectly pink interior into overcooked territory [38]. Quick, confident searing is key. **Using thin cuts**: This technique needs at least 1. 5 inches of thickness to work properly.
Thinner steaks cook too quickly to control. **Skipping the thermometer**: Guessing internal temperature in thick cuts is nearly impossible. Your thermometer is your best friend here [38]. **Cutting too soon**: Those resting periods aren't optional—they let temperatures equalize and juices redistribute throughout the meat.
Visual and Tactile Cues for Perfect Doneness
While a
- Reverse searing starts in a 225-250°F oven, finishes with a blazing-hot sear for perfect edge-to-edge doneness
- Filet mignon requires 1.5-inch minimum thickness; thinner cuts eliminate the thermal buffer needed for controlled cooking
- Low-temperature enzymes tenderize below 122°C while surface drying creates a dry pellicle that maximizes flavorful Maillard browning during the final sear
- Remove steak 10–15°F under final temp before searing and rest 5 minutes after searing to lock in juices and prevent overcooking
- Use an accurate thermometer; pull at 115°F internal to finish at 130°F medium-rare; time varies by thickness—25–30 minutes for 1.5-inch filet at 250°F
- Dry-brine 12–24 hours ahead for deeper seasoning and refrigerate uncovered for better crust formation and flavor penetration without masking filet mignon's delicate character
- https://www.omahasteaks.com/blog/how-to-reverse-sear-a-filet-mignon/?srsltid=AfmBOoro64bXnAbDg2MF7E7SZU2qgz5DTTbs4_0cuOipJUb4ib0UC-Pn
- https://www.masterclass.com/articles/how-to-reverse-sear-a-steak-explained
- https://www.seriouseats.com/reverse-seared-steak-recipe
- https://pmc.ncbi.nlm.nih.gov/articles/PMC9317986/
- https://www.omahasteaks.com/blog/how-to-reverse-sear-a-filet-mignon/?srsltid=AfmBOootg9rAoPwNzhBdWrrl67nlJTa2Vhw9LQkqODqoqT267BpbaCeB
- https://virginiaboyskitchens.com/blogs/features/reverse-sear-filet-mignon?srsltid=AfmBOoqfRedkaClcPUxZOMuYtH2EGIBhTLNxgMujgC4BAb1x4opzNVIF
- https://chefiq.com/blogs/blog/what-is-the-reverse-sear-method-for-cooking-steak?srsltid=AfmBOop3182CVQLkistD_HFL-msZW5nPfw0xbn3HxvjL-k3zzrXX9kAY
- https://landandseadelivery.com/blogs/steak-guide/can-you-reverse-sear-filet-mignon-a-comprehensive-guide-to-perfecting-your-steak
- https://onestophalal.com/blogs/info/mastering-the-art-of-reverse-searing-unlocking-perfectly-cooked-steaks
- https://jesspryles.com/how-to-cook-a-steak-with-reverse-sear-method/
- https://www.omahasteaks.com/blog/how-to-reverse-sear-a-steak/?srsltid=AfmBOoqxTJiUIB_So8fqs_zS-6i5nam31Shtxbr1_dFGjwS3Y1IwtqR_
- https://www.usda.gov/about-usda/news/blog/whats-your-beef-prime-choice-or-select
- https://www.sullivanssteakhouse.com/usda-prime-vs-choice/
- https://pmc.ncbi.nlm.nih.gov/articles/PMC4872334/
- https://www.consumerreports.org/health/meat-poultry/best-mail-order-steaks-a7115135133/
- https://www.smokedbbqsource.com/best-mail-order-steaks/
- https://snakeriverfarms.com/blogs/srf-journal/fresh-vs-frozen-meat
- https://blog.doingsciencetostuff.com/2013/06/08/fresh-vs-frozen-steak-revisited/
- https://www.americastestkitchen.com/how_tos/8741-the-science-of-cooking-frozen-steaks
- https://zimmysnook.ca/reverse-sear-filet-mignon/
- https://www.foodnetwork.com/recipes/alton-brown/reverse-sear-filet-mignon-or-ribeye-filet-8311115
- https://buythermopro.com/blogs/news/why-a-meat-thermometer-is-a-must-have-for-perfect-reverse-sear-steak?srsltid=AfmBOopedz6Ue764kLwMPQa0Ikg3KTk7cEKS5WfDirMOrmcboHEA9pOM
- https://snakeriverfarms.com/blogs/srf-journal/the-best-steak-cooking-tip-take-the-temperature
- https://virginiaboyskitchens.com/blogs/features/reverse-sear-filet-mignon?srsltid=AfmBOoriXP6FXJCV7U7kY-GFZnlxXmiDO8Vt4IdJ3nlGn2Bi-kdrDFqc
- https://www.wellseasonedstudio.com/how-to-reverse-sear-filet-mignon/
- https://www.omahasteaks.com/blog/how-to-reverse-sear-a-filet-mignon/?srsltid=AfmBOoqajG8XBs1vBvB_HXaEMMgP4BoKxh3s8CHRkWOKHglgFDJQ8JKG
- https://girlscangrill.com/recipe/steak/sous-vide-filet-mignon-steaks/
- https://www.tastingtable.com/1281918/sous-vide-reverse-sear-method-better-steak/
- https://www.webstaurantstore.com/blog/2962/letting-meat-rest.html?srsltid=AfmBOor-Vpijod_SRUo_QUwolnAQ0T7yCMaqmMpIeFV3UwX7NM8P0fbQ
- https://chefiq.com/blogs/blog/what-is-the-reverse-sear-method-for-cooking-steak?srsltid=AfmBOopPOkD_lguwnjAymJ0Id2h7VpwuhNUWQEe5rMFQT0sXchWFvWNT
- https://grillio.com/blog/reverse-searing/?srsltid=AfmBOorzH_YvhAoPs20eJaBGh4kCChJlBwVuBg1wtDQdwDll-MFr5eHL
- https://www.omahasteaks.com/blog/how-to-reverse-sear-a-filet-mignon/?srsltid=AfmBOoq0CdJK27b9mo0C3OIFgRumwLfphOk7LsiXJQHgYV4e9J-dzja8
- https://www.webstaurantstore.com/blog/5490/how-to-baste-a-steak.html?srsltid=AfmBOooiQBkZSbBTdwljIo9O08S9bCLdUjF7OeIyacGygWgPV-Bm047_
- https://cravingtasty.com/filet-mignon-recipe/
- https://madaboutfood.co/reverse-sear-filet-mignon/
- https://www.webstaurantstore.com/blog/4970/what-is-reverse-searing.html?srsltid=AfmBOor1iAlRDb8vv6kUojfRTuE_23m8GFh40v8v-cFyuMufFdKwcC4F
- https://landandseadelivery.com/blogs/steak-guide/how-to-reverse-sear-filet-mignon-the-ultimate-guide-for-perfectly-cooked-steak
- https://themom100.com/check-steak-doneness-without-meat-thermometer/
- https://butcherboymarket.com/know-how-articles/how-to-check-your-steaks-temperature-without-a-thermometer/
- https://www.foodrepublic.com/1826344/how-to-test-meat-doneness-without-thermometer/
