
The Beginner's Guide: How to Make Whipping Cream
Homemade whipped cream transforms desserts with its fresh taste and customizable texture. This comprehensive guide explains the science behind whipping cream, essential tools and techniques, troubleshooting tips, and creative variations. Learn how to achieve perfect peaks every time, fix common mistakes, and explore flavor options beyond vanilla. Master the art of whipped cream with step-by-step instructions for hand whisking, electric mixers, and professional methods.
Introduction
Why Homemade Whipped Cream Beats Store-Bought Every Time
Making whipped cream at home takes just minutes and transforms desserts with its fresh, pure taste. Store-bought versions rely on hydrogenated oils, corn syrup, and stabilizers that can't match the clean flavor of real cream [1]. When you make it yourself, you control everything - from sweetness level to texture. Want it barely sweet for berries? Perfect. Need stiff peaks for piping? You've got it [2]. The homemade version holds its shape beautifully for decorating cakes, topping pies, or creating those Instagram-worthy swirls on hot chocolate [2]. Plus, with the right tools, like a quality mixing bowl set, you'll have everything you need for whipping success.
Understanding the Focus: Whipping Cream vs. Heavy Cream
Here's what you need to know about cream types: heavy cream packs at least 36% milk fat, while whipping cream contains 30-36% [5]. That extra fat makes all the difference. Heavy cream whips into those perfect, stable peaks that hold their shape for hours - exactly what you need for decorating or make-ahead desserts [4]. Whipping cream works too, but creates a lighter, softer texture that's best used right away [5]. We'll dive deeper into the science behind this in the next section, but for now, remember: when in doubt, reach for heavy cream. Your whipped cream will thank you.
What You'll Learn in This Beginner's Guide
Ready to master whipped cream? This guide gives you everything you need. We'll show you exactly how to achieve those perfect peaks every time, whether you're whisking by hand or using a stand mixer [7]. You'll learn why cold cream matters (spoiler: it's all about the fat crystals), how to fix whipped cream that's gone wrong, and clever tricks for making it last longer [6][7]. Plus, we'll share creative flavor ideas that go way beyond vanilla - think caramel, chocolate, even cocktail-inspired versions [8]. By the end, you'll be whipping cream like a pro, creating desserts that look as good as they taste. Let's get started [6].
Understanding Cream Basics for Perfect Whipping
The right fat content and temperature create the perfect three-dimensional network that gives whipped cream its fluffy, stable structure.
The Science Behind Whipping Cream: Fat Content Matters
The science of whipped cream centers on its fat content and molecular structure. When cream is whipped, fat globules partially coalesce around air bubbles, creating a three-dimensional network that gives whipped cream its structure [9]. This process requires cream with 30-40% fat content for optimal results. During whipping, proteins and fat molecules in the cream absorb at the air-water interface, lowering surface tension and stabilizing the incorporated air bubbles [10]. The fat crystals form connections between adjacent bubbles, creating a stable foam structure through partial coalescence - a process where fat globules combine while maintaining some of their original structure [9]. Temperature plays a crucial role, as proper fat crystallization requires cold cream. When fat globules enter an air bubble's surface, oil from the crystal network spreads across it, allowing neighboring globules to form junctions that strengthen the overall structure [10]. This delicate balance of fat content, temperature, and agitation determines whether you achieve perfectly whipped cream or end up with butter.
Heavy Cream vs. Whipping Cream: Key Differences Explained
Heavy cream and whipping cream differ primarily in their fat content, which affects their performance and best uses. Heavy cream contains at least 36% milk fat, while whipping cream (also called light whipping cream) ranges from 30-36% [3]. This higher fat content gives heavy cream superior structural integrity - it whips into stiffer, more stable peaks that maintain their shape longer [11]. Both products start as homogenized blends of milk and milk fat, where the fat is thoroughly emulsified to prevent separation [3]. When making whipped cream, heavy cream produces a thicker, creamier result ideal for piping decorations and creating sturdy dessert toppings. Whipping cream delivers a lighter, airier texture better suited for simple garnishes like fruit salad toppings [3]. Despite these differences, both types can be used interchangeably in most recipes, though the final consistency will vary [3]. For dishes requiring structural stability or extended refrigeration, heavy cream's higher fat content makes it the optimal choice.
Why Temperature Is Crucial for Successful Whipping
Temperature plays a critical role in achieving perfectly whipped cream by controlling fat crystallization and structural stability. Cream must be kept between 35-50°F (1.7-10°C) for successful whipping - above this temperature range, the cream won't whip at all [12]. This temperature requirement exists because cold temperatures allow fat globules to partially coalesce around air bubbles, creating a stable three-dimensional network [13]. When cream is too warm, the fat crystals cannot form proper connections between air bubbles, preventing the formation of the essential foam structure. The crystallization process requires precise temperature control to ensure fat globules can spread across air bubble surfaces and form junctions that strengthen the overall whipped cream structure [13]. Professional kitchens often chill both the cream and equipment (bowls and beaters) before whipping to maintain optimal temperature throughout the process [12].
Cream Terminology: Navigating the Dairy Aisle Confidently
Understanding cream labels in the dairy aisle comes down to butterfat content. Heavy cream contains at least 36% milkfat, making it ideal for whipping into stable peaks and enriching sauces without curdling [14]. Light cream, also called table cream, contains 18-30% milkfat - it adds silkiness to dishes but won't whip properly [15]. Half-and-half blends equal parts whole milk and light cream, containing 10.5-18% milkfat, perfect for coffee but too lean for whipping [15]. When recipes simply call for "cream" without specifying, use heavy cream for best results [16]. While heavy cream and heavy whipping cream are interchangeable with their 35-38% fat content, heavy cream's slightly higher fat percentage makes it more stable when whipped [14]. For cooking applications, higher fat creams like heavy cream withstand heat better without breaking or curdling, while lighter creams work well for finishing dishes or adding subtle richness [15].
Essential Tools and Ingredients
Quality tools and proper preparation make the difference between fluffy success and disappointing results when whipping cream.
The Basic 3-Ingredient Recipe (And Why It Works)
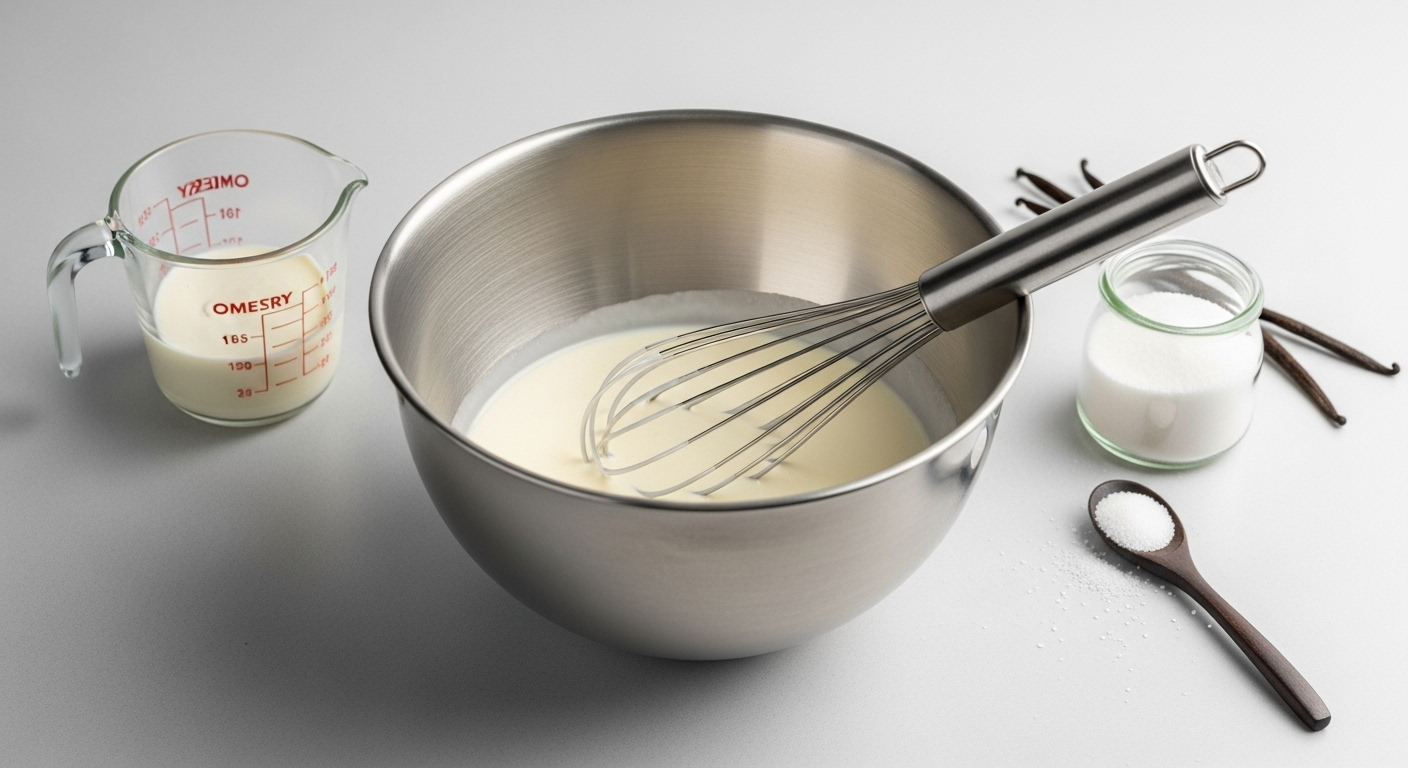
Making perfect whipped cream requires just three essential ingredients: heavy cream, powdered sugar, and vanilla extract. The powdered sugar works better than granulated sugar since it contains cornstarch that helps stabilize the whipped cream and prevent it from becoming watery [17]. As we discussed in the previous section, keeping ingredients cold is essential for success. The simple magic happens when you whip the cream - air gets trapped and creates that fluffy texture we all love. One cup of cream doubles in volume when whipped, producing two cups of finished whipped cream [17]. While the basic recipe is straightforward, having your ingredients and equipment properly chilled makes all the difference between success and disappointment.
Equipment Options: From Hand Whisks to Stand Mixers
The right equipment makes a dramatic difference when whipping cream. Hand mixers range from basic 200-250 watt models to powerful 350-watt versions that rival stand mixers in capability [19]. For optimal whipping, look for models with wire beater attachments rather than traditional center-post designs, as these are easier to clean and more efficient [20]. A quality mixing bowl with the right shape creates ideal conditions for whipping cream quickly - narrower bowls concentrate the whipping action, while wider bowls spread it out and take longer [21]. Features like slow-start functions prevent ingredient splatter, while turbo buttons provide bursts of power when you need them [20]. For comfortable extended use, prioritize mixers between 2-3 pounds with ergonomic handles and non-slip grips [20]. Keep your tools organized with smart storage solutions - clip-on bases for attachments and cord wraps make cleanup easier [19]. While basic models around $20 work for occasional use, investing in quality tools with multiple speeds pays off if you bake regularly [20].
Pre-Whipping Preparation: Chilling Techniques
Proper chilling sets you up for whipped cream success. As covered earlier, temperature control is crucial - but here's how to put that knowledge into practice. Place your mixing bowls and beaters in the refrigerator or freezer 15-30 minutes before starting [17]. For heavy cream, keep it refrigerated until the moment you're ready to whip - cream at 35-50°F whips best [22]. Metal bowls work particularly well because they retain cold temperatures better than glass or plastic [23]. If you're in a rush, place your bowl in an ice bath while whipping - just be careful not to get water in the cream [24]. This extra step might seem fussy, but cold equipment maintains the cream's temperature throughout whipping, ensuring those fat globules can properly crystallize and create stable foam.
Budget-Friendly Alternatives for Essential Tools
You don't need expensive equipment to make perfect whipped cream at home. A glass jar with a tight-fitting lid works remarkably well - simply fill it halfway with cold heavy cream, add sweetener, seal tightly, and shake vigorously for 5-10 minutes [25]. For best results, chill both the jar and cream in advance, and use powdered sugar or liquid sweeteners instead of granulated sugar which can prevent proper whipping [25]. A French press offers another creative alternative - fill it halfway with cream and rapidly pump the plunger up and down for about 5 minutes to achieve soft peaks [26]. While this method may not produce extremely stiff peaks, it works well for basic whipped cream needs and the French press can go straight into the dishwasher for easy cleanup [26]. When you're out of heavy cream entirely, remember the milk and butter substitute mentioned earlier - though it won't whip, it works great in recipes calling for heavy cream [27].
Step-by-Step Whipping Methods
Whether whisking by hand or using modern tools, the key to perfect whipped cream is patience and watching for visual cues.
Whipping By Hand: The Traditional Technique
Hand whisking gives you complete control over your whipped cream's texture. Start with cold cream in a chilled bowl, using a balloon whisk to alternate between quick side-to-side motions and circular movements around the bowl [7]. You'll see trails forming in the cream that gradually hold their shape - this visual feedback helps you stop at exactly the right consistency [7].
While hand whisking takes 4-5 minutes of continuous motion, it's worth the effort for the precise control it provides [28]. The key is maintaining steady rhythm rather than speed. Use a large metal bowl - like a stainless steel mixing bowl - which stays cold longer and gives you plenty of room to work. Your arm might get tired, but you'll have complete control over the final texture, making it perfect for delicate applications where over-whipping would be disastrous.
Using Electric Mixers: Stand and Hand Mixer Methods
Electric mixers make quick work of whipping cream while still giving you good control. For stand mixers, attach the wire whisk and start on low speed, gradually increasing to medium-high while watching for soft peaks - usually around 6-7 minutes [29].
Hand mixers work just as well - use medium to medium-high speed rather than maximum power. This creates smaller, more stable air bubbles that hold their shape longer [30]. Watch the cream's texture rather than the clock, as timing varies based on temperature and cream volume [30]. Remember that cream doubles when whipped, so plan your bowl size accordingly. If you overbeat and the cream gets lumpy, gently fold in a few tablespoons of fresh cream by hand to smooth it out [30].
Quick Methods: Food Processor and Immersion Blender Approaches
Food processors and immersion blenders offer speed but require extra vigilance. A food processor whips cream in under 90 seconds - blend for 30 seconds, then check every few seconds to avoid over-whipping [31]. The opaque bowl is your enemy here, so stop frequently. Note that food processors need full batches; half portions won't whip properly [31].
Immersion blenders work but come with challenges: significant splatter and near-instant over-whipping risk. Use a deep measuring cup, work with ½ cup maximum, and stick to the lowest speed [31]. The cream hits shaving cream consistency in about 60 seconds and can turn grainy moments later [31]. Both methods produce cream best used immediately rather than stored [28].
Professional-Style Results: Using a Whipping Siphon
A whipping siphon delivers professional results through pressurized nitrous oxide (N2O). Cold cream goes into the metal canister, where pressurized gas dissolves into the liquid. When dispensed, this creates perfectly aerated foam with consistent bubbles [32].
To use: Add cold heavy cream and powdered sugar to the chilled siphon, seal tightly, then charge with one N2O cartridge for a pint container [33]. Shake vigorously to distribute the gas, then dispense holding the siphon upside down [32]. This method eliminates timing guesswork and produces reliable results every time [34].
Troubleshooting tips: If cream won't dispense, check for insufficient shaking, improper temperature, or a poor seal [34]. Always verify gaskets are properly placed before charging [32].
Troubleshooting and Perfecting Your Whipped Cream
Understanding visual cues and knowing how to fix mistakes transforms whipped cream disasters into sweet success stories.
Visual Cues: How to Identify Soft, Medium, and Stiff Peaks
Understanding the visual cues of whipped cream stages helps you nail the perfect texture every time. At soft peaks, your cream becomes foamy with visible trails - lift your beaters and watch as peaks form and immediately droop back down. This stage works beautifully for folding into mousses or topping hot chocolate. Medium peaks show more structure - they're glossier and hold their shape with just a slight curl at the tips. Perfect for dolloping on desserts! Stiff peaks are your goal for piping and decorating - the cream stands tall without flopping over. Here's a fun test: carefully turn your bowl upside down. If the cream stays put, you've nailed it.
Watch smaller batches extra carefully - they transform from perfect to over-whipped in seconds. The texture tells you everything: smooth and silky means you're on track, while grainy or dull signals you've pushed too far. Don't panic if you over-whip! You're just a few steps away from homemade butter, or you can start fresh with a new batch.
Common Mistakes That Lead to Failed Whipped Cream
Let's talk about the common pitfalls that can turn your whipping dreams into kitchen nightmares - and how to avoid them. First up: temperature matters more than you might think. As we covered earlier, both your cream and equipment need that 15-minute chill session before you start whipping. Skip this step and you'll struggle to get any structure at all.
Choosing the right cream makes all the difference. While both heavy cream and whipping cream can work, remember that heavy cream's higher fat content gives you more wiggle room and better stability. Over-whipping happens fast - one moment you have gorgeous peaks, the next you're looking at a grainy mess. The opposite problem, under-whipping, leaves you with cream that slides right off your spoon.
Here's a crucial safety tip: whipped cream left out for more than 2 hours needs to go in the trash, not back in the fridge. For make-ahead desserts, consider using stabilizers (we'll cover those next) to keep your cream picture-perfect. And about sweetness - less is often more. Start with just 1-2 tablespoons of sugar per cup of cream. You can always add more, but you can't take it back!
Rescue Techniques: Fixing Over-Whipped or Under-Whipped Cream
Don't worry - whipped cream disasters can often be saved! For cream that's just slightly over-whipped and starting to look heavy, here's your rescue plan: slowly drizzle in 1-2 tablespoons of cold, fresh heavy cream while mixing on low speed. Watch as it transforms back into fluffy perfection.
For more serious cases where your cream has really deflated, you might need to add quite a bit more - up to half of what you started with. So if you began with 1/2 cup of cream, be prepared to add up to 1/4 cup more to bring it back. The key is going slow and steady.
Under-whipped cream? That's the easiest fix of all. Just keep whipping, but watch it like a hawk - check every 20-30 seconds so you don't swing too far the other way.
Now, if your cream has turned into yellow clumps floating in liquid, you've actually started making butter! At this point, you have two choices: finish making butter (why not?) or cut your losses and start fresh. Pro tip: when rescuing over-whipped cream, switch to hand whisking. You'll have much better control as you add fresh cream bit by bit.
Stabilizing Methods for Longer-Lasting Whipped Cream
Want whipped cream that stays fluffy for hours or even days? Let's explore your stabilizing options, from simple to professional-level techniques.
For basic 12-hour stability, confectioners' sugar does double duty - it sweetens while its cornstarch content helps maintain structure. No weird flavors, just reliable results. Need your cream to last 24 hours? Try the marshmallow method - their natural gelatin creates surprising stability. Or go the cream cheese route for an ultra-creamy texture that holds its shape beautifully.
Professional bakers swear by gelatin for marathon stability - up to 48 hours! Simply dissolve 1/2 teaspoon gelatin in 1 1/2 tablespoons warm water, then stream it into your partially whipped cream. The result? Peaks that could survive a cross-country road trip.
Other clever options include cooking cornstarch with a bit of your cream first (1 teaspoon per 2 cups cream), or folding in tangy helpers like crème fraîche or Greek yogurt. These dairy additions bring their own higher fat content to the party, creating both stability and interesting flavor notes.
Here's a simple hack when you need just a few extra hours: place your whipped cream in a fine-mesh strainer over a bowl. Any liquid drains away while the cream keeps its shape - no special ingredients required!
Creating Whipped Cream Without Heavy Cream
When heavy cream isn't available, creative substitutes can save the day - though each comes with its own unique properties and limitations.
The Milk and Butter Method: Creating a Heavy Cream Substitute
When you're out of heavy cream, don't worry - your kitchen likely has everything you need for a simple substitute. The trick is recreating heavy cream's rich fat content by combining whole milk and butter. Mix 3/4 cup whole milk with 1/4 cup melted unsalted butter to replace 1 cup of heavy cream. For an even richer substitute, try 2/3 cup milk with 1/3 cup butter.
Here's what you need to know: this substitute works beautifully in cooked dishes, sauces, and baked goods where you want that creamy richness. However, it won't whip into peaks - the molecular structure just isn't the same as real cream. Let the melted butter cool to room temperature before mixing, then whisk thoroughly until completely combined. This method saves the day when you're making creamy pasta sauces, rich soups, or tender scones.
Dairy-Free Alternatives: Coconut, Cashew, and Other Options
For dairy-free whipped cream, you have several creative options, each with its own personality. Coconut cream is the most common choice, but let's be honest - that coconut flavor dominates everything, and different brands whip up differently depending on their fat content. It's a gamble every time.
A smarter alternative? Combine cashews with coconut oil for a neutral-tasting cream that actually whips into stable peaks. Or try the surprising magic of aquafaba - yes, the liquid from a can of chickpeas! When whipped with cream of tartar and powdered sugar, it creates impressively fluffy, fat-free whipped cream that even holds up when frozen.
For savory dishes, cashew cream shines. Simply blend soaked cashews with water and a pinch of salt for silky smooth results. Pro tip: soak your cashews in hot water for 30 minutes if you're in a rush, or overnight at room temperature for the creamiest texture. Each method offers something different - choose based on whether you prioritize richness, fluffiness, or neutral flavor.
Store-Bought Substitutes: When and How to Use Them
As discussed in the Introduction, store-bought whipped toppings rely on artificial ingredients that can't match homemade quality. If you're considering these options due to time constraints, remember that making real whipped cream takes just minutes with the right tools. For recipes needing extra stability, try the stabilization methods covered in our Troubleshooting section - they'll give you the holding power of commercial products without sacrificing taste.
When store-bought is your only option, read labels carefully and choose products with the fewest additives. Keep in mind that these substitutes perform better hidden in frozen desserts than showcased fresh on pies or fruit, where their artificial taste becomes obvious.
Texture and Flavor Considerations When Using Substitutes
Understanding how substitutes behave helps you choose the right one for your recipe. The milk-butter blend adds richness to cooked dishes but won't create the airy structure needed for whipped toppings. Dairy-free options each bring their own texture challenges - coconut cream's unpredictable consistency, cashew cream's denser structure, or aquafaba's ultra-light foam.
As we covered earlier, fat content drives texture differences. Your choice of substitute should match your recipe's needs: rich and creamy for sauces, light and fluffy for toppings, or somewhere in between for folding into desserts. Remember, no substitute perfectly mimics heavy cream's unique properties, so adjust your expectations and embrace what each alternative does best.
Flavor Variations and Creative Uses
Transform basic whipped cream into extraordinary dessert toppings with creative flavors, colors, and decorating techniques.
Beyond Vanilla: Flavor Enhancers and Add-Ins
Whipped cream makes the perfect base for endless flavor possibilities. Start with fruit variations using orange juice, mango juice, or strawberry syrup - these natural flavors complement desserts without overpowering them [49]. For chocolate whipped cream, skip the cocoa powder and grate real chocolate directly into the cream for better texture and richer taste. Toasted nuts like hazelnuts, almonds, or coconut add welcome crunch and complexity [49].
Want something more sophisticated? Add a splash of vodka, rum, or cream liqueurs like Bailey's Irish Cream [49]. Caramel whipped cream rivals vanilla for versatility - just add caramel flavoring plus a bit of cream cheese for extra stability [50]. Here's a pro tip: whip spices directly into the cream rather than sprinkling them on top. The cream's fat content naturally amplifies these flavors [49].
For tropical combinations, try minced fresh pineapple in strawberry whipped cream - but drain that fruit thoroughly first to avoid watery results [50]. When making chocolate versions, medium dark cocoa delivers the perfect milk chocolate balance, especially on banana pancakes [50].
The secret to perfect flavoring? Add your mix-ins after reaching soft peaks but before stiff peaks form. This gives you proper incorporation without deflating all your hard work [49].
Creating Sweetened vs. Unsweetened Whipped Cream
Choosing between sweetened and unsweetened whipped cream depends on your dessert and personal preference. The main difference? Confectioners' sugar - it sweetens while helping stabilize the cream thanks to its cornstarch content [22].
For lightly sweetened whipped cream, fold in 2-3 tablespoons of confectioners' sugar per cup of cold heavy cream once you hit soft peaks [51]. This subtle sweetness enhances desserts without overwhelming them [51]. Skip the granulated sugar - it won't dissolve properly and leaves a gritty texture. Stick with confectioners' or superfine sugar for smooth results [18].
Unsweetened whipped cream couldn't be simpler. Just whip cold heavy cream to your desired peak - soft for dolloping, stiff for piping [22]. This pure version lets naturally sweet desserts shine and highlights the cream's fresh dairy flavor [22]. As discussed in earlier sections, remember that cream doubles in volume when whipped, so adjust your quantities accordingly.
Colorful Creations: Adding Food Coloring Properly
Creating colorful whipped cream takes a gentle touch. Add gel or paste food coloring early - while the cream is still at soft peaks, not after it's fully whipped [52]. This timing matters because adding color too late or mixing too much can deflate your cream.
If your colored cream goes soft, don't panic. Pop it in the fridge for 10-15 minutes, then gently re-whip to restore those peaks [53]. Start with everything cold - cream, bowl, and beaters - and add color early to avoid overworking the mixture [54].
Need deep colors like navy blue? Mix food coloring with a touch of cocoa powder. This trick achieves rich shades without using so much coloring that your cream breaks down [52]. Making rainbow desserts? Whip separate batches for each color instead of dividing finished cream. Your results will be more stable and vibrant [54].
Piping and Decorating Techniques for Beginners
Ready to make your whipped cream look as good as it tastes? Start with classic swirls using a large star tip - squeeze and swirl from the center outward for beautiful peaks [55]. For rosettes, work that same circular motion but keep it tight and controlled. Star tips also create versatile borders - just squeeze and pull away [56].
Here's the secret: stabilize your whipped cream first (see our stabilizing methods in the troubleshooting section). This ensures your decorations hold their shape instead of melting into puddles. Don't stress about perfection - those little variations in size and shape actually look more appealing and homemade [57].
Master these beginner-friendly techniques:
- Dots: squeeze and release quickly
- Shells: squeeze, pull, stop, repeat
- Zigzags: steady side-to-side motion while moving forward [56]
Keep your piping bag at a 90-degree angle and maintain consistent pressure. With quality tools and a bit of practice, you'll be decorating like a pro [55].
Storing and Serving Your Homemade Whipped Cream
Fresh whipped cream tastes best immediately, but smart storage techniques can extend its life from hours to days.
Immediate Use vs. Make-Ahead: Best Practices
Fresh whipped cream tastes best served right away, but you can absolutely make it ahead with the right techniques. For short-term storage (up to 12 hours), confectioners' sugar works as a simple stabilizer thanks to its cornstarch content. Need it to last longer? Add a tablespoon of sour cream or crème fraîche per cup of cream - the extra fat and acid help maintain structure for 4+ hours [58].
As covered in our troubleshooting section, gelatin and instant pudding mix provide the longest stability (up to 48 hours), making them ideal for decorated cakes or make-ahead desserts.
Pro tip for transporting desserts: Pop your whipped cream creation in the freezer for 30-60 minutes before heading out. This quick chill helps lock in the structure and prevents drooping during travel [58].
Refrigeration Techniques for Maximum Freshness
Store whipped cream in an airtight container between 35-50°F - the same temperature range needed for whipping. Properly stored plain whipped cream lasts about 12 hours before deflating [7].
Want longer storage? Try these tested methods:
- Greek yogurt addition: Maintains structure for 48 hours while adding subtle tang
- Food processor method: Creates denser cream with smaller bubbles that holds for up to one week
- Whipping siphon: Keeps unwhipped cream fresh for 10 days - just shake well before dispensing [7]
Keep your storage containers cold too. Transferring whipped cream to a warm container can cause immediate deflation, so chill your storage containers before use.
Freezing Whipped Cream: Yes, It's Possible!
Whipped cream freezes and thaws remarkably well when properly prepared. To freeze, line a baking sheet with parchment paper and pipe or spoon individual dollops of whipped cream onto the surface [59]. Freeze overnight until solid, then quickly transfer the frozen mounds to a freezer bag or airtight container [60]. The frozen dollops work perfectly for hot beverages - they melt slowly into drinks while providing time-release doses of cream without cooling the liquid too much [59]. For desserts, place frozen whipped cream on top and allow 15-20 minutes to thaw at room temperature before serving [60]. While frozen whipped cream maintains its basic structure without becoming grainy or separating, it does lose some of its original fluffiness [59]. For best quality, use frozen whipped cream within one month, as it can quickly absorb off-flavors from the freezer [61]. Avoid freezing ultrapasteurized whipping cream, since cream whipped after freezing and thawing won't achieve the same stiff peaks as fresh cream [61].
Reviving Deflated Whipped Cream Before Serving
Don't toss that deflated whipped cream - you can usually bring it back to life. For cream that's just starting to lose its lift, slowly add 1-2 tablespoons of cold heavy cream while mixing on low speed. The fresh cream helps rebuild the structure [39].
Severely deflated cream needs more help - add up to half the original amount of fresh cream. Started with 1/2 cup? You might need 1/4 cup more to restore the texture [39].
When to give up: If your cream looks yellow and paste-like, you've accidentally started making butter. At this point, embrace it and keep whipping to make fresh butter, or start over with new cream.
For stabilized whipped cream that's deflated, chill it for 10-15 minutes, then gently re-whip to restore the peaks [41].
- Heavy cream (36% fat) creates more stable whipped cream than whipping cream (30-36% fat), making it ideal for decorating and make-ahead desserts
- Temperature is crucial - keep cream between 35-50°F and chill bowls and beaters for 15-30 minutes before whipping
- Visual cues determine success: soft peaks droop immediately, medium peaks hold with slight curl, and stiff peaks stand tall without flopping
- Fix over-whipped cream by slowly adding 1-2 tablespoons cold heavy cream while mixing on low speed
- Stabilize whipped cream with confectioners' sugar for 12 hours, gelatin for 48 hours, or Greek yogurt for added tang and structure
- Add flavors and colors at soft peak stage to avoid deflating, and use gel food coloring for best results
- Freeze whipped cream in dollops on parchment paper for perfect hot beverage toppings that last up to one month
- https://www.mashupmom.com/make-it-or-buy-it-whipped-cream/
- https://www.seattletimes.com/life/food-drink/this-homemade-whipped-cream-is-so-easy-youll-never-want-store-bought-again/
- https://www.healthline.com/nutrition/heavy-cream-vs-heavy-whipping-cream
- https://www.americastestkitchen.com/articles/3645-whipped-cream-vs-whipping-cream-vs-heavy-cream-whats-the-difference
- https://www.simplyrecipes.com/heavy-cream-vs-whipping-cream-experts-8718442
- https://www.thekitchn.com/how-to-make-whipped-cream-cooking-lessons-from-the-kitchn-102056
- https://www.seriouseats.com/the-best-ways-to-make-whipped-cream-recipe-6755273
- https://www.simplyrecipes.com/recipes/how_to_make_whipped_cream/
- https://www.sciencedirect.com/science/article/abs/pii/S0308814620328880
- https://www.tandfonline.com/doi/full/10.1080/10942912.2018.1460755
- https://www.marthastewart.com/7845011/difference-between-heavy-cream-half-and-half
- https://cooking.stackexchange.com/questions/9419/what-is-the-maximum-temperature-at-which-cream-will-still-whip-successfully
- https://www.sciencedirect.com/science/article/abs/pii/S0260877415001934
- https://www.thekitchn.com/whats-the-difference-between-half-and-half-light-cream-whipping-cream-and-heavy-cream-73203
- https://www.usdairy.com/news-articles/the-types-of-cream-and-their-uses
- https://www.thespruceeats.com/understanding-different-kinds-of-milk-and-cream-3050535
- https://joyfoodsunshine.com/homemade-whipped-cream/
- https://www.allrecipes.com/article/how-to-make-whipped-cream/
- https://www.thespruceeats.com/best-hand-mixers-4135136
- https://www.goodhousekeeping.com/uk/product-reviews/electricals/g28588058/best-hand-mixers/
- https://www.gygiblog.com/blog/2022/05/10/best-mixer-for-whipping-cream-2/
- https://sallysbakingaddiction.com/homemade-whipped-cream/
- https://hilanddairy.com/blog/dairy-tip-tuesday-9-tips-for-perfectly-whipped-cream-2/
- https://www.thekitchn.com/stabilized-whipped-cream-last-longer-23245058
- https://www.self.com/story/how-to-make-your-own-whipped-cream
- https://www.thekitchn.com/kitchen-hack-make-whipped-crea-118391
- https://shelfcooking.com/cream-substitute/
- https://www.jessicagavin.com/how-to-make-whipped-cream-4-ways/
- https://www.kitchenaid.com/pinch-of-help/stand-mixers/how-to-make-whipped-cream.html
- https://www.completelydelicious.com/make-perfectly-whipped-cream/
- https://www.thekitchn.com/skills-showdown-the-best-way-to-make-whipped-cream-23245056
- https://www.amazingfoodmadeeasy.com/info/modernist-equipment/more/whipping-siphon
- https://www.amazingfoodmadeeasy.com/info/modernist-cooking-blog/more/how-to-make-whipped-cream-with-a-whipping-siphon
- https://lakesidetable.com/whipped-cream-dispenser-recipe/
- https://bakestarters.com/blogs/education/soft-medium-firm-stiff-peaks
- https://www.thekitchn.com/a-visual-guide-soft-peaks-firm-115557
- https://www.thedailymeal.com/1548800/mistakes-homemade-whipped-cream/
- https://www.cookist.com/3-common-whipped-cream-mistakes-and-how-to-fix-them/
- https://www.kingarthurbaking.com/blog/2019/06/04/fix-whipped-cream
- https://www.epicurious.com/expert-advice/how-to-save-over-whipped-cream-article
- https://www.kingarthurbaking.com/blog/2023/06/08/baking-trials-whats-the-best-way-to-stabilize-whipped-cream
- https://www.thekitchn.com/heavy-cream-substitute-23004405
- https://www.epicurious.com/expert-advice/heavy-cream-substitute
- https://kitchenprojects.substack.com/p/kitchen-project-120-all-about-whipped
- https://www.noracooks.com/vegan-whipped-cream/
- https://www.eatingbyelaine.com/5-minute-silky-smooth-vegan-heavy-cream-dairy-free/
- https://www.365daysofbakingandmore.com/stabilized-whipped-cream/
- https://www.realsimple.com/food-recipes/cooking-tips-techniques/heavy-cream-vs-heavy-whipping-cream
- https://combinegoodflavors.com/flavored-whipped-cream/
- https://www.preparedpantry.com/blogs/how-to-bake/favorite-flavored-whipped-cream?srsltid=AfmBOoqSIwyRK_IlObOcqQ5S3khV50lMq1w30Asgq8zacjeTh5I-eyMb
- https://bakingbites.com/2011/05/how-to-make-lightly-sweetened-whipped-cream/
- https://www.hanielas.com/colored-whipped-cream/
- https://www.reddit.com/r/AskBaking/comments/1e8kxpm/my_whipped_cream_softened_when_i_added_colouring/
- https://waltoncakeboutique.com/recipes/how-to-make-a-stable-and-delicious-whipped-cream-frosting/
- https://sallysbakingaddiction.com/piping-tips/
- https://blog.wilton.com/beginner-piping-techniques/
- https://www.mirlandraskitchen.com/how-to-decorate-with-whipped-cream/
- https://www.epicurious.com/expert-advice/how-to-make-whipped-cream-ahead-of-time-article
- https://www.simplyrecipes.com/recipes/how_to_freeze_whipped_cream/
- https://bakingmischief.com/can-you-freeze-whipped-cream/
- https://nchfp.uga.edu/how/freeze/dairy-products/freezing-whipped-cream/
- https://www.kingarthurbaking.com/recipes/homemade-whipped-cream-recipe
- https://www.thepioneerwoman.com/food-cooking/meals-menus/g44840160/whipped-cream-desserts/
- https://www.thechoppingblock.com/blog/whipped-cream-a-versatile-and-easy-complement-to-any-dessert
- https://www.americastestkitchen.com/articles/4110-yes-you-can-make-whipped-cream-way-ahead