

- Stainless steel's composition provides excellent corrosion and heat resistance.
- Proper preheating and cooking techniques are crucial for optimal performance.
- Seasoning stainless steel is debated, with arguments for and against the practice.
- Regular use and proper care are essential for maintaining stainless steel cookware.
- Understanding the science behind food sticking helps achieve better cooking results.
Composition and properties of stainless steel
Stainless steel, a cornerstone material in quality cookware, is primarily composed of iron (66-71.27%), chromium (17.5-19.5%), and nickel (8-10.5%). The popular 18/10 designation in high-quality cookware indicates 18% chromium and 10% nickel content, providing excellent corrosion and heat resistance[1]. However, it's worth noting that stainless steel has a relatively low thermal conductivity compared to other metals like aluminum or copper. This characteristic is why many stainless steel pans incorporate aluminum or copper cores to enhance heat distribution[2].
While generally considered non-reactive, studies have shown that stainless steel can leach small amounts of nickel and chromium into food during cooking, especially with acidic foods and longer cooking times. After six hours of cooking, nickel and chromium concentrations in tomato sauce increased up to 26- and 7-fold respectively, depending on the grade of stainless steel[3]. This leaching tends to decrease with repeated use but may still be a concern for individuals with metal sensitivities.
Benefits of cooking with stainless steel pans
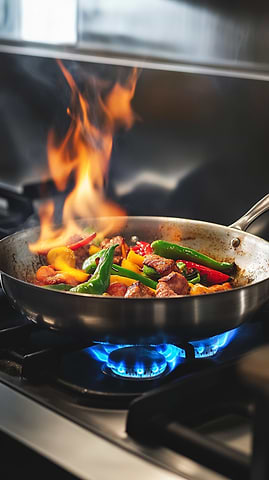
Stainless steel pans offer numerous advantages that make them a wise investment for any kitchen. Their durability and longevity allow them to withstand high temperatures and frequent use without deteriorating[4]. These pans excel at heat retention and distribution, ensuring even cooking and consistent results.
One of the key benefits of stainless steel is its versatility in various cooking techniques. It particularly shines in achieving that coveted Maillard reaction for perfect browning and searing[5]. Unlike some alternatives, stainless steel pans can safely withstand high heat, making them ideal for oven use and creating flavorful fond for sauces[6].
Maintenance is straightforward, with most stainless steel cookware being dishwasher-safe and easy to clean by hand[4]. For health-conscious cooks, stainless steel presents a safer option compared to some coatings, as it doesn't release potentially harmful chemicals when heated[5].
Our 8-inch Chef's Knife, crafted with the same attention to quality as our cookware, is an excellent companion to stainless steel pans for all your food preparation needs. Its durable construction and precise edge make it perfect for a wide range of kitchen tasks, from chopping vegetables to slicing meats for your stainless steel pan creations.
Common misconceptions about stainless steel cookware
Despite their popularity, stainless steel pans are often misunderstood. One common misconception is that they're inherently non-stick. In reality, stainless steel requires proper technique and seasoning to prevent food from sticking. Many home cooks struggle with issues like eggs adhering to the pan surface, leading to frustration and a misconception about the pan's effectiveness[6].
Another myth is that stainless steel cookware is completely inert and doesn't leach any substances into food. While it's generally considered safe, as mentioned earlier, small amounts of nickel and chromium can leach into food, especially when cooking acidic dishes for extended periods[7].
Additionally, some believe that stainless steel pans are unsuitable for high-heat cooking. In fact, they excel at searing and can safely withstand high temperatures, unlike many alternatives[6]. Understanding these misconceptions can help you make the most of your stainless steel cookware and appreciate its true capabilities.
The Debate: To Season or Not to Season
Arguments for seasoning stainless steel pans
Seasoning stainless steel pans offers several advantages for home cooks. One primary benefit is the creation of a non-stick surface, which can significantly reduce food adhesion issues. This seasoned layer, formed by baking oil onto the pan's surface, acts as a barrier between the food and the metal, minimizing sticking problems[8].
While seasoning may alter the pan's appearance, giving it a brownish tinge, it can be particularly beneficial for low-fat cooking or when preparing delicate foods like fish or eggs that are prone to sticking[9]. Additionally, seasoning can enhance the pan's versatility, allowing for a wider range of cooking techniques without the fear of food tearing or sticking.
However, it's important to note that proper preheating and temperature control are equally crucial in preventing sticking, even with seasoned pans. The 'water test' or 'mercury ball test' can help determine if a pan is adequately heated, ensuring optimal cooking conditions and further reducing the likelihood of food adhesion[10].
Arguments against seasoning stainless steel pans
While seasoning stainless steel pans has its proponents, there are compelling arguments against this practice. Seasoning can alter the pan's appearance and potentially compromise its intended functionality. Stainless steel is designed to be naturally non-reactive and resistant to corrosion, and seasoning may interfere with these properties.
Moreover, the effectiveness of seasoning on stainless steel is debatable. Unlike more porous surfaces, stainless steel's smooth surface may not retain the seasoning as effectively. This can lead to inconsistent results and frustration for cooks. Additionally, seasoned pans may require special care and maintenance, potentially limiting their versatility in the kitchen.
Perhaps most importantly, proper cooking techniques can often achieve non-stick results without seasoning. Regular use and correct heat management are often more crucial than seasoning for optimal stainless steel pan performance[11].
Expert opinions on the necessity of seasoning
Expert opinions on the necessity of seasoning stainless steel pans vary widely, reflecting the complexity of this culinary debate. Some seasoned chefs advocate for the practice, arguing that it creates a non-stick surface ideal for delicate foods and low-fat cooking. They contend that seasoning forms a protective layer of baked-on oil, reducing food adhesion and enhancing the pan's versatility[8].
Conversely, other experts argue that proper technique trumps seasoning. This perspective emphasizes that regular use and correct heat management are often more crucial than seasoning for optimal performance[11]. The debate ultimately highlights the importance of personal preference and cooking style in determining whether seasoning is necessary for stainless steel pans.
The Importance of Seasoning Stainless Steel Pans
Enhancing non-stick properties
Enhancing the non-stick properties of stainless steel pans involves a combination of proper techniques and understanding the material's characteristics. One crucial factor is preheating the pan adequately. When a stainless steel pan reaches high temperatures, its porous surface expands, creating a smoother cooking surface less prone to sticking.
To determine if the pan is sufficiently heated, perform the 'water test' or 'mercury ball test' by adding a few drops of water to the hot, dry skillet. If the water droplets remain intact and dance across the surface, the pan is ready for cooking[10]. Using room temperature ingredients further helps maintain consistent heat, preventing temperature fluctuations that can lead to sticking.
Selecting an oil with a high smoke point, such as avocado oil or peanut oil, creates a slick surface that enhances non-stick properties. However, it's essential to use the right amount of oil, as excess can be counterproductive[10]. While it's not possible to create a permanently non-stick surface on stainless steel like some other materials, these techniques significantly reduce sticking issues[12].
Improving heat distribution
Improving heat distribution in stainless steel pans is crucial for achieving optimal cooking results. One key factor is using multi-ply pans, which are considered essential by experts. These pans consist of multiple layers of metal that enhance heat conductivity and distribution.
The multi-ply construction typically includes an aluminum or copper core sandwiched between layers of stainless steel, combining the heat-conducting properties of these metals with the durability and non-reactivity of stainless steel. This design allows for more even heating across the pan's surface, reducing hot spots and ensuring consistent cooking.
Additionally, proper preheating techniques play a significant role in heat distribution. Gradually heating an empty pan to the appropriate temperature before adding oil and ingredients allows the metal to expand uniformly, further enhancing heat distribution. This preheating process, when combined with the multi-ply construction, creates an ideal cooking surface that mimics the performance of professional kitchen equipment, enabling home cooks to achieve restaurant-quality results.
Protecting the pan's surface
Protecting the surface of stainless steel pans is crucial for maintaining their performance and longevity. While seasoning is not typically recommended for stainless steel, as it is a non-reactive material that cannot form the same polymerized oil layer as some other materials[15], there are other methods to safeguard the pan's surface.
Regular maintenance is key, including proper cleaning with mild dish soap and avoiding harsh abrasives that can damage the protective oxide layer. For minor scratches, a paste made from baking soda and water can be gently rubbed in the direction of the grain to minimize their appearance. Deeper scratches may require fine-grit sandpaper (around 600-grit) used carefully along the grain, followed by a stainless steel cleaner to restore shine[16].
To prevent future damage, use soft cloths for cleaning, avoid abrasive cleaners, and consider protective films for high-traffic areas. By implementing these protective measures, you can ensure your stainless steel pans maintain their sleek appearance and optimal functionality for years to come.
Extending the lifespan of your cookware
Extending the lifespan of your stainless steel cookware involves more than just proper cleaning and storage. While not essential for cooking performance, seasoning the exterior of your pans can provide additional protection against rust and improve overall appearance. To season the outside, clean the pan thoroughly, apply a thin layer of high smoke point oil, heat the pan upside down in a preheated oven at 200°C, and wipe away excess oil after cooling. Repeat this process several times until the exterior develops a slight brown tinge[17].
For the interior, seasoning creates a non-stick surface that enhances cooking performance. This process not only improves cooking but also simplifies cleanup, often requiring just hot water and a paper towel rather than soap. The seasoning method for the interior is similar to the exterior, involving heating oil in the pan until it smokes, then cooling and wiping excess oil[18].
To maintain your pan's longevity during cooking, it's crucial to understand the science behind food sticking. When adding large pieces of protein, the pan's surface temperature drops, causing its pores to widen. As the pan reheats, these pores grip the food. Patience is key; wait for the pan to fully return to temperature, at which point the food will naturally release, allowing for easy flipping without damaging the pan's surface[19].
Preparing Your Stainless Steel Pan for Seasoning
Cleaning the pan thoroughly
Thoroughly cleaning your stainless steel pan is crucial before seasoning. Begin by allowing the pan to cool completely to prevent warping from temperature shock[20]. Rinse off excess food with warm water, then soak the pan in warm, soapy water for a few minutes. Scrub gently with a non-abrasive sponge to avoid scratching the surface.
For stubborn, burnt-on food, create a paste with baking soda and water, apply it to the affected areas, and let it sit before scrubbing[21]. Alternatively, fill the pan with a mixture of water and vinegar (1:3 ratio), bring it to a boil, and then scrape off loosened particles with a wooden spoon[22].
For discoloration or rainbow stains caused by overheating, wipe the pan with a cloth dampened with white vinegar[21]. After cleaning, rinse thoroughly and dry immediately with a microfiber towel to prevent water spots. Avoid using harsh abrasives, steel wool, or bleach, as these can damage the pan's surface[22].
Drying the pan completely
Drying your stainless steel pan completely after cleaning is crucial for maintaining its integrity and preparing it for seasoning. Water left on the pan's surface can lead to water spots or even rust formation, compromising the pan's performance. To ensure thorough drying, use a clean, lint-free cloth or paper towel to wipe down the entire surface, paying special attention to any crevices or handles where water might collect.
For stubborn moisture, you can place the pan on a low heat burner for a minute or two, allowing any remaining water to evaporate. This step not only aids in drying but also begins the process of heating the pan, which is beneficial for the subsequent seasoning process. As the pan heats, you may notice the metal expanding slightly, which is normal and actually helps in creating a smoother cooking surface by closing any microscopic pores or fissures in the metal[23].
Choosing the right oil for seasoning
Selecting the right oil for seasoning your stainless steel pan is crucial for achieving optimal results. The ideal oil should have a high smoke point, allowing it to withstand the high temperatures required for seasoning without breaking down. Oils with high smoke points include canola, corn, vegetable, and any oil marketed as "frying" oil. These oils can withstand temperatures up to 450°F-500°F, making them suitable for the seasoning process[24].
For those seeking more refined options, naturally refined oils like avocado (smoke point 480-520°F), safflower (450-500°F), and refined coconut oil (400-450°F) are excellent choices[25]. These oils not only withstand high temperatures but also create a stable, non-stick surface on your pan.
When applying the oil, ensure that the entire bottom of the pan is covered with about 1/8" (3mm) of oil, paying special attention to any high spots to prevent sticky areas from forming during the seasoning process[24].
Understanding smoke points of different oils
Understanding the smoke points of different oils is crucial when seasoning stainless steel pans. The smoke point is the temperature at which an oil starts to break down and smoke, affecting both flavor and nutritional value. Refined oils generally have higher smoke points, making them suitable for high-heat cooking methods like frying and grilling.
For example, refined avocado oil has an impressive smoke point of 480-520°F, while refined safflower oil ranges from 450-500°F. Medium smoke point oils, such as extra virgin olive oil (325-400°F) and unrefined avocado oil (350-400°F), are better suited for sautéing and baking. Low smoke point oils like unrefined coconut oil (350-380°F) and unrefined sesame oil (350°F) are best for gentle sautéing or finishing dishes.
When seasoning stainless steel pans, opt for oils with high smoke points to ensure they can withstand the high temperatures required for the seasoning process without breaking down and potentially leaving a burnt residue on the pan's surface.
Step-by-Step Guide to Seasoning a Stainless Steel Pan
Preheating the pan
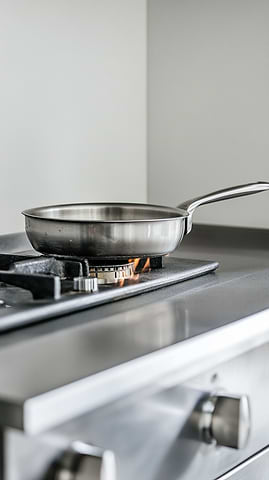
Preheating your stainless steel pan is a crucial step in achieving optimal cooking results. Start by placing the empty pan over medium heat for a minute or two. This gradual warming allows the metal to expand slightly, closing any microscopic fissures or pores in the pan's surface.
To test if the pan is adequately heated, perform the 'water test' by flicking a few drops of water onto the dry pan. If the water sizzles, the pan is at a nice medium heat; if it rolls around on the surface, you're closer to medium-high or high heat[23]. Once the pan is properly preheated, add your oil and allow it to reach a shimmering consistency before introducing food.
This process creates a smoother, tighter surface for the oil to slide on, reducing the likelihood of food sticking. It's important to note that when adding larger pieces of protein, such as chicken or steak, the pan's surface temperature will temporarily drop. As the pan returns to temperature, its pores will narrow, initially gripping the food. Patience is key here; wait for the pan to fully regain its heat, at which point the food will naturally release, allowing for easy flipping without damaging the pan's surface[26].
Applying a thin layer of oil
Applying a thin layer of oil is a crucial step in seasoning your stainless steel pan. While it's not possible to create a permanently non-stick surface like some other materials, this technique can significantly reduce food sticking. Begin by selecting an oil with a high smoke point, such as vegetable or canola oil.
Heat the pan over medium-high heat until it's hot but not smoking. Remove the pan from the heat and carefully add a small amount of oil, about 1-2 tablespoons, depending on the size of your pan. Using a paper towel or cloth, spread the oil evenly across the entire cooking surface, including the sides. Be sure to create a very thin, barely visible layer; excess oil can lead to a sticky residue.
Some chefs recommend adding a sprinkle of salt to the oil during this process, believing it helps create a more durable seasoning. However, this step is optional and its effectiveness is debated among culinary experts. The key is to use the pan frequently after seasoning, as regular use helps maintain and improve the non-stick properties.
Heating the oil to its smoke point
Heating the oil to its smoke point is a crucial step in seasoning your stainless steel pan. As the oil approaches its smoke point, typically around 400°F (200°C) for vegetable oil, it undergoes a chemical transformation. The oil begins to form ripples across the pan's surface, signaling that it's nearing the ideal temperature.
At this point, the oil molecules start to break down and reorganize, creating a polymer layer that bonds with the pan's surface. This process, known as polymerization, is what gives the pan its non-stick properties. It's important to note that while a small amount of smoke is acceptable, excessive smoking should be avoided as it can impart a rancid taste to the pan.
Once the oil reaches its smoke point, remove the pan from the heat source. The newly formed polymer layer will remain intact even as the pan cools, providing a non-stick surface for cooking at lower temperatures. This technique effectively mimics the seasoning process used for other types of cookware, allowing you to create a versatile cooking surface on your stainless steel pan[27].
Cooling and wiping the pan
After heating the oil to its smoke point, it's crucial to allow the pan to cool completely before proceeding. This cooling process is an essential step in the seasoning procedure, as it allows the polymerized oil layer to bond effectively with the pan's surface. Once cooled, carefully pour out any excess oil into a safe disposal container.
Next, use paper towels to gently wipe the interior of the pan, removing any remaining oil residue. This step ensures that only a thin, even layer of seasoning remains on the surface. It's important to note that the pan may appear slightly discolored or have a brownish tinge, which is normal and indicates successful seasoning.
For optimal results, some experts recommend repeating the seasoning process multiple times to build up a more durable non-stick surface. After seasoning, avoid using soap or abrasive cleaners on the pan, as these can strip away the newly formed protective layer. Instead, clean the seasoned pan by rinsing with hot water and wiping with a paper towel, which should be sufficient for most cooking residues. This gentle cleaning method helps maintain the seasoned surface, enhancing the pan's non-stick properties and extending its lifespan.
Repeating the process for optimal results
To achieve optimal results when seasoning your stainless steel pan, it's crucial to repeat the process multiple times. Each iteration builds up layers of seasoning, enhancing the pan's non-stick properties and developing a deeper, richer color. After the initial seasoning, allow the pan to cool completely before wiping away any excess oil. Then, repeat the oiling and heating process several times, gradually creating a more durable and effective non-stick surface.
Some experts recommend applying this technique to both the interior and exterior of the pan, as seasoning the outside can provide extra protection against rust and improve overall appearance. For the exterior, place the pan upside down in a preheated oven at about 200°C, letting it heat for a few minutes to allow the oil to bond with the metal through polymerization. Continue this process until the outside of the pan has developed a slight brown tinge.
It's important to note that while seasoning a stainless steel pan can significantly improve its performance, it may not create a permanently non-stick surface like some other materials. Therefore, regular maintenance and occasional re-seasoning may be necessary to maintain the pan's enhanced cooking properties.
Maintaining Your Seasoned Stainless Steel Pan
Proper cleaning techniques after use
Proper cleaning techniques are essential for maintaining your seasoneCertainly, I'll continue from where we left off:
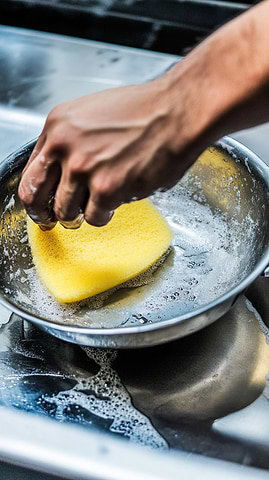
Proper cleaning techniques are essential for maintaining your seasoned stainless steel pan. For everyday cleaning, use hot soapy water and a non-abrasive sponge, avoiding harsh abrasives or steel wool that can damage the surface[22]. For stubborn food residue, fill the pan with soapy water, bring it to a boil, and scrape with a wooden spoon or spatula. Alternatively, create a paste with baking soda and water for tougher messes[22].
However, if you've seasoned your pan, avoid using soap as it can strip away the seasoning. Instead, rinse with hot water and wipe with a paper towel, which is usually sufficient for most cooking residues[18]. For discoloration or rainbow stains caused by overheating, wipe the pan with a cloth dampened with white vinegar or use a mixture of vinegar and water (1:3 ratio) brought to a boil[21].
Always dry your pan immediately after cleaning to prevent water spots, and allow it to cool completely before washing to avoid warping[22].
Avoiding harsh abrasives and steel wool
Avoiding harsh abrasives and steel wool is crucial for maintaining the integrity of your seasoned stainless steel pan. These aggressive cleaning tools can scratch the surface, removing the seasoning and potentially damaging the pan's finish. Instead, opt for gentler cleaning methods that preserve the pan's non-stick properties.
Use non-abrasive sponges or soft cloths for routine cleaning, and tackle stubborn residues with natural solutions like baking soda paste or vinegar. For tougher messes, consider boiling water in the pan to loosen stuck-on food before gently scraping with a wooden spoon or silicone spatula.
Commercial stainless steel cleaners can be effective, but choose ones specifically designed for cookware to avoid harsh chemicals. In cases of severe staining or burnt-on food, a mixture of vinegar, water, and baking soda can create a powerful yet safe cleaning solution. Remember, patience and gentle techniques are key to preserving your pan's seasoning and overall condition.
Re-seasoning frequency and indicators
Re-seasoning frequency for stainless steel pans depends on usage and care. While technically not necessary, some cooks choose to re-season their pans periodically to maintain optimal non-stick properties. Indicators that your pan may need re-seasoning include increased food sticking, discoloration, or a dull appearance.
However, proper cooking techniques often negate the need for frequent re-seasoning. Preheating the pan before adding fat and food, and allowing it to come back to temperature when adding large pieces of protein can significantly reduce sticking issues[33]. If you do choose to re-season, start by thoroughly cleaning the pan and applying a thin layer of high smoke point oil. Heat the pan until the oil begins to smoke, then let it cool completely before wiping away excess oil[34].
It's important to note that regular washing with soap and water will remove the seasoning, necessitating more frequent re-application. To maintain your pan's condition between seasonings, consider using gentle cleaning methods like hot water and a soft cloth for routine cleaning, reserving more intensive techniques for stubborn residues[35].
Storing your seasoned pan correctly
Proper storage is crucial for maintaining your seasoned stainless steel pan. After cleaning and drying thoroughly, store your pan in a cool, dry place to prevent moisture accumulation. Avoid stacking other cookware directly on top of your seasoned pan, as this can scratch or damage the seasoned surface. If stacking is necessary, place a soft cloth or paper towel between pans to protect the seasoning.
For long-term storage, consider applying a thin layer of oil to the pan's surface to prevent rust formation. However, be cautious not to use too much oil, as this can lead to rancidity over time. If you've seasoned the exterior of your pan, be mindful of this when storing, as the seasoned surface may transfer oil to other surfaces.
Some cooks prefer to hang their pans, which not only protects the seasoning but also allows for easy access and proper air circulation. Remember that regular use is key to maintaining your pan's seasoned surface, so try to incorporate it into your cooking routine frequently. If you notice any changes in the pan's performance or appearance during storage, it may be time to re-season before your next use.
Troubleshooting Common Issues with Seasoned Stainless Steel Pans
Dealing with uneven seasoning
Dealing with uneven seasoning on stainless steel pans can be challenging, but there are effective strategies to address this issue. One common problem is the formation of sticky oil bubbles or uneven patches after cooking at high temperatures. This often occurs when additional oil is added to the pan before cooking, causing it to polymerize unevenly.
To prevent this, ensure that your initial seasoning is thorough and even, using multiple thin layers of oil heated to their smoke point. When cooking, preheat the pan properly and use minimal additional oil. If uneven seasoning does occur, you may need to strip the pan and re-season it entirely.
Some cooks have found success in maintaining a smooth seasoning by treating their stainless steel pans similarly to other types of cookware: using a flat metal spatula to scrape the surface, rinsing only with water, and wiping with a paper towel. Regular use and proper care are key to maintaining an even seasoning. Experimenting with different seasoning methods, such as using a wood stove to maintain a consistent temperature over several hours, may also help achieve a more even and durable non-stick surface.
Addressing food sticking issues
Addressing food sticking issues in stainless steel pans requires a combination of proper techniques and understanding the material's properties. One crucial factor is preheating the pan correctly. Start by heating the pan on medium-high for 2-3 minutes, then perform the water test: add a teaspoon of water to the pan. If it forms a ball and rolls around, the pan is perfectly preheated. If the water bubbles and evaporates, it's too cold; if it splits into little bubbles and dances, it's too hot[39].
Once preheated, add an appropriate amount of high smoke point oil or fat, such as vegetable, peanut, or avocado oil, to create a slick surface. For a 20-centimeter pan, about three tablespoons of oil should sufficiently cover the surface[39]. Another key aspect is using room temperature ingredients to prevent temperature fluctuations in the pan[10].
When cooking proteins, allow them to form a crust before attempting to flip them. If the food sticks, it likely needs more time to cook. Patience is crucial; food will typically release from the pan when it's ready, resulting in a perfect sear[10]. For delicate foods like eggs or fish, consider using a lower preheating temperature and brushing the pan with oil for even coverage[39]. By following these techniques, you can significantly reduce food sticking issues and fully utilize the benefits of stainless steel cookware.
Removing burnt-on residue
Removing burnt-on residue from stainless steel pans can be challenging, but several effective methods exist. One popular approach involves creating a paste with baking soda and water, applying it to the affected areas, and letting it sit for a few minutes before scrubbing with a non-abrasive sponge. For tougher stains, this mixture can be left overnight.
Another technique involves boiling a mixture of water and baking soda in the pan, which can help loosen burnt-on food particles. Once the solution has simmered and most of the water has evaporated, allow the pan to cool before scrubbing with a non-abrasive sponge[22].
For particularly stubborn residues, a vinegar and baking soda solution can be highly effective. This mixture creates a chemical reaction that helps break down burnt food particles, making them easier to remove. It's crucial to avoid using harsh chemicals or abrasive tools like steel wool or wire brushes, as these can damage the pan's surface. Instead, opt for gentle scrubbing techniques using sponges, microfiber cloths, or non-abrasive scrubbers, moving in the direction of the pan's grain if visible[41].
Restoring a damaged seasoning layer
Restoring a damaged seasoning layer on your stainless steel pan requires patience and careful attention to detail. Begin by assessing the extent of the damage. For minor issues, such as small patches of lost seasoning, you can often spot-treat the affected areas. Start by cleaning the pan thoroughly with hot, soapy water and a non-abrasive sponge to remove any residue.
Once clean and dry, apply a thin layer of high smoke point oil to the damaged areas and heat the pan until the oil begins to smoke. Allow it to cool and wipe away any excess oil. For more extensive damage, you may need to strip the entire pan and re-season from scratch.
To do this, create a paste using baking soda and water, apply it to the pan's surface, and let it sit for several hours or overnight. Scrub the paste off with a non-abrasive sponge, rinse thoroughly, and dry immediately to prevent water spots[22]. If stubborn seasoning remains, consider using a commercial cleaner, following the manufacturer's instructions[40].
Once the pan is completely stripped, follow the initial seasoning process to rebuild the protective layer. Remember that maintaining your pan's seasoning is an ongoing process; regular use and proper care, including preheating the pan before adding oil and food, will help preserve and enhance the seasoning over time[21].
Cooking Tips for Seasoned Stainless Steel Pans
Adjusting cooking temperatures
Adjusting cooking temperatures is crucial when using seasoned stainless steel pans. The key to success lies in preheating the pan properly before adding any ingredients. Start by heating the empty pan over medium heat for 2 to 5 minutes, allowing it to reach a temperature between 225°F and 235°F. This temperature range activates the Leidenfrost Effect, creating a non-stick surface that surpasses even some coated pans.
To test if the pan is adequately heated, perform the water droplet test: add a few drops of water to the pan. If the water forms a ball and rolls around like mercury, the pan is ready. Once the desired temperature is achieved, add a high smoke point oil such as vegetable, canola, or avocado oil. Immediately after adding the oil, introduce your room-temperature ingredients to prevent excessive temperature drops.
For optimal results, avoid cooking on high heat with seasoned pans. Instead, maintain a medium heat throughout the cooking process, allowing proteins to sear undisturbed for 7-8 minutes for skin-on chicken or 3-5 minutes for steak or pork. Remember, patience is key when adjusting temperatures and cooking times to achieve perfectly browned, non-stick results in your seasoned stainless steel pan.
Using the right utensils to protect the seasoning
When using a seasoned stainless steel pan, selecting the right utensils is crucial to protect the seasoning layer and maintain its non-stick properties. Opt for wooden, silicone, or nylon utensils that won't scratch or damage the seasoned surface. Metal utensils, particularly those with sharp edges, should be avoided as they can scrape off the seasoning, requiring you to start the process anew.
This is especially important if you've invested time in creating a well-seasoned surface that has developed a brownish tinge, which is a sign of effective seasoning[8]. However, it's worth noting that the seasoning on stainless steel is not as robust as that on some other materials, so extra care is needed.
For techniques requiring rapid stirring or flipping, such as making a classic French fines herbes omelet, a seasoned stainless steel pan with gentle utensils can provide the perfect non-stick surface without the risk of damaging the coating. Remember, the key to maintaining a non-stick surface is frequent use. This underscores the importance of not only using the right utensils but also using your seasoned pan regularly to maintain its optimal performance.
Foods that benefit most from a seasoned stainless steel pan
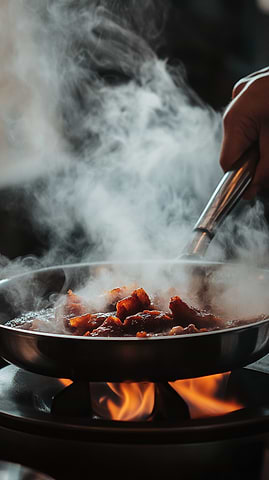
Seasoned stainless steel pans excel at cooking a variety of foods, particularly those that benefit from a crispy exterior and tender interior. Proteins like chicken, fish, and steak are prime candidates for seasoned stainless steel cookware. These pans allow for perfect searing, creating a caramelized crust while maintaining moisture inside. The key is to wait for the protein to naturally release from the pan before flipping, as the surface pores initially grip the food but release it once the pan returns to temperature[42].
Delicate foods like eggs and fish, often challenging in traditional stainless steel, become manageable in a well-seasoned pan. The seasoning creates a smoother surface, reducing sticking and tearing of these fragile ingredients[9]. Acidic foods, which can be problematic in some cookware, are perfectly suited for seasoned stainless steel, as the material doesn't react with acids. This makes it ideal for dishes involving tomatoes, citrus, or wine.
Additionally, foods that require high-heat cooking or frequent stirring benefit from the durability of seasoned stainless steel, as it can withstand metal utensils without damage, unlike some alternatives[10]. This versatility makes seasoned stainless steel pans an excellent choice for a wide range of culinary applications.
Conclusion
Stainless steel cookware, with its durability, versatility, and potential for seasoning, offers home cooks and professional chefs alike a powerful tool in the kitchen. Whether you choose to season your stainless steel pans or not, understanding the proper techniques for use and maintenance is key to getting the most out of this cookware.
From mastering the art of preheating to selecting the right oils and utensils, each step in the process contributes to creating delicious meals and extending the life of your pans. Remember, the debate over seasoning stainless steel is ongoing, and ultimately, the choice depends on your personal cooking style and preferences.
As you continue to explore the world of stainless steel cookware, consider expanding your kitchen arsenal with high-quality tools that complement your pans. Our range of products, from our versatile 8-inch Chef's Knife to our durable cookware sets, are designed to enhance your cooking experience and help you achieve professional-level results at home.
Ready to elevate your cooking game with premium stainless steel cookware and kitchen tools? Shop Now and discover the difference that quality makes in your culinary creations.
Stainless steel cookware offers a blend of durability, versatility, and cooking performance that makes it a popular choice for both home cooks and professional chefs. This guide explores the composition, benefits, and proper care of stainless steel pans, as well as addressing common misconceptions and debating seasoning techniques.
References
- Xometry. (n.d.). 18/10 Stainless Steel.
- Thermtest. (n.d.). The Impacts of Thermal Conductivity on Cooking Technique.
- Kamerud, K. L., Hobbie, K. A., & Anderson, K. A. (2013). Stainless Steel Leaches Nickel and Chromium into Foods during Cooking. Journal of Agricultural and Food Chemistry, 61(39), 9495-9501.
- LeafScore. (n.d.). Stainless Steel Cookware Pros and Cons.
- The Spruce Eats. (2021). Nonstick vs. Stainless Steel Cookware.
- Curated. (n.d.). Stainless Steel vs. Nonstick Pans: Which Are Better for You?
- Quora. (n.d.). What are the potential health risks of cooking with stainless steel pans compared to non-stick pans?
- Stack Exchange. (n.d.). Do I need to season a stainless steel saute pan?
- Food Network. (n.d.). How to Make Stainless Steel Nonstick.
- Food52. (n.d.). How to Make Stainless Steel Cookware Nonstick.
- Chef Talk. (n.d.). Seasoning of Stainless Steel Fry Pan.
- Sur La Table. (n.d.). How to Make Stainless Steel Nonstick.
- SunCakeMom. (n.d.). All About Seasoning Cast Iron, Carbon Steel & Stainless Steel.
- Stainless Europe. (n.d.). How to Get Scratches Out of Stainless Steel.
- Knives and Tools. (n.d.). Seasoning Stainless Steel, Carbon Steel & Cast Iron Pans.
- Lobaugh, B. (n.d.). Why I Will Season My Stainless Steel Pans Forever.
- Heritage Steel. (n.d.). Cooking Techniques.
- Martha Stewart. (n.d.). How to Care for a Stainless Steel Pan to Prevent Burning and Warping.
- Food52. (n.d.). Our Guide for Caring for & Cleaning Stainless Steel Pans.
- Better Homes & Gardens. (n.d.). How to Clean Stainless Steel Pans.
- The Practical Kitchen. (n.d.). Why Heat Stainless Steel Pans? FAQ.
- The Boat Galley. (n.d.). Seasoning a Stainless Steel Skillet.
- Mountain Rose Herbs. (n.d.). How to Choose the Best Culinary Oil (with Oil Smoke Point Chart).
- Heritage Steel. (n.d.). Cooking Techniques.
- That Other Cooking Blog. (2016). Make Stainless Steel Pans Nonstick.
- Heritage Steel. (n.d.). Cooking Techniques.
- wikiHow. (n.d.). How to Season a Stainless Steel Pan.
- Proclamation Goods. (n.d.). How to Care for Stainless Steel Pots and Pans.
- ABC News. (2023). How to cook using stainless steel cookware so food doesn't stick.
- Wirecutter. (n.d.). How to Clean Stainless Steel Pans.
- de Buyer. (n.d.). Cleaning Burnt Stainless Steel Pans.
- Heritage Steel. (n.d.). Cooking Techniques.