How to Sharpen a Knife with a Stone

Key Takeaways
- There are three main types of sharpening stones: water stones, oil stones, and diamond stones.
- Grit levels determine the aggressiveness and refinement of the sharpening process.
- Choosing the right stone depends on your knife's steel type and hardness level.
- Proper technique and consistent angle maintenance are crucial for effective sharpening.
- Regular honing between sharpenings helps maintain a knife's edge for longer periods.
Understanding Sharpening Stones
Types of sharpening stones: water stones, oil stones, and diamond stones
Sharpening stones come in three main varieties, each with its own unique characteristics and benefits. Water stones, often made of aluminum oxide, are popular due to their fast cutting action and wide range of available grits. They use water for swarf removal and require periodic flattening due to their softer nature[1].
Oil stones, traditionally made from novaculite, aluminum oxide, or silicon carbide, use oil for swarf removal and are known for their durability and lower price point. However, they cut more slowly than other types[1].
Diamond stones, featuring industrial diamonds bonded to a metal surface, are the fastest cutting and most durable option. They maintain their flatness over time and are available in both interrupted and continuous surface varieties. While typically limited to coarser grits, some manufacturers now offer finer grit options[1].
It's worth noting that the term "whetstone" is often used interchangeably with sharpening stone, while "water stone" specifically refers to stones that require water during use[2].
Grit levels and their purposes
Grit levels play a crucial role in knife sharpening, determining the aggressiveness and refinement of the sharpening process. Coarse grits, typically ranging from 80 to 220, are ideal for repairing heavily damaged or extremely dull blades. These stones remove substantial material, effectively reshaping the edge.
Medium grits, spanning 400 to 800, serve as general-purpose sharpeners, refining the edge while removing less material than coarse stones. Fine grits, between 1000 and 3000, polish and refine the blade's edge, imparting a mirror-like finish[3].
For the ultimate in sharpness and polish, ultra-fine grits of 8000 and above are employed, removing minimal material while achieving a razor-sharp edge. The progression from lower to higher grits is essential, moving logically from coarse to medium, and then to fine, ensuring a systematic refinement of the blade's edge[4].
Choosing the right stone for your knife
Selecting the appropriate sharpening stone is crucial for achieving optimal results. The choice depends on various factors, including the blade's steel type and hardness level. For softer steels (below 53 HRC), opt for coarse-grained stones up to 800 grit. Medium-hardness blades (53-58 HRC) benefit from 800-1000 grit stones, while harder blades (56-59 HRC) require 1000-3000 grit[5].
The stone's material also plays a significant role in the selection process. Water stones are affordable but dish out quickly, requiring frequent flattening. Ceramic whetstones offer better durability and are ideal for high-hardness blades. Diamond stones, while more expensive, provide exceptional longevity and maintain their flatness, making them suitable for various blade types[6].
For those new to knife sharpening or occasional users, a combination stone with dual grits can be a versatile choice. Our Knife Sharpening Stone offers a dual-sided design with both coarse and fine grits, making it an excellent option for maintaining a variety of kitchen knives.
Preparing for the Sharpening Process
Gathering necessary materials and tools
Before beginning the sharpening process, it's essential to gather all the necessary materials and tools. In addition to your chosen sharpening stone, you'll need a lubricant (usually water for most whetstones) to help remove metal particles during sharpening. A sturdy, non-slip base or stand is crucial for keeping the stone stable while you work.
An angle guide can be invaluable for maintaining the correct sharpening angle, especially for those new to the process. Additionally, have a soft cloth or towel on hand for cleaning and drying the knife after sharpening. For safety, consider using a cut-resistant glove to protect your hands[8].
Soaking the stone (if required)
For water stones, proper soaking is crucial to ensure optimal performance. Most water stones benefit from a 15 to 20-minute soak, allowing water to fully penetrate the stone's pores. This process is visually evident as bubbles emerge from the stone, indicating air displacement[9].
It's important to note that soaking times may vary depending on the stone's grit. Fine grit whetstones typically require only a few minutes of soaking, with some experts advising against soaking them at all to prevent cracking. In contrast, coarse grit whetstones benefit from the full 15 to 20-minute soak[10].
During the sharpening process, you may need to periodically add water to maintain optimal lubrication and swarf removal. This ensures consistent performance throughout the sharpening session.
Setting up a stable work surface
A stable work surface is essential for effective and safe knife sharpening. Choose a flat, sturdy surface at a comfortable height that allows you to maintain proper angles and control throughout the process. Adequate lighting is crucial to closely monitor your progress and ensure consistent results.
To prevent the stone from slipping during use, which can lead to inconsistent sharpening or potential injury, secure it using one of several methods. One effective solution is to use a dedicated stone holder with protective rubber feet, which not only stabilizes the stone but also elevates it for improved ergonomics[11].
By ensuring a stable setup, you create an environment conducive to maintaining focus and achieving optimal sharpening results. This attention to detail in your workspace setup will contribute significantly to the overall quality of your knife sharpening efforts.
Determining the Correct Sharpening Angle
Understanding blade angles for different knife types
Different knife types require specific sharpening angles to achieve optimal performance. Kitchen knives, such as paring knives and chef's knives, typically require angles between 15-20 degrees per side. This range balances sharpness for precision slicing with durability for chopping tasks[14].
Japanese knives often feature more acute angles, around 15-17 degrees per side, prioritizing slicing precision but sacrificing some durability[15]. Pocket knives and utility folding knives benefit from slightly wider angles, typically 20-25 degrees per side, to enhance edge retention for versatile use[16].
Understanding these variations allows you to tailor your sharpening approach to each knife's specific purpose and design, optimizing both cutting performance and edge longevity.
Using angle guides for consistency
Angle guides are invaluable tools for achieving consistent sharpening results, especially for beginners. These devices help maintain a precise angle between the blade and the sharpening stone, ensuring uniform edge geometry. Clip-on guides attach directly to the knife's spine, offering a foolproof method for maintaining the desired angle throughout the sharpening process[17].
For those seeking a more budget-friendly option, the coin trick offers a creative alternative. By stacking coins to a specific height, you can create a makeshift guide that corresponds to your desired sharpening angle[17]. Regardless of the method chosen, using an angle guide helps eliminate guesswork and promotes the development of muscle memory, ultimately leading to more effective and efficient sharpening techniques.
Practicing proper hand positioning
Proper hand positioning is crucial for achieving consistent and effective knife sharpening results. One recommended technique involves dividing the tasks between your hands. For right-handed users, the right hand, which holds the knife handle, is responsible for maintaining a consistent angle against the stone without wobbling. The left hand, meanwhile, focuses on pushing or pulling the knife along the stone's surface[18].
When positioning the knife, hold it firmly with one hand, ensuring your fingers are away from the blade. Place the knife's edge against the stone at the desired bevel angle, typically between 15-20 degrees for most kitchen knives. Apply light pressure and use a sweeping motion, starting from the base of the blade and moving towards the tip. Maintain this consistent angle throughout the process, repeating the motion on both sides of the blade for about 5-10 strokes or until you notice a burr forming[19].
With practice, you'll develop the muscle memory and eye for proper angle maintenance, leading to more efficient and effective sharpening sessions.
The Sharpening Technique
Starting with the coarse grit side
When beginning the sharpening process, it's crucial to start with the coarse grit side of your sharpening stone. This initial step is essential for repairing heavily damaged or extremely dull blades, as the coarse grit removes material quickly and effectively reshapes the edge.
Before sharpening, ensure your stone is properly lubricated according to the manufacturer's instructions. Position your knife at the correct angle and begin the sharpening motion. Using a sweeping arc pattern, draw the knife down and across the stone, starting at the heel and finishing at the tip. Maintain consistent pressure and angle throughout the motion.
Repeat this process 5-10 times on each side of the blade, alternating sides to ensure even sharpening. As you work, you'll notice a burr forming on the opposite side of the edge – this is a sign that you're effectively removing material and reshaping the edge. Continue this process until you've felt the burr on both sides of the blade, indicating that you've successfully sharpened the entire edge with the coarse grit[21].
Proper pressure and motion for effective sharpening
Proper pressure and motion are crucial for effective knife sharpening. When using a diamond stone, apply minimal pressure, relying on the weight of the knife itself to do the work. This gentle approach preserves the diamond dust embedded in the stone, ensuring its longevity.
For the forward stroke technique, begin at the heel of the blade and move the edge forward across the stone in a sweeping arc pattern. Maintain a consistent angle and pressure throughout the motion, repeating 5-10 times on each side of the blade. This method effectively removes steel particles from the edge, creating a burr that indicates successful sharpening[22].
Consistency in angle and pressure is paramount for achieving a uniform, sharp edge. As you progress in your sharpening skills, you'll develop a feel for the right amount of pressure and the optimal motion for different types of knives and stones.
Transitioning to finer grits for polishing
After achieving a consistent edge with coarser grits, transitioning to finer grits is essential for polishing and refining the knife's edge. This progression requires careful consideration to achieve optimal results. While some sharpeners prefer small incremental jumps in grit levels for a very shiny, clean finish, others may opt for larger jumps depending on the desired outcome.
When transitioning to finer grits, it's important to note that ceramic stones often require more passes than diamond stones to achieve a polished edge, sometimes necessitating 70-80 strokes per side. Additionally, ceramic stones may need a break-in period, improving with each use.
The choice of final grit and polishing method should be tailored to the knife's intended purpose, with some blades benefiting from a toothier edge achieved with lower grits, while others may require ultra-fine polishing for specific tasks. Experimenting with different progressions will help you find the optimal approach for your knives and cutting needs.
Mastering the Sharpening Stroke
The push-pull method
The push-pull method is a widely used technique for knife sharpening on stones. This approach involves moving the blade back and forth along the stone's surface while maintaining a consistent angle. It allows for better control and consistency in angle maintenance, which is crucial for achieving a sharp, even edge.
The technique typically involves pushing the blade away from you on the edge-leading stroke and pulling it back on the edge-trailing stroke. This alternating motion helps minimize burr formation and promotes even material removal across the entire edge. However, variations exist within this method, and some sharpeners emphasize the edge-leading stroke or even use edge-leading strokes exclusively[28].
For beginners, focusing on maintaining a consistent angle and pressure throughout the push-pull motion is more important than adhering to a strict stroke pattern. As your skills improve, you can experiment with different variations to find what works best for your style and the knives you're working with.
Circular motions for specific blade areas
Circular motions can be particularly effective for sharpening specific blade areas, especially when dealing with curved or complex blade shapes. For recurved knives or blades with pronounced curves, using a circular motion on a flat stone can help maintain the blade's geometry while achieving a uniform edge.
This technique involves making small, controlled circles with the blade against the stone, gradually working along the entire length of the edge. The circular motion creates a polishing action that minimizes the directional bias of the microscopic 'teeth' left by linear sharpening strokes, potentially resulting in a more versatile cutting edge[29].
When sharpening the tip of a knife, it's crucial to adjust both the wrist angle and handle height to maintain the desired bevel angle as the blade curves. As the blade approaches the tip, the handle should be raised while simultaneously decreasing the rotation angle along the axis of the knife handle. This adjustment ensures that the bevel angle remains constant even as the blade's curvature changes dramatically[30].
Maintaining consistent angle throughout the process
Maintaining a consistent angle throughout the sharpening process is crucial for achieving a uniformly sharp edge. One effective technique involves dividing tasks between hands: the dominant hand holding the knife handle maintains a steady angle against the stone, while the other hand focuses on pushing or pulling the blade along the surface. This separation of roles minimizes angle fluctuations during the sharpening motion[31].
For those new to freehand sharpening, using visual references can be helpful. Start by identifying a 45-degree angle, then halve it to approximately 22.5 degrees for Western knives, and halve again for Japanese knives, landing around 11 degrees. This method provides a rough guide without relying on artificial aids[31].
Regular practice and careful observation of the edge will help develop the necessary muscle memory and eye for proper angle maintenance. Remember that freehand sharpening inherently involves some variation, so focus on achieving "good enough" rather than perfection, especially when starting out.
Addressing Both Sides of the Blade
Alternating sides for even sharpening
Alternating sides for even sharpening is crucial for maintaining a balanced and symmetrical edge on your knife. When sharpening, it's important to work on both sides of the blade equally to ensure consistent material removal and edge formation.
Start by sharpening one side of the blade until you feel a burr along the entire length of the edge. This burr indicates that you've reached the apex of the edge on that side. Once achieved, flip the knife over and repeat the process on the other side, using the same number of strokes or amount of time as you did on the first side[33].
As you progress to finer grits, continue this alternating pattern, gradually reducing the number of strokes on each side. For example, you might do ten passes on each side, then five, three, two, and finally one pass per side. This technique helps to refine the edge evenly and remove any remaining burr[33].
Counting strokes for balance
Counting strokes for balance is a crucial aspect of knife sharpening that ensures even material removal and consistent edge formation. The number of strokes required can vary depending on the grit of the stone and the type of steel you're working with.
To maintain balance, work in sets of strokes, checking the edge after each set to catch any potential issues early. Some practitioners prefer to do more strokes on lower grit stones and fewer on finer ones, while others strop between every stone change.
Experimentation and practice will help develop the intuition needed to determine the optimal stroke count for different blade types and conditions. Remember that softer steels typically require fewer strokes, while denser steels demand more work.
Checking progress and adjusting technique
Regularly checking your progress and adjusting your technique is crucial for achieving optimal results when sharpening a knife. One effective method is to use a permanent marker to color the edge bevel before sharpening. This allows you to visually assess where the stone is making contact with the blade, ensuring you're not sharpening at too shallow or too steep an angle[35].
Another important aspect is examining the scratch patterns in the metal. By observing these patterns, you can determine if you're maintaining a consistent angle and whether you need to adjust your technique[36]. It's also essential to feel for the formation of a burr along the entire length of the blade. This burr indicates that you've successfully established an edge on that side of the knife.
Visual inspection under bright light can help identify any remaining flat or rounded spots on the edge that need further attention. Pay particular attention to commonly missed areas such as the heel and tip of the blade[36]. By consistently checking your progress and making necessary adjustments, you can ensure a more efficient and effective sharpening process.
Testing the Knife's Sharpness
The paper test
The paper test is a widely recognized method for assessing a knife's sharpness. To perform this test, hold a single sheet of newspaper at a 45-degree angle and place the knife's edge on the paper's edge at a shallow angle. A sharp knife should effortlessly slice through the paper with a smooth, gliding motion. If the blade skips, tears, or struggles to cut cleanly, it indicates the need for further sharpening[37].
For a more advanced evaluation, attempt to slice the newsprint off without cutting through the underlying paper, a technique known as the 'fillet' test. This challenging maneuver requires exceptional blade sharpness and precision[37].
Alternatively, standard printer paper can be used for a similar test. Hold the paper vertically and attempt to slice downwards. A sharp knife should produce a clean, straight cut with minimal effort, while a dull blade will result in a torn or jagged edge[38].
The tomato slice test
The tomato slice test is a popular method for assessing a knife's sharpness, particularly after honing or sharpening. This test involves attempting to slice through a ripe tomato with minimal pressure. A truly sharp knife should effortlessly glide through the tomato's skin and flesh, producing clean, even slices without crushing the fruit.
When performing the tomato slice test, it's crucial to use a light touch and let the blade's sharpness do the work. If the knife struggles to initiate the cut or tears the tomato's skin instead of slicing cleanly, it indicates that further sharpening or honing is necessary.
This test is particularly useful for kitchen knives, as it simulates real-world cutting tasks and provides immediate feedback on the blade's performance. However, it's important to note that failing the tomato slice test doesn't necessarily mean the knife is completely dull; it may simply require proper honing technique to realign the edge[39].
Using a loupe to inspect the edge
Using a loupe to inspect the edge of a knife can significantly enhance the sharpening process by revealing microscopic details invisible to the naked eye. A magnification range of 3X to 10X is generally sufficient for most sharpening tasks, allowing users to identify burrs, chips, or rolls in the edge[41].
When using a loupe, inspect the toe, heel, and center of the edge on both sides to identify areas requiring additional attention. This meticulous examination can uncover inconsistencies even in factory-sharpened knives, enabling a more precise and targeted sharpening approach[42].
While some experienced sharpeners may rely on visual cues like consistent light reflection along the edge to assess sharpness, a loupe provides an additional layer of precision for both novices and experts alike. By incorporating a loupe into your sharpening routine, you can eliminate guesswork and achieve a more even, consistent edge with greater accuracy.
Finishing Touches and Maintenance
Stropping the blade for a razor-sharp edge
Stropping is the final step in achieving a razor-sharp edge on your knife. To begin, place the tip of the blade on a leather strop with the back facing you. Pull the knife towards you, maintaining a consistent angle similar to that used during sharpening. The leather's forgiving nature allows for slight variations in angle without damaging the edge. Repeat this motion several times on each side of the blade, gradually decreasing pressure as you progress[43].
For optimal results, use a strop imbued with a micro-abrasive compound, typically containing particles measuring between 0.5 and 1 micron. This compound works to refine the edge, removing any remaining burrs and polishing the blade to perfection[44].
Regular stropping can significantly extend the time between full sharpenings, maintaining your knife's edge for longer periods and ensuring peak performance in your kitchen tasks.
Cleaning and storing the newly sharpened knife
After sharpening your knife, proper cleaning and storage are crucial for maintaining its edge and longevity. Begin by hand washing the blade with warm, soapy water and a soft sponge, avoiding abrasive materials that could scratch the surface. Never place your knife in the dishwasher or leave it soaking, as this can damage the blade and handle[46].
Dry the knife thoroughly with an absorbent towel, paying special attention to the handle and any crevices where moisture might collect. For carbon steel knives, consider applying a thin layer of food-safe oil, such as camellia oil, to protect against corrosion[46].
When it comes to storage, opt for a magnetic wooden strip, a knife block with universal slots, or a dedicated in-drawer storage unit to prevent blade damage and ensure safety[47]. If using a magnetic strip or knife block, always place the spine of the blade against the storage surface first to protect the cutting edge.
Regular honing to maintain the edge between sharpenings
Regular honing is essential for maintaining a knife's edge between sharpenings. Honing realigns the microscopic teeth of the blade that can bend with frequent use, restoring its sharpness without removing metal. For optimal results, use a fine-grit ceramic honing rod, which is less destructive and suitable for both Western-style and many Japanese hybrid knives[48].
When honing, maintain a consistent angle (typically 15-20 degrees for most kitchen knives), use light pressure, and limit yourself to 3-4 swipes per side[49]. Ideally, hone your knife before each significant use, or at minimum once a week if you cook 3-4 times weekly.
This practice can significantly extend the time between full sharpenings, potentially allowing you to go a year or longer before needing professional sharpening services[48]. By incorporating regular honing into your routine, you'll maintain consistently sharp knives, enhancing your cooking experience and safety in the kitchen.
Conclusion
Mastering the art of knife sharpening is an invaluable skill for any home cook or professional chef. By understanding the types of sharpening stones, grit levels, and proper techniques, you can maintain your knives' sharpness and extend their lifespan. Remember to choose the right stone for your knife, maintain a consistent angle, and practice regularly to improve your skills.
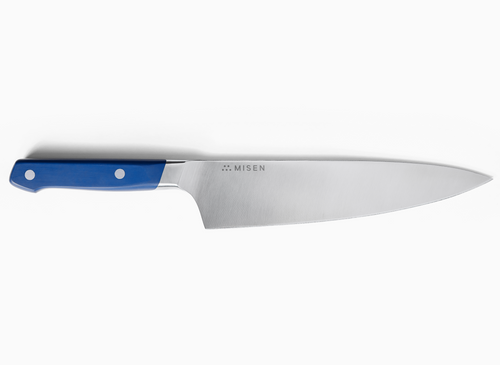
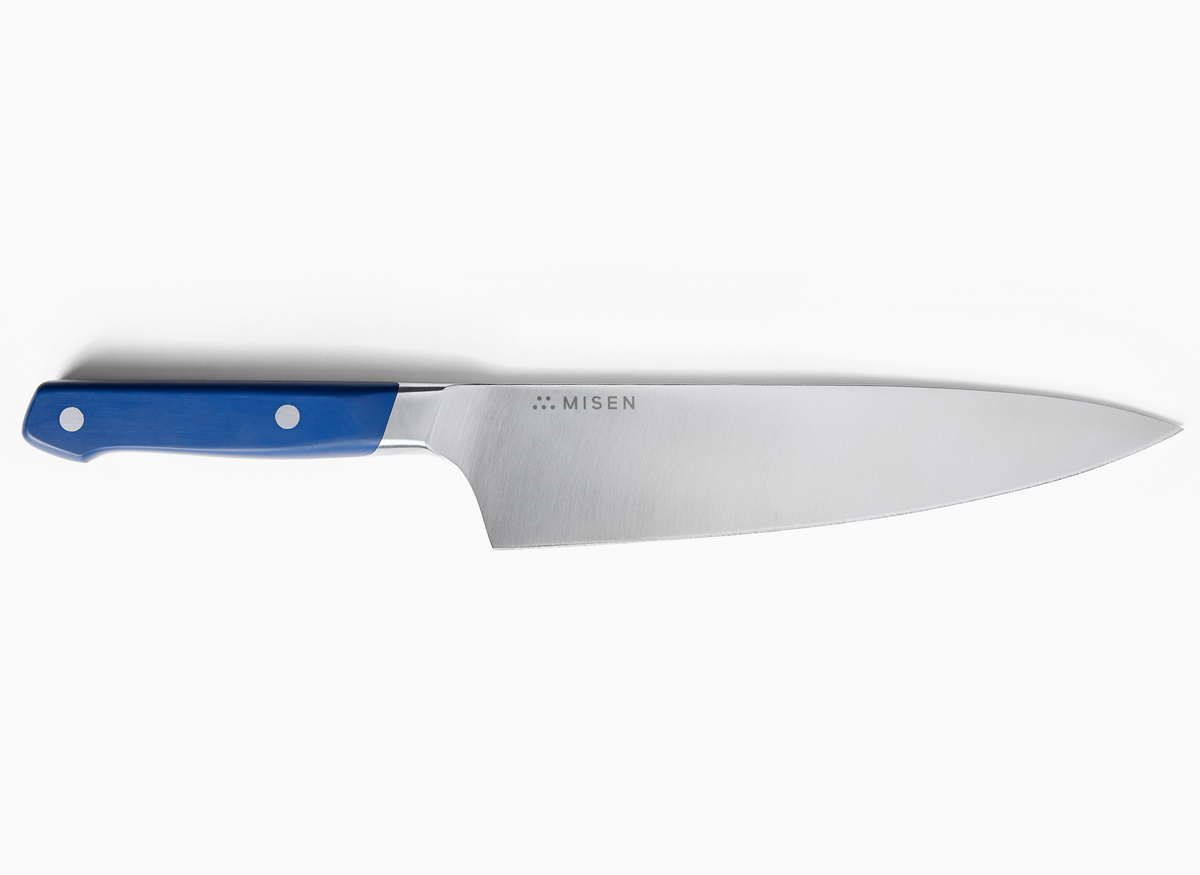
Investing in quality knives and maintaining them properly will significantly enhance your cooking experience. Our Chef's Knife is designed to hold its edge well and is easy to sharpen, making it an excellent choice for both beginners and experienced cooks.
Ready to elevate your kitchen experience with sharp, high-quality knives? Shop Now and discover our range of premium kitchen tools designed to enhance your culinary journey.
Sharpening stones are essential tools for maintaining the edge of your kitchen knives. This guide explores the types of sharpening stones, their grit levels, and proper techniques for achieving a razor-sharp edge on your blades. By understanding these fundamentals, you'll be able to keep your knives in top condition, enhancing your cooking experience and extending the life of your cutlery.
References
- Sharpening Supplies. (n.d.). Difference in Sharpening Stone Materials.
- Knives and Tools. (n.d.). Difference between sharpening stones and whetstones.
- Nakano Knives. (n.d.). Sharpening Whetstone Grits Explained.
- Knives and Tools. (n.d.). With which sharpening stone do I start?
- My Chef Knives. (n.d.). How to choose a sharpening stone.
- Koi Knives. (n.d.). How to Choose a Sharpening Stone.
- Serious Eats. (n.d.). The Best Knife Sharpeners.
- Blade Magazine. (n.d.). How to Use a Whetstone.
- Simply Recipes. (n.d.). How to Sharpen a Knife with a Whetstone.
- Santoku Knives. (n.d.). How Long Should You Soak a Whetstone?
- Sharpening Supplies. (n.d.). Detailed Discussion on Knife Sharpening Angles.
- Noblie Custom Knives. (n.d.). A Beginner's Guide to Knife Sharpening Angles.
- Blade HQ. (n.d.). Knife Sharpening Angle Guide.
- My Electric Knife Sharpener. (n.d.). Best Knife Sharpening Angle Guide.
- Kitchen Knife Forums. (n.d.). Keeping the Angle.
- Sur La Table. (n.d.). How to Sharpen Knives at Home.
- Sharpening Supplies. (n.d.). Step-by-Step Knife Sharpening.
- A.G. Russell Knives. (n.d.). Knife Sharpening on Stones.
- Bushcraft USA. (n.d.). Using a Circular Motion on a Stone.
- Kitchen Knife Forums. (n.d.). Sharpening the Tip of a Knife.
- YouTube. (n.d.). Knife Sharpening Tutorial.
- Blade Forums. (n.d.). Tips for Holding an Angle While Freehand Sharpening.
- Outdoor Life. (n.d.). How to Sharpen a Knife.
- Jeff Peachey. (2021). Knife Sharpening Tips, Links, Advice and Commandments.
- ITS Tactical. (n.d.). How to Sharpen a Knife While Minimizing Mistakes and Maximizing Cutting Edge Performance.
- Art of Manliness. (n.d.). Use a Newspaper to Test a Knife's Sharpness.
- Red Label Abrasives. (n.d.). The Best Ways to Test the Sharpness of a Knife.
- Reddit. (n.d.). Wusthof Knives Not Sharp, Honing Issues.
- Blade Forums. (n.d.). How Much Magnification to See Edge Detail.
- Sharp Pebble. (n.d.). Why a Magnifier Will Give Your Knife a Perfect Edge Every Time.
- Knives and Tools. (n.d.). How Do You Strop a Knife?
- Work Sharp Tools. (n.d.). Mastering the Art of Knife Stropping: Unlocking Razor-Sharp Perfection.
- Town Cutler. (n.d.). Care and Maintenance.
- Chef's AC. (n.d.). Knife Sharpening and Maintenance Best Practices.
- Kitchen Knife Guru. (n.d.). How to Hone a Knife.
- Serious Eats. (n.d.). Honing vs. Sharpening: What's the Difference?
