How To Sharpen A Knife

Key Takeaways:
- Sharp knives are safer and more efficient in the kitchen
- Different knife edges serve various purposes
- Essential sharpening tools include whetstones, manual and electric sharpeners
- Proper technique is crucial for effective sharpening
- Regular maintenance extends the life of your knives
Understanding Knife Sharpening Basics
The importance of maintaining a sharp knife
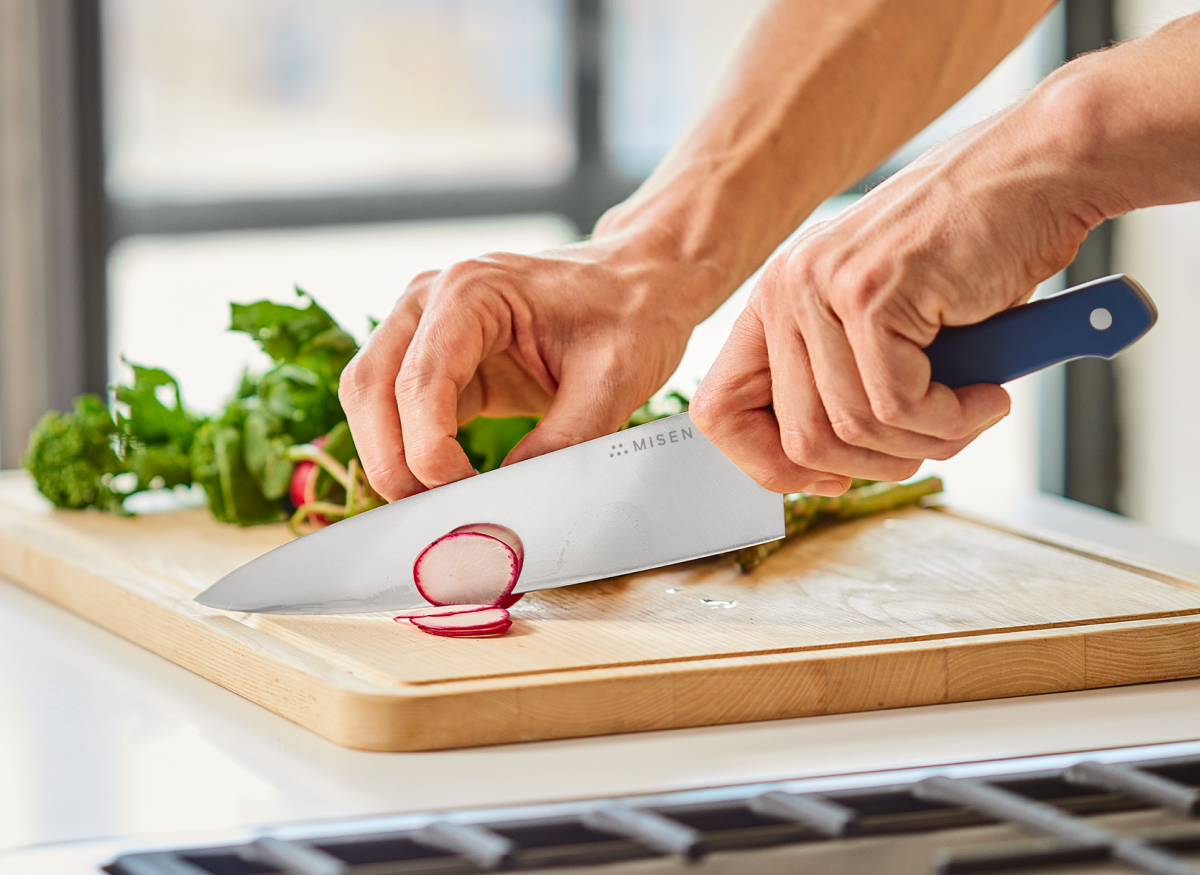
A well-honed blade is the cornerstone of kitchen efficiency and safety. Contrary to popular belief, sharp knives are actually safer than dull ones, as they require less force to cut through ingredients, reducing the risk of slips and accidents[1]. Sharp knives also preserve food quality by making clean cuts with minimal damage, ensuring that flavors and nutrients remain intact[2].
Moreover, they contribute to improved presentation, allowing for precise and aesthetically pleasing cuts that elevate the visual appeal of dishes. Regular maintenance of knives not only prolongs their lifespan but also encourages more frequent cooking, as the ease and enjoyment of using sharp tools can inspire culinary creativity[2].
Different types of knife edges
The performance and suitability of a blade for specific tasks are largely determined by its edge type. The flat grind, characterized by a straight taper from spine to edge, offers exceptional sharpness and ease of maintenance, making it ideal for chef's knives and everyday carry blades[3].
For outdoor enthusiasts, the Scandinavian or V grind provides a robust edge that excels in woodworking and bushcraft activities, offering both durability and ease of field sharpening[5]. The convex grind, featuring a rounded taper, combines exceptional durability with excellent edge retention, making it suitable for heavy-duty tasks like chopping[3].
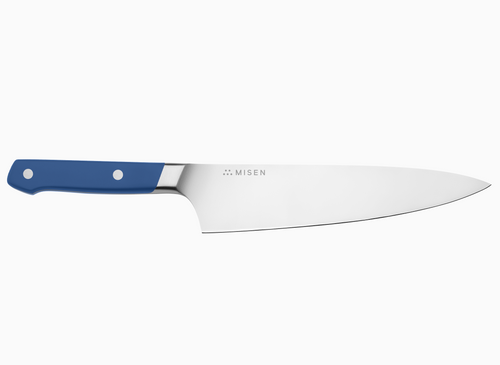
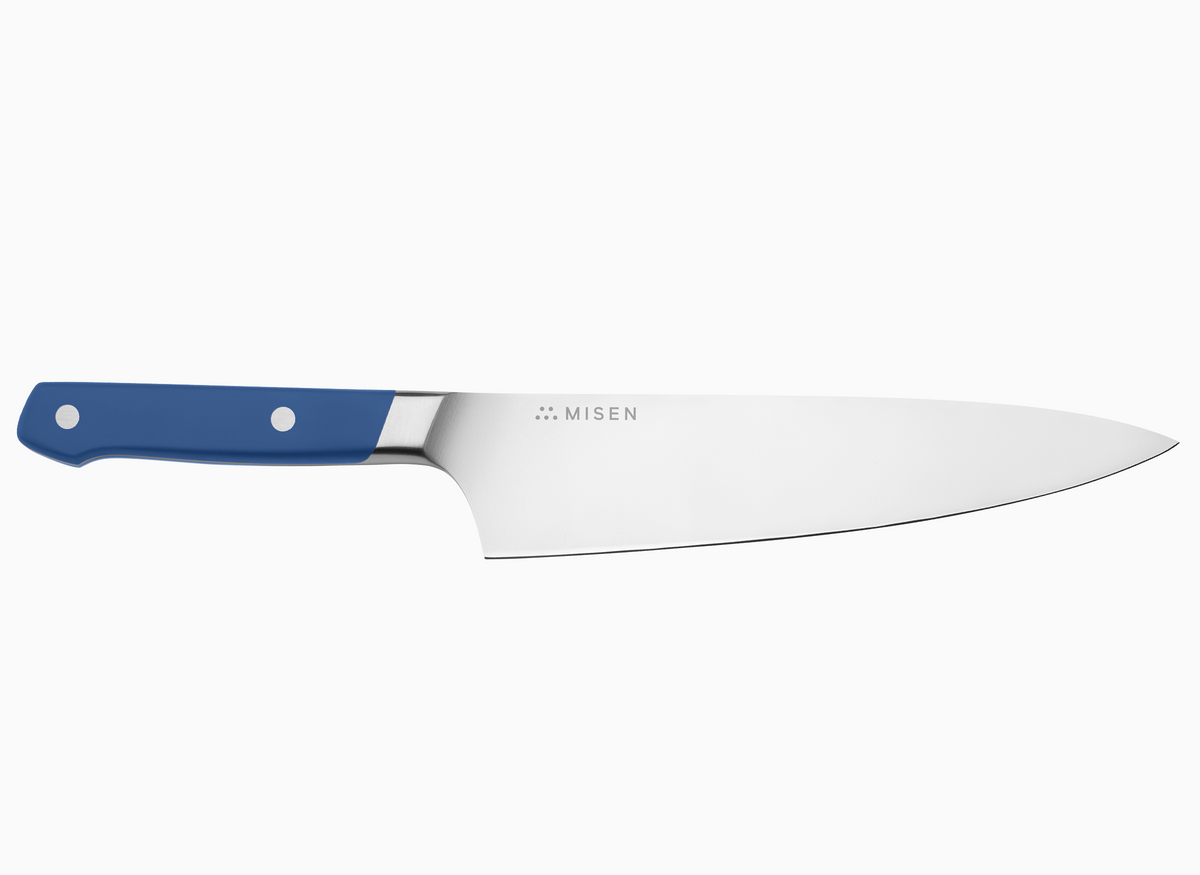
Understanding these various edge types allows users to select the most appropriate knife for their specific needs, balancing factors such as sharpness, durability, and ease of maintenance. Our Chef's Knife, for instance, features a precision-honed edge that maintains its sharpness and versatility for a wide range of kitchen tasks.
Signs that your knife needs sharpening
Recognizing when your knife needs sharpening is crucial for maintaining kitchen efficiency and safety. A telltale sign is difficulty in cutting soft foods like tomatoes or onions. If your knife struggles to slice through a tomato's skin, leaving it mushy, or if it slips on an onion's surface instead of cleanly cutting through, it's time for sharpening[6].
Another indicator is the 'cracked pepper' effect when chopping bell peppers; a sharp knife should cut smoothly without causing the pepper to crack loudly. For a quick test, try the paper test: hold a sheet of paper vertically and attempt to slice it with your knife. A sharp blade will cut cleanly, while a dull one will tear or skip along the edge[6].
Visual inspection can also reveal dullness; look for nicks or a rounded edge on the blade[7]. Importantly, if you find yourself applying more force than usual when cutting, it's a clear indication that your knife needs attention.
Essential Tools for Knife Sharpening
Whetstones: Grit levels and their uses
Whetstones are essential tools for knife sharpening, available in various grit levels that serve different purposes. Coarse grit stones, typically ranging from #120 to #400, are ideal for repairing heavily damaged or extremely dull blades. These stones aggressively remove material, making them perfect for reshaping edges or grinding out chips[9].
Medium grit stones, falling between #700 and #2000, are used for regular sharpening and maintenance. They strike a balance between material removal and edge refinement, with #1000 grit often considered the go-to starting point for general sharpening tasks[10].
Fine grit stones, ranging from #3000 to #8000, are employed for polishing and honing the blade to achieve a razor-sharp finish. These stones remove minimal material and are excellent for refining the edge after using coarser grits[11].
When selecting whetstones, consider the condition of your knives and your sharpening goals to choose the appropriate grit progression, ensuring optimal results in maintaining and enhancing your blade's edge.
Manual knife sharpeners: Pros and cons
Manual knife sharpeners offer several advantages for home cooks and professionals alike. They provide greater control over the sharpening angle, allowing users to customize the edge based on the knife type and personal preference[12]. This precision is particularly beneficial for maintaining high-quality kitchen knives.
Manual sharpeners are generally more affordable and portable, making them a practical choice for those who want to sharpen knives on the go or have limited storage space[13]. However, they do require more time and effort to use effectively, and may not be suitable for serrated blades. The learning curve associated with manual sharpeners can be steep, but mastering the technique provides a valuable skill for long-term knife maintenance[12].
Electric sharpeners: Features and considerations
Electric knife sharpeners offer convenience and efficiency for maintaining sharp blades. These devices typically feature multiple stages with abrasive materials of varying grits, allowing for progressive sharpening and honing. Key considerations when choosing an electric sharpener include the sharpening angle, which can range from 14 to 20 degrees depending on the knife type and desired precision.
The abrasive material used is crucial, with diamond being the most durable and effective option, capable of sharpening even hard steel blades. The number of sharpening stages is another important feature, with most quality sharpeners offering at least two stages for coarse sharpening and fine honing. Advanced models may include additional polishing stages for a razor-sharp finish.
Ease of use is a significant factor, with some sharpeners featuring guided slots to maintain the correct angle and clear instructions for optimal results. However, it's essential to note that not all electric sharpeners are suitable for every type of knife. While most work well with standard double-bevel blades, specialized knives like single-bevel Japanese blades or serrated edges may require specific sharpeners or settings.
Honing rods: Purpose and technique
Honing rods play a crucial role in maintaining knife sharpness between full sharpenings. Unlike sharpening, which removes metal to create a new edge, honing realigns the microscopic teeth along the blade's edge that can bend with regular use[16]. This process helps maintain the knife's sharpness and extends the time between more intensive sharpening sessions.
To use a honing rod effectively, hold it vertically with the tip on a cutting board and slide the knife down the rod at a 15-20 degree angle, applying light pressure. Repeat this motion 3-6 times on each side of the blade[17]. For optimal results, choose a honing rod that is at least two inches longer than your largest knife and matches your knife's material.
Regular honing, ideally before each use, can significantly improve knife performance and safety in the kitchen.
How to Sharpen a Knife Using a Whetstone
Preparing the whetstone
Preparing a whetstone for knife sharpening is a crucial step that ensures optimal performance. Begin by selecting the appropriate grit levels for your sharpening needs. For most kitchen knives, a combination of coarse (around 1000 grit) and fine (6000 grit) stones is ideal[19].
Soaking the whetstone is essential for many traditional Japanese waterstones. Submerge the stone in water for 15-30 minutes, or until bubbles stop appearing, allowing it to become fully saturated[20]. This saturation process enables the stone to produce sufficient abrasive slurry during use.
Set up your sharpening area by placing the soaked whetstone on a stable, non-slip surface, such as a damp dishcloth atop a cutting board[21]. Keep a container of water and a spoon nearby to maintain moisture on the stone's surface during sharpening. By properly preparing your whetstone, you create the foundation for a precise and effective knife sharpening session.
Finding the correct sharpening angle
Finding the correct sharpening angle is crucial for achieving a razor-sharp edge on your knife. Most kitchen knives require a 15 to 20-degree angle per side, with Japanese knives typically needing a sharper 15-degree angle and Western-style knives often using a slightly more obtuse 20-degree angle[22].
Maintaining this angle consistently throughout the sharpening process is essential for creating an even, sharp edge. For beginners, using an angle guide can be helpful in maintaining the correct angle, but with practice, you'll develop a feel for it.
A unique method for finding the right angle involves using your smartphone as a makeshift protractor. By placing your phone on the stone and propping up the back of the blade to the desired angle, you can create a visual reference for maintaining consistency[23]. Remember that equal angles on both sides of the blade are crucial; uneven angles will result in a dull knife.
Proper technique for sharpening on a whetstone
Proper technique for sharpening on a whetstone begins with positioning the knife correctly. Hold the handle in your dominant hand and place the heel of the blade on the far edge of the stone, maintaining a consistent angle of 15-20 degrees. Apply even pressure with your fingers on the blade and use long, smooth strokes to move the entire edge along the stone, from heel to tip[25].
Count each pass to ensure equal treatment on both sides of the knife. As you work, a slurry will form, which aids in the sharpening process. Continue until you feel a burr along the edge, then flip the knife and repeat on the other side. For optimal results, progress from a coarse grit stone (around 1000) to a finer grit (6000 or higher) for honing[26].
The finer stone requires more passes, potentially up to 50 strokes per side, to achieve a razor-sharp edge. Throughout the process, maintain a consistent angle and pressure, adjusting your grip as needed to follow the curve of the blade. Remember to keep the stone wet, periodically adding water to maintain the necessary lubrication and prevent damage to both the knife and the stone[20].
Progressing through different grit levels
Progressing through different grit levels is crucial for achieving a razor-sharp edge on your knife. The process typically begins with coarse stones (120-400 grit) for repairing significant damage or extreme dullness. These aggressive grits are ideal for grinding out chips or reshaping edges[9].
Moving to medium grit stones (700-2000) is essential for normal sharpening tasks, with 700-1200 grit being particularly effective[9]. Fine grit stones (1000-3000) are used to refine the edge and remove scratches left by coarser stones. For a polished finish, extra-fine (3000-5000) and ultra-fine (5000+) grits can be employed, though it's worth noting that grits beyond 8000 offer minimal practical improvement[27].
When progressing through grits, it's crucial to follow a logical sequence, moving from coarse to medium, and then to fine, ensuring each stage builds upon the previous one for optimal sharpening results[27].
Alternative Sharpening Methods
Using a manual pull-through sharpener
Manual pull-through sharpeners offer a quick and convenient method for maintaining knife edges. These devices typically feature two pieces of hardened material, often Tungsten Carbide or ceramic, set in a V-shape at a predetermined angle. To use, simply draw the knife through the V-shaped opening, maintaining steady pressure and pace.
While efficient for rapid edge maintenance, pull-through sharpeners have limitations. They can struggle to maintain even pressure along the entire blade, potentially leading to uneven sharpening or a recurved edge, especially on larger knives. Tungsten Carbide models remove material quickly, which is beneficial for reprofiling old edges but can be overly aggressive for routine maintenance.
Ceramic versions are gentler but may accumulate metal shavings over time, becoming less effective without proper cleaning. Despite these drawbacks, pull-through sharpeners excel in producing a serviceable edge quickly, making them ideal for field use or when time is limited. However, the resulting edge is often rougher and less refined compared to other sharpening methods[28].
Sharpening with an electric sharpener
Electric knife sharpeners offer a convenient and efficient solution for maintaining sharp blades. These devices typically feature multiple stages with abrasive materials of varying grits, allowing for progressive sharpening and honing. Key considerations when choosing an electric sharpener include the sharpening angle, which can range from 14 to 20 degrees depending on the knife type and desired precision.
The abrasive material used is crucial, with diamond being the most durable and effective option, capable of sharpening even hard steel blades. The number of sharpening stages is another important feature, with most quality sharpeners offering at least two stages for coarse sharpening and fine honing. Advanced models may include additional polishing stages for a razor-sharp finish.
Ease of use is a significant factor, with some sharpeners featuring guided slots to maintain the correct angle and clear instructions for optimal results. However, it's essential to note that not all electric sharpeners are suitable for every type of knife. While most work well with standard double-bevel blades, specialized knives like single-bevel Japanese blades or serrated edges may require specific sharpeners or settings.
Honing vs. sharpening: When to use a honing rod
Honing and sharpening are distinct processes that serve different purposes in knife maintenance. Honing realigns the existing edge of a knife, pushing the microscopic teeth of the blade back into proper alignment without removing material. This process is ideal for maintaining a knife's sharpness between full sharpenings and should be done frequently, even after each use.
A honing steel is the tool used for this purpose. To hone a knife, hold the steel vertically with its tip on a cutting board and slide the blade down at a 15-degree angle, applying light pressure and repeating 3-6 times on each side[17]. Sharpening, on the other hand, involves removing material from the blade to create an entirely new edge. This process is necessary when a knife becomes dull and is typically required every six to twelve months, depending on usage[30].
Understanding this distinction allows for proper knife maintenance, ensuring optimal performance and longevity of your kitchen tools[31].
DIY sharpening methods for emergencies
In emergency situations, improvised knife sharpening methods can be crucial. One effective technique involves using a ceramic coffee mug's unglazed bottom rim. Hold the mug upside down and drag the blade along the rim at a 20-degree angle, applying light pressure in one direction for 3-5 strokes on each side[32].
For outdoor scenarios, a flat river stone can serve as a makeshift whetstone. Wet the stone and maintain a consistent angle while stroking the blade from base to tip[33]. In urban environments, a car window's edge can be utilized for sharpening. After cleaning the window, hold the knife at a 20-degree angle and move it along the edge in long strokes[32].
For a more refined edge, cardboard can act as a strop. The rough side of the cardboard mimics the abrasive nature of stropping compounds, allowing for a polished finish[32]. These methods, while not ideal, can significantly improve a dull blade's performance in emergency situations.
Maintaining Your Newly Sharpened Knife
Proper knife storage to preserve the edge
Proper knife storage is crucial for preserving the edge and ensuring the longevity of your blades. Magnetic knife strips offer an excellent solution, providing easy access and visibility while keeping blades safe from damage. These strips come in various lengths and materials, with wooden options offering a more blade-friendly surface[34].
For those with limited counter space, in-drawer knife holders present a viable alternative. Cork-lined boxes with dividers provide flexibility for storing different knife sizes while protecting the blades[34]. Knife blocks, while popular, may not be the ideal choice for everyone due to their limited slot configurations and counter space requirements.
For those who frequently transport their knives, a high-quality knife bag offers protection and portability. When storing knives loosely, blade guards or sayas (wooden sheaths) are essential for safeguarding both the edges and the user[34]. Regardless of the chosen method, proper storage not only preserves the sharpness of your knives but also enhances kitchen safety and efficiency.
Regular honing to extend sharpness
Regular honing is crucial for maintaining a sharp knife edge between full sharpenings. Honing realigns the microscopic teeth along the blade's edge that can bend with regular use, extending the knife's sharpness without removing material. Ideally, honing should be performed before each use, taking only about 30 seconds.
To hone effectively, use a fine-grit ceramic rod, which is suitable for both German-style knives and many Japanese hybrids. Hold the honing steel vertically on a cutting board, and maintain a consistent angle of 15-20 degrees (depending on the knife type) while sliding the blade down the rod from heel to tip. Apply light pressure, using just a little more than the weight of the knife itself. Alternate sides, performing 3-4 swipes per side.
Developing a consistent honing routine can significantly extend the time between full sharpenings, potentially allowing a year or longer before professional sharpening is needed. To support this habit, store the honing steel in an easily accessible location near your knives, making it convenient to incorporate into your cooking routine.
When to seek professional sharpening services
While regular honing and basic sharpening techniques can maintain your knives' edges, there comes a time when professional sharpening services become necessary. These experts possess specialized equipment and skills to restore severely dulled or damaged blades to their original sharpness. Professional services are particularly beneficial for high-end cutlery, Japanese knives, or blades with complex geometries that require precise angle maintenance.
The cost of professional sharpening is often surprisingly affordable, with prices ranging from $5 to $10 per knife, depending on size and type[39]. This investment not only extends the life of your knives but also enhances kitchen safety and efficiency. Professional sharpeners can address issues beyond mere dullness, such as chips, bent tips, or uneven edges, which are challenging to correct with home methods.
Moreover, they can provide valuable advice on proper knife care and maintenance. For commercial kitchens, outsourcing knife sharpening to professionals can be more cost-effective than in-house sharpening, reducing injury risks and ensuring consistent quality across all kitchen tools[40].
Tips for preventing premature dulling
Preventing premature dulling of your knives is crucial for maintaining their sharpness and longevity. One key factor is choosing the right cutting surface. Wooden cutting boards, especially those with end grain facing up in a butcher block style, are ideal as they allow the knife to slide between vertical wood fibers, minimizing damage to the edge. Plastic boards are a practical alternative, offering easy cleaning and affordability. However, avoid glass, marble, or ceramic surfaces, which can rapidly dull your blade[42].
Proper cleaning techniques also play a vital role. Hand-washing knives is preferable to using a dishwasher, where blades can collide with other utensils or dishes. After washing, thoroughly dry your knives before storage to prevent damage to wooden handles and potential rusting[42].
When using your knives, employ proper technique to extend their sharpness. Use less force with thin, sharp blades, and avoid aggressive chopping or rocking motions. When mincing herbs, maintain a light touch on the spine of the blade with your support hand[43]. Refrain from using your knife's edge for scraping or scooping ingredients; instead, use the spine or invest in a bench scraper. Finally, reserve your primary kitchen knives for their intended purpose, avoiding tasks like cutting through bones, frozen foods, or extremely dense ingredients, which can lead to chipping or bending of the blade[43].
Conclusion
Mastering the art of knife sharpening is an essential skill for any home cook or professional chef. By understanding the basics of knife edges, choosing the right sharpening tools, and employing proper techniques, you can maintain razor-sharp blades that make cooking safer, more efficient, and more enjoyable. Regular maintenance, including honing and proper storage, will extend the life of your knives and ensure they perform at their best.
For those looking to elevate their kitchen experience with high-quality, easy-to-maintain knives, our Chef's Knife is an excellent choice. Its precision-honed edge and ergonomic design make it a versatile tool for a wide range of kitchen tasks.
Ready to upgrade your kitchen tools and take your culinary skills to the next level? Shop Now and discover our full range of premium kitchen essentials.
Proper knife sharpening is essential for maintaining kitchen efficiency and safety. This guide explores the fundamentals of knife sharpening, including different edge types, sharpening tools, and techniques to keep your blades in top condition.
References
- The Importance of Using a Sharp Knife in the Kitchen
- Why It's Important to Have a Sharp Knife in the Kitchen
- A Guide to Knife Grinds
- Knife Grinds
- Signs of a Dull Kitchen Knife
- How to Know When to Sharpen Your Knives
- Which Whetstone Grit to Choose for Sharpening Japanese Knives
- Whetstone Grit Blog
- Sharpening Whetstone Grits Explained
- Electric vs Manual Knife Sharpeners: Which Reigns Supreme
- Comparing Electric and Manual Knife Sharpeners: Pros and Cons
- Honing vs. Sharpening
- Honing vs. Sharpening: What's the Difference?
- How to Sharpen Knives with a Whetstone: The Best Method
- How to Sharpen a Knife with a Whetstone
- How to Use a Whetstone
- Knife Skills: How to Sharpen a Knife
- Sharpening with Stone: Easy Angle Guide for Perfect Blades
- How to Sharpen Knives with a Whetstone: The Best Method
- How to Sharpen a Knife with a Whetstone
- With Which Sharpening Stone Do I Start?
- Pros and Cons of Various Sharpening Devices
- Honing vs. Sharpening: What's the Difference?
- Difference Between Honing Steel and Sharpening Steel
- How to Sharpen a Knife Without a Sharpener: DIY Methods
- How to Sharpen a Knife
- How to Store Knives
- Why Professional Knife Sharpening?
- How Much Do Knife Sharpening Services Cost?
- Tips for Keeping Your Kitchen Knives Sharp
- Stop Chipping and Dulling Your Knife's Edge: Here's How
