How to Use a Whetstone

- Water stones and oil stones are the two main types of whetstones
- Grit levels range from coarse to ultra-fine for different sharpening needs
- Proper soaking and setup are crucial for effective sharpening
- Creating a burr is key to achieving a sharp edge
- Regular maintenance of both knives and whetstones ensures optimal performance
Understanding Whetstones
Types of whetstones: water stones vs. oil stones
Whetstones come in two main varieties: water stones and oil stones. Each type has its unique characteristics and benefits for knife sharpening. Water stones, often associated with Japanese craftsmanship, use water as a lubricant to create a slurry of loose abrasive particles. This slurry facilitates faster and easier sharpening[1].
Water stones can be further categorized into those that require soaking and "splash & go" varieties that only need surface wetting. They are generally softer, allowing dull abrasive particles to break away quickly, exposing fresh, sharp particles for consistent cutting power. This characteristic makes water stones more efficient at material removal but also means they wear down faster and require more frequent flattening[1].
Oil stones, on the other hand, are typically harder and more durable. They maintain their flatness for longer periods and are less prone to developing grooves or scratch marks from tools with small contact surfaces. This makes them particularly popular among sculptors working with filigree tools. However, the trade-off for this durability is slower material removal compared to water stones[2].
The choice between water stones and oil stones often depends on your specific sharpening needs. Water stones excel in speed, while oil stones offer longevity and precision work. As you develop your sharpening skills, you may find that having both types in your toolkit allows for greater versatility in maintaining your knives.
Grit levels and their purposes
Grit levels play a crucial role in the effectiveness of whetstones for knife sharpening. Understanding the different grit ranges and their purposes will help you achieve the best results for your knives.
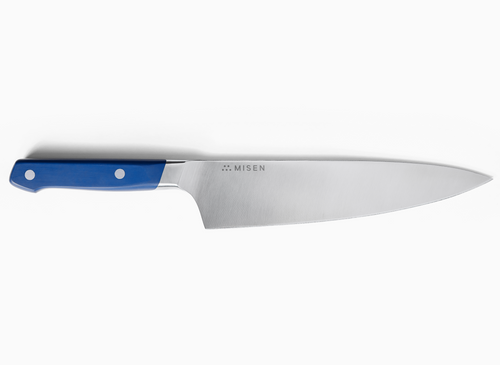
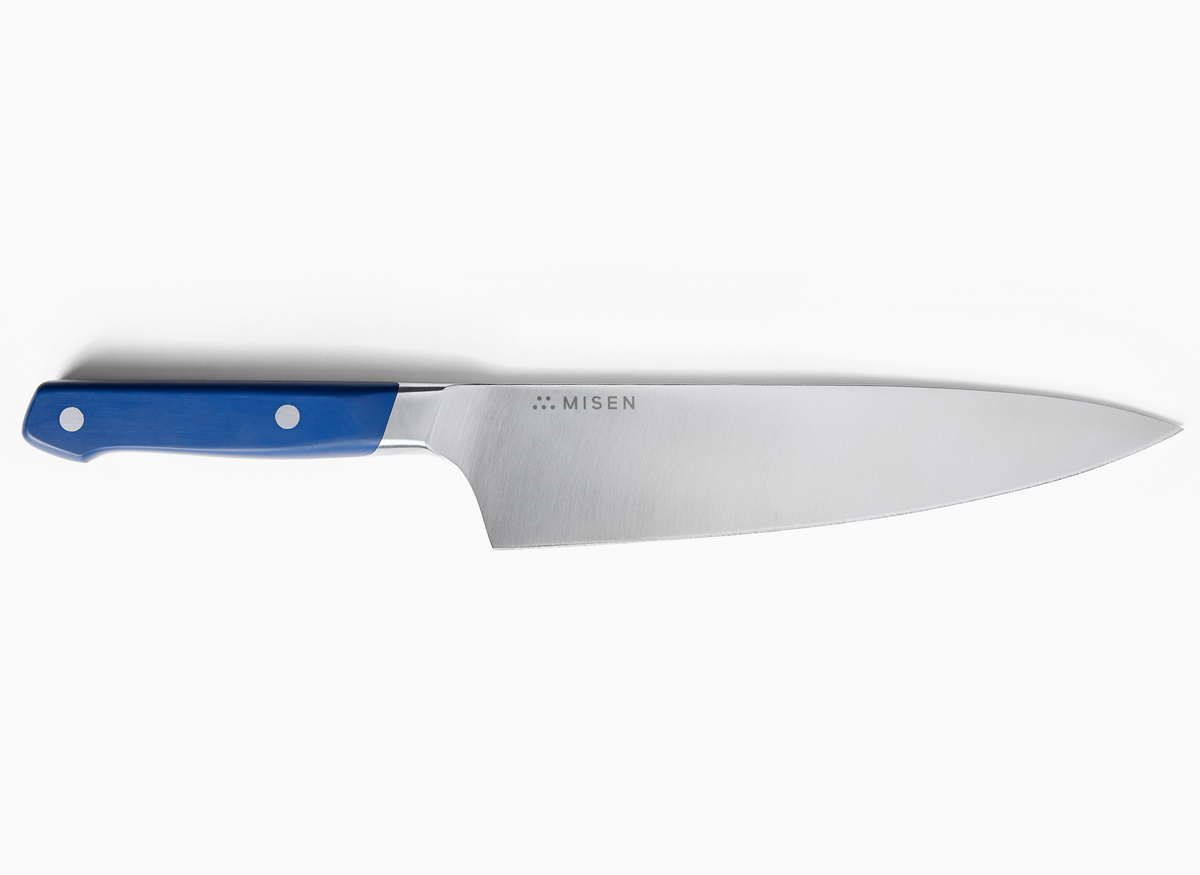
Coarse grit stones, typically ranging from 80 to 200 grit, are ideal for repairing heavily damaged or extremely dull blades. These stones aggressively remove material, reshaping the edge and addressing significant imperfections. When working with a high-quality knife like the Misen Chef's Knife, you may rarely need to use such coarse grits unless the blade has sustained serious damage.
Medium grit stones, falling between 400 and 800 grit, serve as all-purpose sharpeners for general maintenance and edge refinement. They strike a balance between material removal and precision, making them suitable for routine sharpening tasks. This grit range is often the starting point for maintaining well-kept knives.
Fine grit stones, ranging from 1000 to 3000 grit, excel in polishing and refining the blade's edge. These stones remove minimal material while imparting a smooth, mirror-like finish to the edge. For the ultimate in edge refinement, ultra-fine grit stones (8000-12000 grit) are employed. These stones focus on polishing and finishing, producing an exceptionally sharp edge with minimal material removal.
The progression from coarse to ultra-fine grits allows for a systematic approach to knife sharpening, addressing various levels of blade wear and desired sharpness outcomes. By understanding and utilizing the appropriate grit levels, you can achieve optimal results, whether repairing damaged edges or honing already sharp blades to perfection.
Choosing the right whetstone for your needs
Selecting the right whetstone is crucial for maintaining your knives effectively. Consider the type of knives you'll be sharpening and your skill level when making your choice. For beginners, a combination stone with medium (1000) and fine (6000) grits is ideal for general maintenance[5]. This allows you to start with the medium grit for edge setting and progress to the fine grit for polishing.
Synthetic whetstones offer consistent quality and well-defined standards, making them suitable for most users[6]. However, natural whetstones, while more expensive and variable, can produce incredibly smooth cuts prized by enthusiasts. The stone's length is crucial; choose one at least two inches longer than your largest knife blade to ensure efficient sharpening[7].
For those new to whetstones, look for sets that include accessories like angle guides, stands, and dressing stones to aid in the learning process and maintain the stone's condition. These additional tools can help you develop proper technique and keep your whetstones in optimal condition.
Ultimately, the right whetstone balances your sharpening needs, skill level, and budget while providing the necessary grit range for your knife collection. As you become more experienced, you may find yourself expanding your whetstone collection to address specific sharpening tasks and achieve even finer edges on your knives.
Preparing for Sharpening
Soaking the whetstone (for water stones)
Proper soaking of a whetstone is crucial for effective knife sharpening, especially when using water stones. To prepare your water stone, submerge it completely in water for at least 45 minutes before use. This saturation process is essential to prevent the stone from drying out during sharpening, which can cause the knife blade to catch and potentially damage the edge.
Coarse grit whetstones typically require 15 to 20 minutes of soaking, while fine grit stones may only need a few minutes. Some experts recommend not soaking fine grit stones at all to prevent cracking. As you soak the stone, you'll notice air bubbles escaping from its porous surface – when these bubbles significantly decrease or stop altogether, the stone is ready for use.
Keep a container of water nearby during sharpening to maintain moisture on the stone's surface, using a spoon to apply additional water as needed. This constant lubrication helps clear away metal shavings (swarf) and ensures optimal sharpening performance. Remember that different types of whetstones may have specific soaking requirements, so always consult the manufacturer's instructions for best results.
Setting up a stable sharpening station
Creating a stable sharpening station is crucial for achieving consistent results. A dedicated area away from the kitchen, such as a utility room or garage, provides ample space and minimizes concerns about cleanliness[11]. This setup allows for efficient workflow and easy maintenance of the sharpening area.
Consider using a sink bridge over a large plastic tub or sink for easy access to water and convenient cleanup. If you have multiple stones, you can store perma-soak stones in a bin inside the sink. A nearby surface, like a covered washing machine top, can serve as a staging area for knives awaiting sharpening.
For those with limited space, portable options exist. A non-slip mat or damp towel placed on a stable surface can create a temporary sharpening station, ensuring safety and stability during the process[12]. Adequate lighting is essential for precision, so choose a well-lit area or incorporate additional task lighting.
By establishing a dedicated sharpening station, you create an environment conducive to maintaining your knives effectively and safely. This setup will help you develop consistent technique and make the sharpening process more enjoyable and efficient.
Assessing your knife's current condition
Before beginning the sharpening process, it's crucial to assess your knife's current condition. This evaluation will help determine the appropriate starting grit for your whetstones and the overall approach to sharpening.
Start with a visual inspection, looking for any visible damage such as pits, dents, or chips in the edge[13]. Next, perform a sharpness test using your thumbnail: gently try to run the blade down your nail at the edge angle. A sharp knife will catch, while a dull one will slide.
For a more definitive assessment, examine the edge under bright light. A dull edge will gleam as it reflects light, while a sharp edge appears flat and non-reflective[14]. These evaluations will help determine the appropriate starting grit for your sharpening stones.
For severely damaged or extremely dull blades, begin with a coarse stone (220-400 grit). Moderately dull knives may only require a medium grit (600-1000), while those needing a quick touch-up can start with a fine grit (1000-3000)[15]. By accurately gauging your knife's condition, you can tailor your sharpening approach for optimal results.
How to Use a Whetstone: The Basics of Knife Sharpening
Finding the correct sharpening angle
Finding the correct sharpening angle is crucial for achieving optimal results when using a whetstone. For most kitchen knives, including the versatile Misen Chef's Knife, the ideal sharpening angle falls between 15° and 20° per side.
Japanese knives, typically made of harder steel (60 HRC or higher), can be sharpened at a more acute angle of 15°, resulting in an exceptionally sharp edge[16]. Western-style knives, often made of slightly softer steel (55-58 HRC), generally benefit from a wider angle between 18° and 20° per side. This balance ensures both sharpness and edge durability.
To maintain the correct angle while sharpening, beginners can use an angle guide or employ the marker trick. The marker trick involves coloring the edge with a marker and observing where the ink is removed during sharpening, allowing for visual confirmation of the correct angle[17].
It's important to note that if your knife dulls quickly or becomes damaged easily, you may be sharpening at too acute an angle. In such cases, increasing the angle slightly can improve edge retention[16]. With practice, you'll develop a feel for the correct angle and be able to maintain it consistently throughout the sharpening process.
Creating a burr: the key to effective sharpening
Creating a burr is a critical step in effective knife sharpening, serving as the centerpiece of the process. A burr, also known as a wire edge, forms when the metal at the edge of the blade is pushed to one side during sharpening. This formation indicates that you have successfully sharpened the entire bevel down to the edge.
To create a burr, start with a coarse stone, which acts as an efficient "burr creator." Apply consistent pressure and maintain the correct angle while sharpening one side of the blade. Run your finger gently across the opposite side of the edge to feel for the burr – it should feel like a small, raised wire.
Once you've formed a burr along the entire length of the blade on one side, repeat the process on the other side. This burr formation process not only ensures that you've sharpened the entire edge but also provides a tangible sense of accomplishment for both novice and experienced sharpeners.
It's important to note that while some may hesitate to use coarse stones for fear of damaging the blade, the benefits of starting with a coarse grit far outweigh the potential risks when proper technique is employed. As you progress in your sharpening skills, you'll become more adept at creating and removing burrs efficiently, resulting in consistently sharp edges on your knives.
Proper pressure and stroke techniques
Proper pressure and stroke techniques are crucial for effective knife sharpening with a whetstone. When sharpening, apply firm but gentle pressure, allowing the blade to glide smoothly across the stone. The pressure should be consistent throughout the stroke, with slightly more emphasis on the edge.
As you sharpen, use long, smooth strokes that cover the entire length of the blade. Start with the heel of the knife at the far edge of the stone and draw it towards you while simultaneously moving the contact point from heel to tip. This sweeping motion ensures even sharpening along the entire edge.
Maintain a consistent angle throughout the process, typically between 15 to 20 degrees for most kitchen knives. For beginners, using an angle guide can help maintain the correct angle until muscle memory develops. As you progress, you'll need to make fewer strokes on each side, eventually alternating sides with each pass.
Remember to keep the stone moistened during sharpening, as this helps create the abrasive slurry necessary for effective sharpening. By mastering these techniques, you'll be able to achieve a razor-sharp edge on your knives consistently, enhancing your cooking experience and the longevity of your cutlery.
Sharpening Process Step-by-Step
Starting with the coarse grit side
When beginning the sharpening process with a whetstone, it's crucial to start with the coarse grit side. This initial step is essential for repairing chips, fixing broken tips, and establishing the proper angle for a sharp blade[20].
Place the heel of the knife on the far edge of the stone, maintaining a 15- to 20-degree angle. Using even pressure, slowly drag the knife over the stone toward you while simultaneously moving the contact point from heel to tip[10]. This sweeping motion ensures uniform sharpening along the entire edge.
Repeat this process for about five strokes until you can detect small burrs (edge curvatures) forming. Then, shift your fingers to an unsharpened area and continue this five-stroke pattern from the tip to the base of the blade[21]. As you work, a thin film of silty water will accumulate on the stone and blade, facilitating the abrasive action that gradually removes material from the knife's edge.
Remember to keep the stone moistened throughout the process, as this helps create the necessary abrasive slurry for effective sharpening. This initial coarse grit stage sets the foundation for a sharp, well-defined edge that will be refined in subsequent steps.
Progressing to finer grits
After establishing the initial edge with a coarse grit stone, progressing to finer grits is essential for refining and polishing the knife's edge. This progression allows you to gradually refine the edge, removing the scratches left by coarser stones and creating a smoother, sharper cutting surface.
Medium grit stones, typically ranging from 600 to 1000 grit, serve as the next logical step in the sharpening process. These stones strike a balance between material removal and edge refinement, making them ideal for general-purpose sharpening[13].
Once the edge has been properly shaped and sharpened on the medium grit stone, transitioning to fine grit stones (1000-3000 grit) further refines the edge, reducing micro-serrations and creating a smoother cutting surface. For those seeking an exceptionally polished edge, extra-fine (3000-5000 grit) and ultra-fine (5000+ grit) stones can be employed. These higher grit stones impart a mirror-like finish to the blade, resulting in a razor-sharp edge with minimal drag during cutting tasks[4].
It's important to note that while progressing through finer grits, maintaining consistent angle and pressure becomes increasingly crucial to achieve optimal results. Each successive grit should remove the scratches left by the previous stone, gradually refining the edge to the desired level of sharpness and polish.
Alternating sides and maintaining consistency
Alternating sides and maintaining consistency are crucial aspects of effective knife sharpening with a whetstone. When sharpening, it's essential to work on both sides of the blade equally to ensure a balanced edge. Start by sharpening one side of the knife for a few strokes, then flip the blade and sharpen the other side for an equal number of strokes.
This alternating pattern helps create a symmetrical edge and prevents the formation of an uneven bevel. As you progress through different grit levels, maintain this alternating technique, but reduce the number of strokes on each side. For instance, you might start with 10 strokes per side on a coarse stone, then decrease to 5 strokes per side on a medium stone, and finally 2-3 strokes per side on a fine stone.
Consistency in angle, pressure, and motion is paramount throughout the sharpening process. Strive to maintain the same angle (typically 15-20 degrees) for each stroke, applying steady pressure from heel to tip. This consistency ensures uniform material removal along the entire edge, resulting in a sharp, even blade.
For beginners, using a sharpening guide can help maintain a consistent angle until muscle memory develops. Remember that sharpening is a skill that improves with practice, so focus on developing a smooth, rhythmic motion that you can replicate consistently across different knives and sharpening sessions.
Finishing Touches and Maintenance
Removing the burr and polishing the edge
Removing the burr and polishing the edge is a crucial final step in the knife sharpening process. After creating a burr on both sides of the blade, it's essential to eliminate this excess material to achieve a razor-sharp edge. One effective method involves holding the knife at the same angle used during sharpening and gently pulling the edge across the finest grit stone, alternating sides with each stroke.
This technique helps to break off the burr without compromising the newly sharpened edge. For an even more refined finish, some sharpeners opt to strop the blade. While not strictly necessary, stropping can further polish the edge, removing any remaining microscopic burrs and aligning the edge's steel particles.
This process typically involves drawing the blade across a leather strop or a piece of denim, maintaining the same angle used during sharpening. The result is an exceptionally smooth, polished edge that glides effortlessly through materials. It's important to note that as you progress to finer grits and finishing techniques, the burr becomes increasingly difficult to detect.
In such cases, washing the blade to remove any metal particles can help in feeling the burr's presence. Additionally, dry hands often prove more effective than wet ones when attempting to detect these minute imperfections. By mastering this final step, you'll ensure that your knives maintain their sharpness and performance for longer periods.
Testing the sharpness of your knife
Testing the sharpness of your knife is crucial for ensuring optimal performance and safety. There are several methods you can use to assess the sharpness of your newly honed blade.
The thumb test, while requiring caution, offers a quick and reliable method. Gently place your thumb on the edge and pull away across the blade; a sharp knife will feel tacky and want to bite in, while a dull one will feel smooth and slide without resistance[24].
The paper test provides a visual indicator of sharpness. Hold a sheet of thin paper, such as newspaper or magazine pages, and slice through it diagonally in a downward motion. A sharp knife will cut cleanly, while a dull one will catch or tear the paper[24].
For a more advanced assessment, the hanging hair test demonstrates exceptional sharpness. Suspend a single hair and lower it onto the upturned blade edge; a razor-sharp knife will effortlessly sever the hair upon contact[25].
The arm hair test involves gently touching the blade to a small patch of arm hair. A sharp knife will effortlessly shave the hair, while a dull one will cause pulling or tugging[26].
By employing these diverse testing methods, you can accurately gauge your knife's sharpness and determine when it requires maintenance or sharpening. Regular testing and maintenance will ensure that your knives, including high-quality options like the Misen Chef's Knife, always perform at their best.
Cleaning and storing your whetstone
Proper cleaning and storage of your whetstone are crucial for maintaining its effectiveness and longevity. After each use, thoroughly clean your whetstone with soap and water, using a firm-bristled brush to remove lubricant, metal particles, and other contaminants[27].
Once cleaned, wipe off any moisture and allow the stone to dry completely before storage, as residual moisture can lead to cracking due to temperature changes[28]. Store your whetstone in a cool, dark place away from direct sunlight and areas with fluctuating temperature and humidity.
Avoid stacking multiple whetstones on top of each other, as the weight can cause cracking or breakage. For vitrified whetstones, which require soaking before use, it's acceptable to store them in water. However, resinoid or magnesia method whetstones should never be soaked, as this can weaken the binding agent and cause damage[28].
Regularly inspect your whetstone for any dips or unevenness on the surface, and use a refacing wheel or flattening stone to rectify these issues, ensuring optimal performance during sharpening sessions[29]. By following these care and maintenance tips, you'll extend the life of your whetstone and ensure consistent sharpening results for years to come.
Troubleshooting Common Sharpening Issues
Dealing with uneven edges
Dealing with uneven edges is a common challenge when sharpening knives with a whetstone. To address this issue, start by identifying the side with the thinner bevel and focus on sharpening that side first. Use a coarse grit stone (around 100 grit) to remove material and establish a consistent angle along the entire edge.
Apply steady pressure and maintain the chosen angle throughout the process, working until you've created a burr along the full length of the blade. Once the thinner side is evened out, switch to the opposite side and repeat the process, pushing the burr back over. This technique helps balance the bevels on both sides of the knife.
As you progress, gradually transition to finer grits, ensuring that each stage removes the scratches left by the previous one. Remember to maintain consistent pressure and angle throughout the sharpening process to avoid creating new inconsistencies.
For particularly stubborn uneven edges, consider using a marker to color the edge, allowing you to visually track your progress as you remove material. This method, combined with patience and attention to detail, will help you achieve a symmetrical, sharp edge on your knife.
Addressing chips and nicks in the blade
Addressing chips and nicks in the blade is a crucial aspect of knife maintenance. For minor damage, such as tiny chips or bent edges, a ceramic honing rod can often straighten the edge through a process called 'honing'. However, when actual material has been chipped off, more aggressive measures are necessary.
Using a coarse whetstone or diamond plate (around 100 grit) is essential for removing sufficient steel to form a new edge. For larger chips, an extra coarse diamond plate proves most efficient. The process involves grinding the cutting edge consistently until a new, chip-free edge is formed. It's important to maintain the correct angle and apply even pressure throughout.
For broken knife tips, two methods exist: the cutting edge method and the spine method. The spine method, which involves grinding material off the top of the blade, is generally preferred as it preserves more of the knife's original shape. This technique requires creating a papertemplate, marking the area to be removed, and carefully grinding until a new tip is formed.
When addressing nicks and chips with a whetstone, it's crucial to use a sufficiently coarse grit. A 1000 grit stone, while effective for general sharpening, may not be coarse enough to efficiently remove significant damage. In such cases, starting with a coarser grit (e.g., 200-400) before progressing to finer grits can yield better results in eliminating nicks and restoring a smooth edge[34].
Overcoming difficulties with maintaining angle consistency
Maintaining angle consistency is often the most challenging aspect of freehand knife sharpening with a whetstone. To overcome this difficulty, it's crucial to develop muscle memory through consistent practice. One effective technique involves dividing the tasks between your hands: use your dominant hand to maintain a steady angle while your other hand controls the blade's movement across the stone[35].
To find the initial angle, start with the blade perpendicular to the stone, then halve the angle twice to achieve approximately 22.5 degrees for Western knives or once more for Japanese knives[36]. A visual shortcut is to place the blade's spine about halfway up your horizontal thumb.
Good lighting is essential for observing the edge during sharpening, with natural sunlight being ideal[37]. The 'marker trick' can help verify consistency along the entire edge. Remember that perfection is challenging to achieve freehand, so focus on maintaining a consistent angle rather than striving for an exact degree measurement.
With practice and patience, you'll develop the skills to maintain a consistent angle throughout the sharpening process. As you become more proficient, you'll find that maintaining the correct angle becomes second nature, allowing you to achieve professional-quality results on your knives.
Advanced Whetstone Techniques
Sharpening different types of knives (serrated, Japanese, etc.)
Sharpening different types of knives requires specific techniques tailored to their unique designs. Japanese kitchen knives, for example, often feature distinct characteristics that demand a specialized approach.
Single-bevel knives, such as Yanagiba, Usuba, and Deba, possess a shinogi line where the cutting section tapers towards the edge. When sharpening these knives, it's crucial to maintain this line and the gentle curve (urasuki) on the back. Position the blade perpendicular and flat against the stone, using your fingers to apply gentle pressure while sharpening until you feel a slight, even burr on the reverse side.
For double-bevel knives like gyuto and santoku, note the bevel ratio, which can vary from 50:50 to 70:30 or even 90:10. Adjust your sharpening technique accordingly, applying more strokes to the side with the larger bevel. Maintain a consistent angle between 10 to 20 degrees, using the 'penny trick' for guidance if needed.
Serrated knives present a unique challenge, requiring specialized tools or techniques to maintain their saw-like edge. Focus on sharpening the flat side of the blade to preserve the serrations, using a ceramic rod or specialized serrated knife sharpener to touch up the teeth as needed.
Regardless of the knife type, frequent maintenance with the appropriate whetstone grit is key to maintaining optimal performance and extending the life of your blades. By understanding the specific requirements of each knife type, you can ensure that all your kitchen knives, from the versatile Misen Chef's Knife to specialized Japanese blades, remain in top condition.
Using nagura stones for slurry creation
Nagura stones play a crucial role in enhancing the performance of whetstones during knife sharpening. These small, auxiliary stones serve multiple purposes, including cleaning finishing stones, removing clogging, truing stone surfaces, reducing startup time, and refining the average particle size in the slurry[40].
To use a nagura stone effectively, begin by soaking it in clean water for 10-15 minutes. Next, wet your whetstone thoroughly and work the nagura stone over its surface in tight circular motions, ensuring complete coverage[41]. This process generates a granular and abrasive slurry that enhances the sharpening capabilities of the whetstone.
Different types of nagura stones exist, including soft nagura for use on hard whetstones and hard nagura for softer whetstones. Tomo nagura, traditionally cut from the same material as the whetstone, offers the ideal slurry composition. For those seeking a more advanced approach, a nagura progression using Mikawa Asano nagura stones can simulate the use of multiple whetstones with varying grit levels[42].
By incorporating nagura stones into your sharpening routine, you can significantly improve the efficiency and effectiveness of your whetstone, ultimately achieving superior results in knife sharpening. This technique is particularly useful when working with high-quality knives, ensuring that you can maintain their exceptional edges with precision.
Developing muscle memory for efficient sharpening
Developing muscle memory for efficient sharpening is a crucial aspect of mastering the art of knife sharpening with a whetstone. This process involves consistent practice and repetition to train your body to maintain the correct angle and pressure without conscious effort.
Start by focusing on maintaining a steady angle, typically between 15 to 20 degrees for most kitchen knives. Use visual aids like the 'marker trick' or a folded paper guide to help you find and feel the correct angle[14]. As you practice, pay attention to the subtle feedback from the blade and stone, such as the sound of metal on stone and the feel of the edge forming.
Over time, your hands will develop a tactile sense for the proper technique, allowing you to adjust your movements instinctively. Experienced sharpeners often rely on this developed muscle memory, feeling the subtle changes in the blade's edge as they work and adjusting their technique accordingly[43].
Remember that consistency is key; regular practice, even with short sessions, will yield better results than infrequent, lengthy sharpening marathons. As your muscle memory improves, you'll find yourself able to maintain a consistent angle and pressure throughout the sharpening process, resulting in more efficient and effective knife maintenance.
Conclusion
Mastering the art of knife sharpening with whetstones is a rewarding skill that will enhance your culinary experience and extend the life of your knives. By understanding the different types of whetstones, their grit levels, and proper sharpening techniques, you can maintain razor-sharp edges on all your kitchen knives, including high-quality options like the Misen Chef's Knife.
Remember that practice and patience are key to developing the muscle memory and technique required for effective sharpening. As you become more proficient, you'll find that the process becomes more intuitive and enjoyable. Regular maintenance of both your knives and whetstones will ensure optimal performance and longevity.
Ready to elevate your kitchen experience with professional-grade knives and tools? Shop Now and discover the difference that quality cutlery can make in your cooking journey.
Whetstones are essential tools for maintaining sharp kitchen knives. This guide explores the different types of whetstones, their grit levels, and how to choose and use them effectively. By understanding proper whetstone techniques, you can keep your knives in top condition for precise, effortless cutting.
References
- Knives and Tools. (n.d.). Difference between sharpening stones and whetstones.
- Dictum. (n.d.). Oil stones vs. water stones.
- Kitchenware. (n.d.). Guide to choosing a whetstone.
- Ichimonji. (n.d.). How to choose a whetstone sharpening stone.
- Food & Wine. (n.d.). Best sharpening stones.
- Serious Eats. (n.d.). Knife skills: How to sharpen a knife.
- Kitchen Knife Forums. (n.d.). Sharpening station setup: Any tips?
- Edison Vacuums. (n.d.). Don't be blunt: A practical knife sharpening reference.
- Knives and Tools. (n.d.). With which sharpening stone do I start?
- Wilto Makes Food. (n.d.). Sharpening.
- Knife Planet. (2017). Lesson 4: Sharpening pressure levels & water stones.
- Knives and Tools. (n.d.). Find the correct sharpening angle in three steps.
- Dai Tool. (n.d.). How to sharpen knives with a whetstone: The best method.
- Dai Tool. (n.d.). How to sharpen knives with a whetstone: The best method.
- Japanese Chef Knife. (n.d.). How to sharpen.
- Ethan Chlebowski. (n.d.). The beginner's guide to whetstone sharpening.
- Knife Aid. (n.d.). How to test the sharpness of a knife.
- Tog Knives. (n.d.). How to test how sharp a knife is.
- Red Label Abrasives. (n.d.). The best ways to test the sharpness of a knife.
- Chef's AC. (n.d.). Maintaining your maintenance tools: Keeping your whetstone in top shape.
- Ichimonji. (n.d.). Whetstone care.
- Kireaji. (n.d.). Daily care of whetstone.
- Stack Exchange. (n.d.). Should sharpening nicked knives with whetstones leave the nicks in the blade?
- Kitchen Knife Forums. (n.d.). Keeping the angle.
- Mediocre Chef. (n.d.). How to sharpen kitchen knives.
- Blade Forums. (n.d.). Tips for holding an angle while freehand sharpening.
- Covington and Sons. (2020). Sharpening part 18: The nagura stone.
- Knifewear. (n.d.). The nagura stone: Every knife sharpener's secret weapon.
- Natural Whetstones. (n.d.). Japanese nagura information.
- Oishya. (n.d.). Japanese knife sharpening: Traditional & modern tools.
