

Key Takeaways
- There are three main types of sharpening stones: water stones, oil stones, and diamond stones.
- Grit levels determine the stone's purpose, from repairing damaged blades to fine polishing.
- Choosing the right stone depends on your knife's steel type and hardness.
- Proper technique and consistent angle are essential for effective sharpening.
- Regular maintenance, including honing, extends the life of your knife's edge.
Understanding Sharpening Stones
Types of sharpening stones: water stones, oil stones, and diamond stones
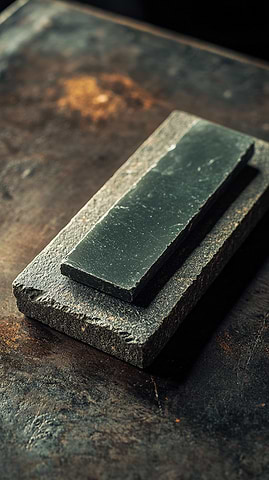
Sharpening stones come in three main varieties, each with its unique characteristics. Water stones, often made of aluminum oxide, are popular for their fast cutting action and wide range of available grits. They use water as a lubricant, which is cleaner and more readily available than oil. However, their softness requires periodic flattening to maintain effectiveness[1].
Oil stones, traditionally made from novaculite, aluminum oxide, or silicon carbide, offer greater durability than water stones. They use oil for swarf removal and to prevent clogging. While they cut more slowly, they provide good overall performance at a competitive price point[2].
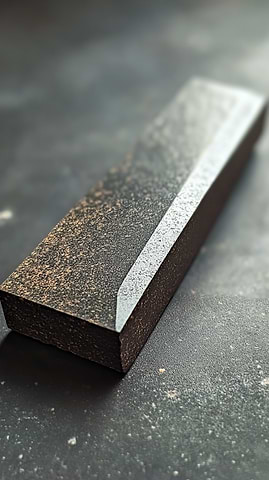
Diamond stones, containing industrial diamonds bonded to a metal surface, are the fastest cutting and most durable option. They maintain their flatness over time and are available in both interrupted and continuous surface varieties. Diamond stones excel at coarse sharpening but typically max out at around 1200 grit, with some newer options reaching up to 8000 grit[1].
Grit levels and their purposes
Grit levels play a crucial role in knife sharpening, determining the aggressiveness and purpose of each stone. Extra coarse stones (up to 220 grit) are ideal for repairing heavily damaged blades or reshaping edges. Coarse stones (220-600 grit) excel at restoring very dull knives and removing significant amounts of metal.
Medium grit stones (600-1000 grit) are versatile, suitable for general sharpening and maintenance of moderately dull edges. Fine stones (1000-3000 grit) refine the edge, creating a smoother finish and preparing the blade for polishing. Extra-fine stones (3000-5000 grit) further polish the edge, enhancing its sharpness and reducing microscopic imperfections.
Ultra-fine stones (5000+ grit) provide the ultimate polish, creating a mirror-like finish and razor-sharp edge. When sharpening, it's essential to progress through the grits systematically, starting with the appropriate coarseness for your blade's condition and moving to finer grits for the desired finish[4].
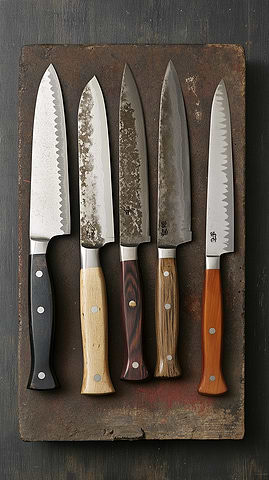
Choosing the right stone for your knife
Selecting the appropriate sharpening stone depends on your knife's steel type and hardness. For softer blades (below 53 HRC), use coarse-grained stones up to 800 grit. Medium-hardness blades (53-58 HRC) benefit from 800-1000 grit stones, while harder blades (56-59 HRC) require 1000-3000 grit. High-hardness blades (60-62 HRC) need fine-grained stones between 3000-8000 grit, and ultra-hard blades (above 63 HRC) demand at least 8000 grit[7].
The stone's material also plays a crucial role. Whetstones or water stones are affordable but dish out quickly, requiring frequent flattening. Ceramic whetstones offer a longer lifespan and are ideal for high-hardness blades, while diamond stones provide quick results and maintain flatness but require pre-sharpening to reach the specified grit[8].
Consider your knife's condition and usage frequency when choosing a stone. For versatility in maintaining your blade's edge, you might want to invest in a combination stone with multiple grits, like our Knife Sharpening Set, which includes everything you need to keep your knives in top condition.
Preparing for the Sharpening Process
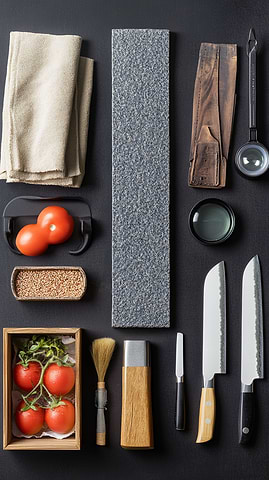
Gathering necessary materials and tools
To properly sharpen a knife with a stone, you'll need to gather several essential materials and tools. First and foremost, you'll require a high-quality whetstone, ideally a set with multiple grits for optimal sharpening results. A sturdy stand or base to elevate the stone is crucial for maintaining the correct sharpening angle and protecting your knuckles.
You'll also need water for lubricating the stone, unless you're using a diamond stone. An angle guide can be invaluable for beginners to maintain consistent blade angles during sharpening. Additionally, gather a soft brush for cleaning the stone, a towel or cloth for wiping the blade, and optionally, a magnifying glass or loupe for inspecting the edge.
For safety, consider using cut-resistant gloves to protect your hands during the sharpening process. Lastly, have a way to test the sharpness of your knife after sharpening, such as a piece of paper or a ripe tomato, to ensure your efforts have been successful.
Soaking the stone (if required)
Soaking the whetstone is a crucial step in preparing it for knife sharpening. For waterstones, which are the most common type for kitchen use, proper soaking ensures optimal performance. Coarse grit whetstones typically require a longer soaking time of 15 to 20 minutes, allowing the water to fully penetrate the stone's pores. Fine grit whetstones, on the other hand, need only a brief soak of about 5 minutes.
To determine if your stone is adequately soaked, observe the bubbles emerging from its surface when submerged in water. As the stone absorbs water, the bubbling will gradually decrease. Once the bubbling has mostly ceased, the stone is ready for use. It's important to note that not all whetstones require soaking; diamond stones, for instance, can be used dry or with just a light misting of water. Always consult the manufacturer's instructions for your specific whetstone to ensure proper preparation and maintenance.
Setting up a stable work surface
Setting up a stable work surface is crucial for effective and safe knife sharpening. A sturdy, non-slip base or stand is essential to keep the whetstone firmly in place during the sharpening process. Many high-quality sharpening stone sets come with their own stands that provide stability and elevate the stone off the counter[10].
For stones without a dedicated stand, placing them on a damp folded towel can help prevent slipping. The work surface should be at a comfortable height to maintain proper arm positioning and control throughout the sharpening process. Additionally, ensuring adequate lighting and space around your work area will contribute to better visibility and maneuverability while sharpening.
Determining the Correct Sharpening Angle
Understanding blade angles for different knife types
Understanding blade angles for different knife types is crucial for achieving optimal sharpness and performance. Western-style knives typically have a total angle of 40-44 degrees, with each side sharpened to 20-22 degrees. These knives, often made from softer stainless steel, benefit from a more robust edge to withstand the high-impact chopping common in Western cooking.
In contrast, Asian-style knives, particularly Japanese ones, are usually sharpened to a more acute angle of about 30-34 degrees total, with each side at 15-17 degrees. This sharper edge is possible due to the harder, higher-carbon steel used in their construction, allowing for finer cutting but requiring more careful handling[15].
For specialized knives, the angles can vary significantly. Straight razors, for instance, have an extremely acute angle of about 7-8 degrees per side, creating a very fine but delicate edge suitable only for soft materials[16]. Hunting and pocket knives, which often encounter tougher materials, are typically sharpened to angles between 22 and 30 degrees per side, prioritizing edge durability over extreme sharpness[17].
Using angle guides for consistency
Angle guides are invaluable tools for achieving consistency in knife sharpening, especially for beginners. These guides come in various forms, each with its own advantages. One popular type is the clip-on guide that attaches to the knife's spine, maintaining a consistent angle throughout the sharpening process. These guides typically offer angles between 15 to 20 degrees, making them suitable for most kitchen knives.
Another option is the wedge-style guide, which provides a range of angles from 10 to 20 degrees in 1-degree increments. This flexibility allows for precise angle selection based on the knife type and intended use. Wedge guides are secured to the sharpening stone, serving as a visual and tactile reference for maintaining the correct angle.
While angle guides are excellent learning tools, they're not essential for everyone. Experienced sharpeners often develop techniques to estimate angles without additional tools. Ultimately, angle guides can significantly improve sharpening results for novices and serve as a stepping stone towards mastering freehand sharpening techniques.
Practicing proper hand positioning
Practicing proper hand positioning is crucial for maintaining a consistent angle while sharpening a knife with a stone. One effective technique involves dividing the tasks between your hands. For right-handed individuals, the right hand, which holds the knife handle, is responsible for maintaining a steady angle against the stone without wobbling. The left hand, meanwhile, focuses on pushing or pulling the blade across the stone. This separation of duties helps prevent unintended angle changes during the sharpening process[19].
To initially find the correct angle, a visual estimation method can be employed. Start by holding the knife at a 90-degree angle to the stone, then halve that angle to 45 degrees. Halving again brings you to approximately 22.5 degrees, suitable for Western stainless knives. For Japanese knives, halve once more to reach about 11 degrees. This technique provides a rough guide for beginners, with muscle memory eventually taking over with practice[19].
Regularly using the marker trick, where a marker is applied to the edge before sharpening, can help ensure consistent contact along the entire blade length. Any remaining marker can be easily removed using acetone[19]. With practice and attention to technique, maintaining a consistent angle will become second nature, resulting in sharper, longer-lasting edges on your knives.
The Sharpening Technique
Starting with the coarse grit side
When beginning the sharpening process, it's crucial to start with the coarse grit side of your sharpening stone. This initial step is essential for restoring severely dull or damaged blades efficiently. Select the appropriate coarseness based on your knife's condition; a very dull knife requires a coarser stone to quickly refine the edge.
Apply a few drops of water or oil directly to the stone, depending on the type you're using. Position your knife at the correct angle, typically around 20 degrees for most knives, and use a sweeping arc motion to draw the blade across the stone. Start at the heel and finish at the tip, maintaining a consistent angle throughout. Repeat this process 5-10 times on each side of the blade, alternating sides to ensure even sharpening.
As you work, you'll notice a burr forming on the opposite side of the edge – this is a sign that you're effectively removing material and reshaping the blade. Continue until you've felt the burr on both sides, indicating that you've adequately sharpened the entire edge with the coarse grit before moving on to finer grits.
Proper pressure and motion for effective sharpening
Proper pressure and motion are crucial for effective knife sharpening. When using coarse stones, apply more pressure to remove material quickly, but lighten your touch as you progress to finer grits. For diamond stones, use minimal pressure—just the weight of the knife itself—to prevent premature wear of the abrasive surface[24].
The sharpening motion should be a smooth, consistent stroke from heel to tip, maintaining a constant angle throughout. For most kitchen knives, use a forward stroke, moving the edge across the stone as if peeling steel away from the edge. This technique is particularly effective for water stones and diamond stones[24].
When sharpening Japanese knives, use two or three fingers to press the blade edge against the stone, applying pressure on the forward stroke and releasing it on the return[25]. The key is to find a rhythm that allows you to maintain consistent pressure and angle, resulting in an even, sharp edge along the entire length of the blade.
Transitioning to finer grits for polishing
After achieving a sharp edge with coarser grits, transitioning to finer grits is essential for polishing and refining the blade. While the progression of grits can vary based on personal preference and knife type, a common approach is to make small jumps between grits to ensure a smooth transition. For instance, moving from a 320 grit stone to a 1000 grit, then to a 3000 or 4000 grit, and finally to a 6000 or 8000 grit can produce excellent results.
However, it's important to note that larger jumps are possible and can still yield a keen edge. Research has shown that a blade sharpened on a coarse 320 grit stone can be effectively refined with just 100 laps on a 16,000 grit stone, removing about 13 nanometers of steel per lap[26]. This demonstrates that the conventional wisdom of making small grit jumps may not always be necessary.
When polishing, pay attention to the scratch patterns left by previous grits and ensure they are fully removed before progressing. Some sharpeners prefer to use sandpaper for final polishing, especially on complex blade shapes, as it can conform to curves more easily than rigid stones. Experimenting with different progressions and materials, such as polishing powders and finger stones, can help you find the ideal method for achieving your desired finish[27].
Mastering the Sharpening Stroke
The push-pull method
The push-pull method is a traditional approach to knife sharpening that involves moving the blade across the stone in alternating directions. This technique typically uses full-length strokes from heel to tip, with emphasis on the edge-leading stroke. Some sharpeners exclusively use edge-leading strokes, utilizing the entire stone from corner to corner.
The push-pull method can be performed with the knife held at either a 90-degree angle to the stone or at a 45-degree angle, which some find easier for maintaining a consistent sharpening angle. Advanced practitioners may alternate edge-leading strokes to minimize burr formation, though beginners should focus on mastering consistent angle control before attempting this variation.
Regardless of the chosen method, applying appropriate pressure and maintaining a consistent angle throughout the sharpening process are key factors in achieving a sharp, well-defined edge.
Circular motions for specific blade areas
Circular motions can be particularly effective when sharpening specific blade areas, especially the tip and curved sections. For knife tips, maintaining a constant bevel angle requires adjusting both wrist rotation and handle height. As the blade curves towards the tip, the handle should be raised while decreasing the rotation angle along the knife handle's axis[30].
When addressing deep belly or curved sections, some sharpeners employ an overlapping zig-zag pattern with shorter, more precise scrubbing motions. This technique helps maintain angle consistency and prevents uneven spots that can be challenging to correct later[31].
Circular motions on a sharpening stone create a unique effect on the microscopic level. While straight strokes produce a 'saw-tooth' edge angled in a specific direction, circular motions minimize directional bias. This results in a more polished edge that performs equally well in both push and pull cuts. However, maintaining a uniform grind along the entire blade can be challenging with this method, requiring careful attention to technique[32].
Maintaining consistent angle throughout the process
Maintaining a consistent angle throughout the sharpening process is crucial for achieving a sharp, even edge. One effective technique involves dividing tasks between hands: the hand holding the knife handle maintains a steady angle, while the other hand focuses on pushing or pulling the blade across the stone[19].
To find the correct angle initially, use a visual estimation method: start at 90 degrees to the stone, halve it to 45, then halve again for Western knives (about 22.5 degrees) or once more for Japanese knives (around 11 degrees)[19]. For beginners, using an angle guide can be invaluable in ensuring consistency and precision[33].
As you practice, focus on developing muscle memory to maintain the angle without relying on guides. Remember that perfection is challenging to achieve freehand, so aim for consistency and improvement over time[34]. Good lighting is essential for observing your progress and making necessary adjustments. With practice and attention to technique, maintaining a consistent angle will become second nature, resulting in sharper, longer-lasting edges on your knives.
Addressing Both Sides of the Blade
Alternating sides for even sharpening
Alternating sides for even sharpening is crucial for achieving a balanced and sharp edge. When using a sharpening stone, make an equal number of strokes on each side of the blade, typically 5-10 strokes per side before evaluating progress. Avoid alternating sides with each individual stroke, as this makes it more challenging to maintain a consistent angle and develop a proper burr[35].
For optimal results, use a circular motion while sharpening, as it helps maintain the angle more effectively than straight strokes. This technique involves moving the blade in a circular pattern across the stone, always cutting into it rather than dragging the edge backward. The blade edge should face the same direction as your stroke, essentially moving metal away from the edge[36].
As you progress through finer grits, continue alternating sides, gradually reducing the number of strokes per side. This method ensures even material removal and helps create a symmetrical, razor-sharp edge on both sides of the blade.
Counting strokes for balance
Counting strokes for balance is a crucial aspect of knife sharpening that ensures even material removal and a symmetrical edge. When using a whetstone, it's recommended to make an equal number of strokes on each side of the blade, typically 5-10 strokes per side before evaluating progress. This approach helps maintain consistency and allows for proper burr formation.
For more advanced sharpeners, the number of strokes may vary based on the knife's condition and the stone's grit. On coarser stones, fewer strokes might be necessary, while finer grits may require more passes to achieve the desired polish. Some experts prefer to do more strokes on lower grit stones and fewer on finer ones. This approach allows for efficient material removal in the early stages and precise edge refinement in the later stages.
Regardless of the specific technique, the key is to maintain balance and consistency throughout the sharpening process, adjusting the number of strokes as needed based on the blade's response and the desired outcome.
Checking progress and adjusting technique
Regularly assessing your progress and adjusting your technique is crucial for achieving optimal results when sharpening a knife with a stone. After making several passes on each side of the blade, carefully inspect the edge for consistency and sharpness. One effective method is the paper test: attempt to slice through a piece of paper, paying attention to any areas that snag or tear. If you encounter uneven spots, focus additional attention on those sections during subsequent sharpening passes.
Another useful technique is the marker method, where you color the edge with a permanent marker before sharpening. As you work, the marker will be removed from areas that contact the stone, allowing you to visually confirm your angle consistency and identify any missed spots.
If you notice that you're not making progress or the edge isn't improving, consider adjusting your angle slightly or increasing the pressure applied during your strokes. However, be cautious not to use excessive force, as this can lead to uneven material removal or damage to the blade. Throughout the sharpening process, periodically clean the stone and reapply water or oil as needed to maintain optimal cutting performance.
By consistently monitoring your progress and making small adjustments to your technique, you'll develop the skills necessary to achieve razor-sharp edges on your knives[36].
Testing the Knife's Sharpness
The paper test
The paper test is a quick and effective method to assess a knife's sharpness. To perform this test, hold a single sheet of paper at a 45-degree angle and place the knife's edge on the paper's edge at a shallow angle. A sharp knife should effortlessly slice through the paper with a smooth, gliding motion. If the blade skips, tears, or struggles to cut the paper, it indicates that the knife requires further sharpening[38].
For a more advanced version of this test, attempt to slice through a suspended piece of paper from bottom to top. A truly sharp knife will create a clean, precise cut without any tearing or resistance[39]. To further challenge your knife's edge, try the 'fillet' test by attempting to slice the newsprint off without cutting through the paper. Successfully accomplishing this feat demonstrates an exceptionally keen edge[38].
The paper test is not only simple to perform but also provides a clear indication of your knife's cutting ability, helping you maintain optimal sharpness for improved performance and safety in various cutting tasks.
The tomato slice test

The tomato slice test is a popular method for evaluating a knife's sharpness and overall cutting performance. This test involves attempting to slice a ripe tomato with minimal pressure, assessing the blade's ability to cleanly cut through the delicate skin without crushing the fruit's soft interior. A truly sharp knife should effortlessly glide through the tomato, creating thin, uniform slices without tearing or squashing the flesh.
While the tomato slice test is widely recognized, it's important to note that it primarily evaluates the knife's ability to perform push cuts rather than draw cuts. For a more thorough evaluation, it's recommended to combine the tomato slice test with other sharpness tests, such as the paper test or the arm hair test, to gain a more complete understanding of the knife's cutting capabilities across different materials and techniques[40].
Using a loupe to inspect the edge
Using a loupe to inspect the edge can significantly enhance the sharpening process by providing detailed visual feedback. A magnification of 10x to 20x is generally sufficient for most sharpening tasks, allowing sharpeners to observe burr formation, scratch patterns, and edge consistency[41].
When selecting a loupe, consider factors such as focal length, field of view, and lens material. Glass lenses offer superior clarity but are heavier, while acrylic lenses are lighter but may sacrifice some image quality[42]. Loupes with built-in LED lights can be particularly useful for illuminating the blade edge.
Some experienced sharpeners rely on visual inspection without magnification, looking for a consistent streak of light along the edge to indicate proper sharpening and the absence of burrs[41]. Ultimately, optical monitoring during sharpening can help identify issues such as uneven angles, persistent burrs, or unwanted scratches, allowing for immediate corrections and improving overall sharpening results.
Finishing Touches and Maintenance
Stropping the blade for a razor-sharp edge
Stropping is the final step in achieving a razor-sharp edge on your knife. This technique involves using a leather strop and micro abrasive compound to refine the blade's edge to perfection. To begin, place the tip of the knife on the strop with the back of the blade facing you. Pull the knife towards you, maintaining a consistent angle similar to that used during sharpening.
Repeat this motion several times on each side of the blade, applying minimal pressure and letting the strop and compound do the work. The leather's forgiving nature allows for slight variations in angle, making it easier for beginners to master the technique. For optimal results, gradually decrease the pressure as you progress, and follow the entire shape of the blade from heel to tip.
To test the sharpness of your newly stropped knife, perform a paper test by attempting to push cut through paper with minimal force. A truly razor-sharp edge should glide effortlessly through the paper, demonstrating the effectiveness of your stropping technique.
Cleaning and storing the newly sharpened knife
After sharpening your knife, proper cleaning and storage are crucial for maintaining its edge and longevity. Begin by hand washing the blade with warm, soapy water and a soft sponge, avoiding abrasive materials that could scratch the surface. Never leave your knife soaking in water or place it in the dishwasher, as these practices can damage the blade and handle[46].
Dry the knife thoroughly using an absorbent towel, preferably paper towels, to prevent moisture-related issues. For carbon steel knives, consider applying a thin layer of food-safe oil to protect against corrosion[47].
When it comes to storage, avoid tossing your knife into a drawer or utensil cup where it can contact other metal objects. Instead, opt for a magnetic wooden strip, a protective sheath, or a dedicated knife roll. These methods prevent blade damage and maintain the knife's sharpness. For those preferring drawer storage, invest in plastic sheaths that protect the blade while keeping it easily accessible[48].
By following these cleaning and storage practices, you'll ensure your newly sharpened knife remains in optimal condition, ready for its next use.
Regular honing to maintain the edge between sharpenings
Regular honing is essential for maintaining a knife's edge between sharpenings. Honing realigns the microscopic teeth on the blade's edge that bend with frequent use, restoring its sharpness without removing metal. This process extends the time between actual sharpenings and ensures optimal cutting performance.
For home cooks, honing before every major cooking project is recommended. To hone effectively, use a honing steel and run the blade at a 15-20 degree angle down the rod, making an equal number of strokes on each side, typically about eight in total. This simple maintenance routine not only keeps your knife sharp but also enhances safety in the kitchen, as a well-maintained blade requires less force and provides more control during use.
While honing is crucial for routine maintenance, it's important to remember that it doesn't replace the need for occasional sharpening, which restores a truly dull edge by removing small amounts of metal. By incorporating regular honing into your knife care routine, you can significantly extend the life and performance of your kitchen knives, ensuring they remain sharp and efficient between professional sharpenings.
Conclusion
Mastering the art of knife sharpening is an essential skill for any home cook or professional chef. By understanding the different types of sharpening stones, their grit levels, and proper techniques, you can maintain your knives' sharpness and extend their lifespan. Remember to choose the right stone for your knife, maintain a consistent angle, and practice regularly to improve your sharpening skills.
At Misen, we're committed to helping you get the most out of your kitchen tools. Our high-quality knives and sharpening accessories are designed to make the sharpening process easier and more effective. Whether you're a beginner or an experienced sharpener, we have the tools you need to keep your knives in top condition.
Ready to elevate your knife care routine? Shop Now to explore our range of premium knives and sharpening tools, and take the first step towards maintaining razor-sharp edges in your kitchen.
Understanding sharpening stones is crucial for maintaining your kitchen knives. This guide explores different types of sharpening stones, their grit levels, and how to choose the right one for your needs. We'll also cover proper sharpening techniques and maintenance to keep your knives in top condition.
References
- Sharpening Supplies. (n.d.). Difference in Sharpening Stone Materials.
- Norton Abrasives. (n.d.). Choosing a Sharpening Stone.
- Nakano Knives. (n.d.). Sharpening Whetstone Grits Explained.
- My Chef Knives. (n.d.). How to Choose a Sharpening Stone.
- Koi Knives. (n.d.). How to Choose a Sharpening Stone.
- Serious Eats. (n.d.). The Best Knife Sharpeners.
- Knife Aid. (n.d.). Correct Angle for Knife Blade.
- Sharpening Supplies. (n.d.). Detailed Discussion on Knife Sharpening Angles.
- Blade HQ. (n.d.). Knife Sharpening Angle Guide.
- Kitchen Knife Forums. (n.d.). Keeping the Angle.
- A.G. Russell Knives. (n.d.). Knife Sharpening on Stones.
- Koi Knives. (n.d.). Guide to Sharpening Japanese Knives.
- Science of Sharp. (2015). It's Too Big of a Jump.
- Reddit. (n.d.). Advice for Grit Progression for Thinning and Sharpening.
- Kitchen Knife Forums. (n.d.). Sharpening the Tip of a Knife.
- Blade Forums. (n.d.). Best Freehand Guidance on Sharpening Knives with Deep Belly or Curves.
- Bushcraft USA. (n.d.). Using a Circular Motion on a Stone.
- Smith's Products. (n.d.). Knife Sharpening Angle Guide.
- Blade Forums. (n.d.). Tips for Holding an Angle While Freehand Sharpening.
- Buck Knives. (n.d.). How to Sharpen Your Knife.
- Outdoor Life. (n.d.). How to Sharpen a Knife.
- Art of Manliness. (n.d.). Use a Newspaper to Test a Knife's Sharpness.
- Red Label Abrasives. (n.d.). The Best Ways to Test the Sharpness of a Knife.
- Badger & Blade. (n.d.). Tomato Slice Test (TST).
- Kitchen Knife Forums. (n.d.). What Loupe Strength Do You Suggest for Edge Checks?
- TSPROF. (n.d.). Optical Monitoring During Sharpening.
- Town Cutler. (n.d.). Care and Maintenance.
- Sharp Edge Shop. (n.d.). Guide: Maintenance of Kitchen Knives.
- AllRecipes. (n.d.). How to Care for Kitchen Knives.