

Key Takeaways
- Serrated knives have a distinct anatomy designed for specific cutting tasks.
- Various types of serrated edges exist, each suited for different purposes.
- Special sharpening techniques are necessary to maintain serrated blades.
- Proper tools and methods are crucial for effective serrated knife sharpening.
- Regular maintenance can significantly extend the life of serrated knives.
Anatomy of a serrated knife
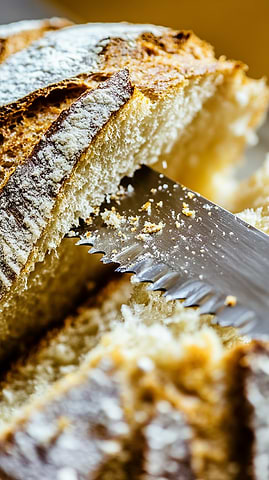
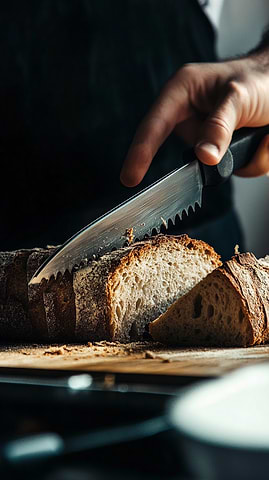
Serrated knives are marvels of culinary engineering, designed to tackle tough-skinned foods with ease. The blade, the knife's primary cutting surface, features a series of teeth or serrations along its edge. These serrations can vary in size and shape, from fine to coarse, depending on the knife's intended use[1].
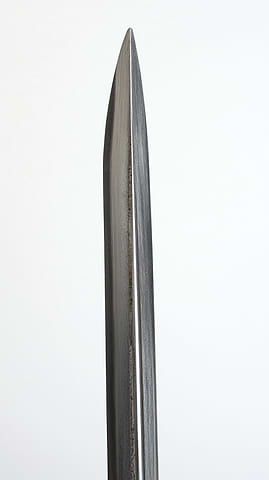
The tip of the blade, typically the first third, is used for precise cutting tasks. The spine, or the top of the blade, provides stability and can be used to apply additional pressure when cutting through tough materials. The heel, located closest to the handle, is the strongest part of the blade and is ideal for cutting through dense ingredients[1].
The tang, which extends into the handle, adds strength and balance to the knife. Some serrated knives may feature a bolster, a thick piece of metal between the blade and handle, which enhances balance and provides a finger guard. The handle, crucial for comfort and control, can be made from various materials such as plastic, wood, or metal[1].
Types of serrated edges
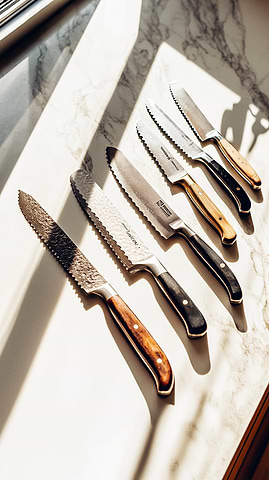
Serrated knives come with various types of edges, each designed for specific cutting tasks. The most common serrations include wavy, scalloped, saw-toothed, and micro serrations. Some manufacturers even create patented serration designs for improved cutting performance[2].
Single-edge serrations, typically found on high-quality bread and tomato knives, feature serrations on one side of the blade and a flat surface on the other. These are generally easier to sharpen and maintain. Double-edge serrations, often seen on less expensive blades, have serrations on both sides of the blade, sometimes with different sizes on each side.
The quality of a serrated knife is determined by several factors, including the sharpness of the serrations, the depth of the slots between them, and the number of serrations. Optimal performance is achieved with fewer, razor-sharp, pointed serrations and deep slots, as this configuration provides better grip and cutting power[3].
Why serrated knives require special sharpening techniques
Serrated knives require special sharpening techniques due to their unique blade design. Unlike straight-edge knives, serrated blades feature a series of teeth or scallops that create a saw-like cutting action. This distinctive structure necessitates a different approach to maintenance and sharpening.
The primary challenge lies in preserving the integrity of the serrations while restoring the blade's sharpness. Traditional sharpening methods, such as using a flat sharpening stone, are ineffective and can damage the serrated edge. Instead, specialized tools like tapered sharpening rods or ceramic honing rods are essential for addressing each individual serration[4].
The sharpening process typically focuses on the flat side of the blade, as this approach maintains the original serration pattern. However, in cases where the serrations have significantly flattened due to extensive use, a more labor-intensive re-serration process may be necessary to restore the knife's optimal cutting performance[4].
Tools for Sharpening Serrated Knives
Ceramic honing rods
Ceramic honing rods are a popular choice for maintaining serrated knives due to their fine grit and durability. These rods typically have a minimum grit of 1200, making them less abrasive than diamond-coated alternatives. This gentler approach is particularly beneficial for high-carbon steel knives, which are more prone to chipping when honed with rougher materials.
Ceramic rods work by slowly grinding down flaws rather than knocking off imperceptible nicks, offering greater control during the honing process. While they may require more strokes to achieve the desired sharpness compared to stainless steel rods, ceramic honing rods can significantly improve blade performance[5].
When selecting a ceramic honing rod, consider factors such as length, weight, and handle design to ensure comfortable and safe use during the honing process. Our Honing Rod is designed with these factors in mind, providing an excellent tool for maintaining your serrated knives.
Tapered diamond sharpening rods
Tapered diamond sharpening rods offer a versatile solution for maintaining serrated knives. These tools feature a conical shape that allows for precise sharpening of individual serrations, regardless of their size. The diamond abrasive coating provides exceptional hardness, enabling fast reconditioning and maintenance of various tools and knives[6].
When using a tapered diamond rod, it's crucial to match the angle of each serration and apply light to moderate pressure while pulling the sharpener against the edge. This technique should be repeated until the desired sharpness is achieved. However, caution must be exercised to avoid exceeding the width of the particular scallop being sharpened, as this is an inherent risk when using tapered rods[7].
After sharpening the serrations, it's essential to remove any burrs created during the process by gently running the rod along the flat side of the blade. Some experts advise against twisting the rod in the scallop during sharpening, as this may not effectively remove burrs and could potentially damage the blade[7].
Electric serrated knife sharpeners
Electric serrated knife sharpeners offer a convenient solution for maintaining the sharpness of serrated blades. These devices often feature multiple sharpening stages, including coarse, medium, and stropping wheels, to produce a refined edge suitable for various culinary tasks[8].
When choosing an electric sharpener for serrated knives, look for models with adjustable sharpening guides and multiple-speed motors, which allow for precise control over the sharpening process. However, it's essential to exercise caution when using electric sharpeners on serrated knives, as improper technique can damage the blade's unique tooth pattern[8].
Importance of choosing the right tool size
Selecting the appropriate tool size is crucial when sharpening serrated knives to maintain their unique edge profile and cutting performance. The key is to match the file or rod diameter to the gullet size of the serrations. When positioning the file, it should rest on top of the gullet with only a slight visibility of the gullet edges behind it[9].
Using a file larger than the gullet can damage the knife's balance by enlarging the gullet and affecting nearby teeth. For rare instances where gullets exceed available file sizes, multiple passes can be made horizontally across the gullet. This precision in tool selection ensures that each serration receives optimal sharpening without compromising the blade's integrity or cutting efficiency[9].
Preparing to Sharpen Your Serrated Knife
Cleaning the knife before sharpening
Before sharpening your serrated knife, it's crucial to clean it thoroughly. This step not only ensures hygiene but also prevents any debris from interfering with the sharpening process. Start by washing the knife with warm, soapy water and a soft cloth, being careful to avoid cuts. Pay special attention to the serrations, where food particles can easily become trapped.
Rinse the knife thoroughly and dry it completely with a clean towel. Avoid using abrasive cleaners or scrubbers, as these can damage the blade's surface. It's important to note that serrated knives should never be cleaned in a dishwasher, as the extreme heat and harsh detergents can damage both the blade and handle.
By hand-washing and immediately drying your serrated knife after each use, you'll maintain its integrity and extend its lifespan, reducing the frequency of required sharpening.
Identifying the beveled side of the blade
Identifying the beveled side of the blade is crucial for properly sharpening a serrated knife. The beveled edge is the side with prominent serrations that appear like small scallops or teeth. This side is typically ground at an angle and should be the focus of your sharpening efforts.
To locate the beveled edge, examine both sides of the knife carefully. One side will have distinct, raised serrations, while the other side will be relatively flat. It's essential to sharpen only the beveled side, as working on the flat side can damage the knife's structure and compromise its cutting ability.
Once you've identified the beveled edge, you can proceed with sharpening by aligning your sharpening tool with the angle of the serrations. Using a permanent marker to color the beveled edge can help you visualize where material is being removed during the sharpening process, ensuring you maintain the correct angle and reach the apex of each serration[10].
Using a marker to highlight the serrations
Using a permanent marker to highlight the serrations is a valuable technique when sharpening a serrated knife. This method provides visual feedback, allowing you to see exactly where material is being removed during the sharpening process.
Begin by coloring the beveled edge of each serration with the marker. As you sharpen, the marker will wear off, revealing the areas where the sharpening rod is making contact. This visual guide helps ensure that you're maintaining the correct angle and reaching the apex of each serration.
If you're only removing marker from the center of the serrated bevel, move to a thicker portion of the tapered sharpening rod. Conversely, if you're only hitting the sides and not the center, switch to a thinner section. Adjust your angle to be shallower if you're only removing marker at the apex, or steeper if you're only removing it from the top of the grind.
This technique is particularly useful for beginners, as it helps develop muscle memory and improves sharpening accuracy over time.
Setting up a safe sharpening workspace
Setting up a safe sharpening workspace is crucial for maintaining serrated knives effectively. Begin by selecting a clean, well-lit area with a stable surface to prevent accidents. Place a damp cloth or non-slip mat beneath your cutting board to ensure stability during the sharpening process[11].
For larger blades, consider enlisting assistance to steady the knife and minimize the risk of damage. Safety should be paramount; use a vice grip to secure the knife firmly, preventing slippage that could lead to injuries. Keep a first aid kit within reach as a precautionary measure.
Proper hand placement is essential; grip the knife by the handle and position your hand away from the sharpening area to reduce the risk of accidents[12]. Some knife enthusiasts recommend using cut-resistant gloves or finger guards for an extra layer of protection.
To ensure optimal results, have vegetables or bread nearby for post-sharpening tests, allowing you to gauge the effectiveness of your work immediately[11].
Step-by-Step Guide: How to Sharpen a Serrated Knife
Sharpening individual serrations with proper technique
Sharpening individual serrations requires a meticulous approach to maintain the knife's unique cutting edge. Begin by identifying the beveled side of the blade, which typically features prominent scallops or teeth. Using a tapered sharpening rod or ceramic honing rod, match the tool's diameter to the size of each serration's gullet.
Position the rod at the same angle as the factory bevel, usually around 20 degrees, and apply gentle pressure while drawing the rod through each serration from heel to tip. Maintain consistent angle and pressure throughout the process, repeating 5-10 strokes per serration or until a burr forms on the opposite side.
For optimal results, work on one serration at a time, ensuring each tooth receives equal attention. After sharpening all serrations, carefully remove any burrs by lightly running the flat side of the blade along a fine-grit sharpening stone or leather strop. This technique preserves the knife's serrated profile while restoring its cutting performance.
Addressing the knife's tip and heel
When sharpening a serrated knife, special attention must be given to the tip and heel of the blade. For the tip, it's crucial to stop just shy of it when sharpening the serrations to avoid rounding it off and decreasing the knife's functionality. Once satisfied with the serrated edge, switch to the flats of the sharpening stones to work on the plain edge portion at the tip[13].
The heel, being the strongest part of the blade, requires a slightly different approach. When using a guided sharpening system, you may need to hunt for the correct angle slot to properly address the heel. Try using a thin bamboo skewer or a piece of fine cardboard to find the angle at which the scallop starts shaving material. This will help determine the appropriate angle slot to use or guide your freehand technique[14].
For both the tip and heel, maintain consistency in your sharpening angle and pressure to ensure a uniform edge along the entire blade. Remember that these areas are often the most challenging to sharpen correctly, so take extra care and time to achieve optimal results.
Finishing Touches and Maintenance
Removing burrs from the flat side of the blade
Removing burrs from the flat side of the blade is a crucial step in achieving a sharp, clean edge on your serrated knife. After sharpening individual serrations, a burr or wire edge forms on the opposite side of the blade. To eliminate this, use your sharpening rod or a fine-grit sharpening stone at a shallow angle (approximately 10 degrees) on the flat side.
Make light, controlled passes to fold the burr back and forth until it breaks off. It's essential to use an edge-trailing motion during this process to avoid cutting into your sharpening tool. Some experts recommend developing a burr on both sides of the blade before removal to ensure an even apex.
For optimal results, alternate between light passes on the serrated and flat sides, gradually decreasing pressure until the burr is completely removed. This technique, known as "chasing the burr," results in a refined, sharp edge. As a final step, consider using a leather strop to further polish the edge, always maintaining an edge-trailing motion to prevent damage to the strop and achieve maximum sharpness.
Testing the knife's sharpness
Testing the sharpness of a serrated knife requires specific techniques due to its unique edge profile. The thumb test, while effective for straight edges, should be approached with caution for serrated blades. Gently place your thumb across the serrations, feeling for a tacky sensation that indicates sharpness[15].
For a safer alternative, the paper test can be particularly revealing for serrated knives. Hold a sheet of newspaper or thin magazine paper at a 45-degree angle and attempt to slice diagonally from heel to tip. A sharp serrated knife should cut cleanly without catching or tearing the paper[15].
For a comprehensive assessment, combine these tests with practical cutting tasks that mimic your typical use of the serrated knife, ensuring it performs efficiently and safely in your kitchen.
Cleaning and storing the knife after sharpening
After sharpening your serrated knife, proper cleaning and storage are crucial for maintaining its edge and ensuring safety. Begin by wiping the blade with a damp cloth to remove any metal filings or debris generated during the sharpening process. This step is essential, as these particles could potentially contaminate food if left on the knife[16].
For a more thorough cleaning, wash the knife with warm, soapy water and dry it immediately to prevent rust formation. Never leave your knife in a sink full of soapy water, as this can damage the blade and pose a safety risk[17].
To protect the newly sharpened edge, consider applying a small amount of food-grade mineral oil to the blade, which helps prevent rust and maintains the knife's condition. When it comes to storage, opt for a method that protects the serrated edge from damage and keeps it safely out of reach. Magnetic knife holders, knife blocks, or individual blade covers are excellent options for storing serrated knives. These storage solutions not only protect the blade but also help maintain its sharpness by preventing contact with other utensils[18].
Frequency of sharpening serrated knives
The frequency of sharpening serrated knives differs from that of straight-edge blades due to their unique tooth-like structure. While straight-edge knives typically require sharpening every two weeks for regular home cooks, serrated knives can maintain their edge for significantly longer periods. The saw-like design of serrated knives allows them to remain functional even when slightly dulled, as the teeth continue to grip and tear through food.
For home cooks, serrated knives may only require sharpening once or twice a year, depending on usage and care. It's crucial to note that over-sharpening can damage the serrations, so it's best to sharpen only when necessary. To determine if a serrated knife needs sharpening, perform a paper test by attempting to slice diagonally through a sheet of newspaper or thin magazine paper. If the knife tears or catches rather than cutting cleanly, it's time for sharpening.
Regular honing with a ceramic rod between sharpenings can help maintain the edge, with experts recommending honing approximately every three to four uses for home cooks. Proper care, including hand-washing, immediate drying, and correct storage, can significantly extend the time between sharpenings for serrated knives.
Common Mistakes to Avoid When Sharpening Serrated Knives
Over-sharpening and damaging the serrations
Over-sharpening serrated knives can lead to significant damage and reduced functionality. One common mistake is applying excessive pressure or making too many passes with the sharpening tool, which can wear down the serrations and alter their shape. This not only diminishes the knife's cutting ability but may also require professional re-serration to restore its original performance.
To avoid this, it's crucial to use a light touch and stop sharpening once the desired sharpness is achieved. Another pitfall is inconsistent angle maintenance during the sharpening process. Deviating from the original angle of the serrations can result in an uneven edge, compromising the knife's cutting efficiency.
Additionally, neglecting the straight sections between serrations can lead to an imbalanced edge. While the focus is often on the serrated portions, it's important to address the entire blade for optimal performance. Using a fine-grit sharpening stone or rod on these straight sections can help maintain a well-rounded cutting edge without over-sharpening the serrations themselves.
Using incorrect sharpening angles
Using incorrect sharpening angles is a common pitfall when maintaining serrated knives. The optimal angle for sharpening serrations typically ranges from 20 to 25 degrees, matching the factory bevel. Deviating from this angle can lead to suboptimal results or even damage the blade.
To determine the correct angle, examine the knife's scalloped edge and use a permanent marker to color the beveled side. This visual aid helps identify where material is being removed during sharpening, allowing for precise angle adjustments. If you're only removing marker from the center of the serrated bevel, move to a thicker portion of the tapered sharpening rod. Conversely, if you're only hitting the sides and not the center, switch to a thinner section.
Adjust to a shallower angle if you're only removing marker at the apex, or steeper if you're only removing it from the top of the grind. Maintaining consistency in angle and pressure throughout the sharpening process is crucial for achieving a uniform, sharp edge across all serrations.
Neglecting to sharpen all serrations evenly
Neglecting to sharpen all serrations evenly is a critical mistake that can compromise the overall performance of your serrated knife. Each serration plays a vital role in the blade's cutting action, and uneven sharpening can lead to inconsistent cutting and reduced efficiency.
When sharpening, it's crucial to pay equal attention to each individual serration, ensuring that you maintain the same angle and apply consistent pressure throughout the process. This meticulous approach helps preserve the knife's original design and cutting geometry.
A common pitfall is focusing too much on the larger serrations while neglecting the smaller ones, which can result in an imbalanced edge. To avoid this, use a sharpening rod or tool that can access all serrations, regardless of size. Remember that the goal is to maintain the knife's original serration pattern while restoring its sharpness.
Applying too much pressure during sharpening
Applying excessive pressure during the sharpening process is a common mistake that can lead to significant damage to your serrated knife. While it may seem intuitive to press harder for faster results, this approach can actually be counterproductive and harmful. Excessive pressure can cause uneven wear on the serrations, potentially altering their shape and compromising the knife's cutting ability.
It's crucial to maintain a light touch, especially when moving the sharpening rod towards the blade edge. A gentle approach allows for better control and reduces the risk of injury. Experts recommend using no more than a few pounds of pressure, particularly during the initial stages of sharpening. When removing burrs or refining the edge, even lighter pressure is advisable.
By using a delicate touch, you ensure that material is removed evenly across all serrations, preserving the blade's original geometry. Remember that serrated knives are designed to cut efficiently with minimal force, and this principle should be applied during the sharpening process as well. If you find yourself tempted to increase pressure due to stubborn dullness or damage, it's better to increase the number of light passes rather than the force applied. This patient approach not only protects the knife but also yields superior sharpening results.
Alternative Methods for Maintaining Serrated Knives
Using a honing steel for quick touch-ups
While honing steels are not designed to sharpen serrated knives, they can be useful for quick touch-ups between more thorough sharpenings. A honing steel can help realign the microscopic teeth along the straight portions of the blade between serrations, maintaining the knife's overall cutting performance.
To use a honing steel on a serrated knife, hold the steel vertically with the tip resting on a cutting board and a kitchen towel placed underneath to prevent slipping. Gently draw the knife down the steel at a 15-20 degree angle, focusing on the flat side of the blade rather than the serrated edge. Make 5-10 light passes on each side, using only enough pressure to maintain contact between the knife and the steel[5].
It's important to note that this technique will not sharpen the serrations themselves but can help maintain the knife's overall cutting ability between more comprehensive sharpenings.For best results, use a ceramic or fine-grit steel honing rod, as these are less likely to damage the delicate serrations[19]. Regular honing with a steel can help extend the time between full sharpenings, but it should not be relied upon as a complete sharpening solution for serrated knives.
Professional sharpening services for serrated knives
Professional sharpening services offer a convenient solution for maintaining serrated knives. These services often employ skilled technicians who understand the intricate design of serrated blades and can enhance their performance, improve safety, and extend their lifespan[20].
When choosing a professional sharpening service, consider factors such as expertise, turnaround time, and the types of knives serviced to ensure optimal results for your serrated blades. Some services specialize in traditional knife grinding techniques, while others may offer additional services such as chip repair and rust cleaning.
Professional sharpening can be particularly beneficial for high-quality knives or those requiring re-serration, as these processes often require specialized equipment and expertise that may not be available to the average home cook.
When to consider replacing a serrated knife
While serrated knives are known for their longevity, there comes a time when replacement becomes necessary. One clear indicator is the presence of loose rivets in Western-style knives, which can lead to dangerous imprecision during cutting. If the handle becomes wobbly or detached, it's time to consider a new knife[21].
Severe blade damage, such as large chips or a broken tip, often signals the end of a serrated knife's lifespan. Although minor chips can be addressed through sharpening, extensive damage compromises the knife's functionality and safety[21].
Another crucial factor is the knife's overall wear. If the blade has been sharpened excessively over time, it may develop a thick spine and poor grind angle, resulting in wedging when cutting. This phenomenon, where ingredients break off before reaching the cutting board, indicates that the knife's geometry has been significantly altered and may no longer perform effectively[21].
For serrated knives specifically, if the serrations have become too worn or flattened to be effectively resharpened, replacement is often the best course of action. Additionally, if the knife is of poor quality and has never performed well, investing in a higher-quality replacement can significantly improve your cutting experience[22].
Ultimately, the decision to replace a serrated knife should be based on a combination of factors, including its overall condition, performance, and the potential for safe and effective use in the kitchen.
Conclusion
Maintaining your serrated knives is essential for preserving their unique cutting ability and extending their lifespan. By understanding the anatomy of these specialized blades and employing proper sharpening techniques, you can ensure that your serrated knives continue to perform at their best. Remember to use the right tools, maintain consistent angles, and avoid common mistakes like over-sharpening or applying too much pressure.
Regular maintenance, including proper cleaning, storage, and occasional honing, can significantly reduce the frequency of required sharpenings. When sharpening becomes necessary, take your time and focus on each serration individually to achieve the best results. If you're unsure about your ability to sharpen serrated knives effectively, don't hesitate to seek professional sharpening services.
By following these guidelines, you'll be able to keep your serrated knives in top condition, ready to tackle any cutting task in your kitchen. For high-quality serrated knives and other essential kitchen tools, Shop Now at Misen and elevate your culinary experience.
Serrated knives are essential tools in any kitchen, featuring a unique blade design that excels at cutting through tough exteriors while preserving delicate interiors. Their effectiveness stems from the specialized serrations along the blade edge, which require proper care and maintenance to ensure long-lasting performance.
References
- BBC Good Food. (n.d.). Anatomy of a knife.
- Knife Sharp. (n.d.). All About Serrated Knives.
- Knives and Tools. (n.d.). What you should know about serrated knives.
- Knife Aid. (n.d.). Sharpening Serrated Knives.
- Serious Eats. (n.d.). How to Choose a Knife Honing Steel.
- Lansky. (n.d.). Folding Diamond Tapered Rod.
- Blade Forums. (n.d.). Best rat tail tapered sharpening rod for serrations.
- Outdoor Life. (n.d.). Best Electric Knife Sharpeners.
- House of Knives. (n.d.). How to Pick the Best Knife Sharpener for Serrated Knives.
- Outdoor Life. (n.d.). How to Sharpen a Serrated Knife.
- Imarku. (n.d.). How to Sharpen Serrated Knives.
- Red Label Abrasives. (n.d.). How to Sharpen Serrated Knives.
- Spyderco Forum. (n.d.). Sharpening serrated knives.
- Quora. (n.d.). What's the best way to sharpen knives with serrated edges?
- Knife Aid. (n.d.). How to Test the Sharpness of a Knife.
- Reddit. (n.d.). Cleaning/wiping down knives after sharpening them.
- Quora. (n.d.). What are some reasons why it is important to clean your knives immediately after using them in the kitchen?
- Restaurantware. (n.d.). Knife Safety, Sharpening, Storage, and Maintenance.
- Knives and Tools. (n.d.). The use of a sharpening steel.
- Sharper Tools. (n.d.). Serrated Knife Sharpening.
- Chubo Knives. (n.d.). Signs It's Time to Replace Your Chef's Knife.
- Edge Pro Inc. (n.d.). Should You Buy New Knives or Sharpen Your Existing Ones?