
Learn proper techniques to sharpen your serrated knife using tapered rods and maintain its edge effectively. Serrated knives stay sharp longer than straight blades because their tooth-and-valley design distributes wear across multiple points, requiring less frequent sharpening.
Understanding Serrated Knives
Serrated knives stay sharp longer because their teeth spread cutting force across multiple points instead of one edge, so only the tips dull while the valleys between them keep slicing effectively.
Anatomy of a serrated blade
Serrated knives have that distinctive saw-like edge you've seen - a series of pointed teeth with spaces (called gullets) between them. One side of the blade is flat while the other has the serrated edge, and this clever design lets the flat side guide your cut while the teeth do the actual work [1].
The spacing and depth of those serrations make a real difference in how your knife performs: wider gullets are perfect for sawing through crusty breads, while tighter spacing gives you cleaner cuts through delicate items like tomatoes [2]. Quality serrated knives use high-carbon stainless steel that balances sharpness with durability - and thanks to their unique design, they keep cutting effectively even as they start to dull, so you won't need to sharpen them nearly as often as your straight-edge knives [2].
Why serrated knives stay sharp longer
Here's why your serrated knife stays sharp so much longer than your chef's knife: it's all about how the blade wears down. Those saw-like teeth spread the cutting force across multiple points instead of one continuous edge [3]. When you accidentally hit your plate or cutting board, only the tips of the serrations get dull - the valleys between them stay sharp and ready to cut [3].
Even with slightly dulled tips, your knife keeps working because those protected valleys can still slice through food after the tips make their initial bite [3]. The spacing matters too - serrated knives with teeth spaced at least 1/4" apart will outlast those with tiny, closely-packed serrations [3]. Sure, a freshly sharpened straight edge might feel sharper at first, but it dulls faster since the entire edge wears at once.
That's what makes serrated knives such workhorses in your kitchen, especially for breads, tomatoes, and other foods with tough outsides and tender insides [4].
Signs your serrated knife needs sharpening
You'll know it's time to sharpen when your serrated knife starts tearing instead of slicing cleanly. The bread test tells all - if you're creating a pile of crumbs instead of clean slices, your knife needs attention.
You might also find yourself pressing harder than usual to get through foods [5]. The good news?
Thanks to their smart design, serrated knives can go years between sharpenings (we'll show you exactly how to do this in the sections ahead). A sharp serrated knife should glide through crusty breads and ripe tomatoes without any force - and keeping it that way means safer, more precise cuts every time [5].
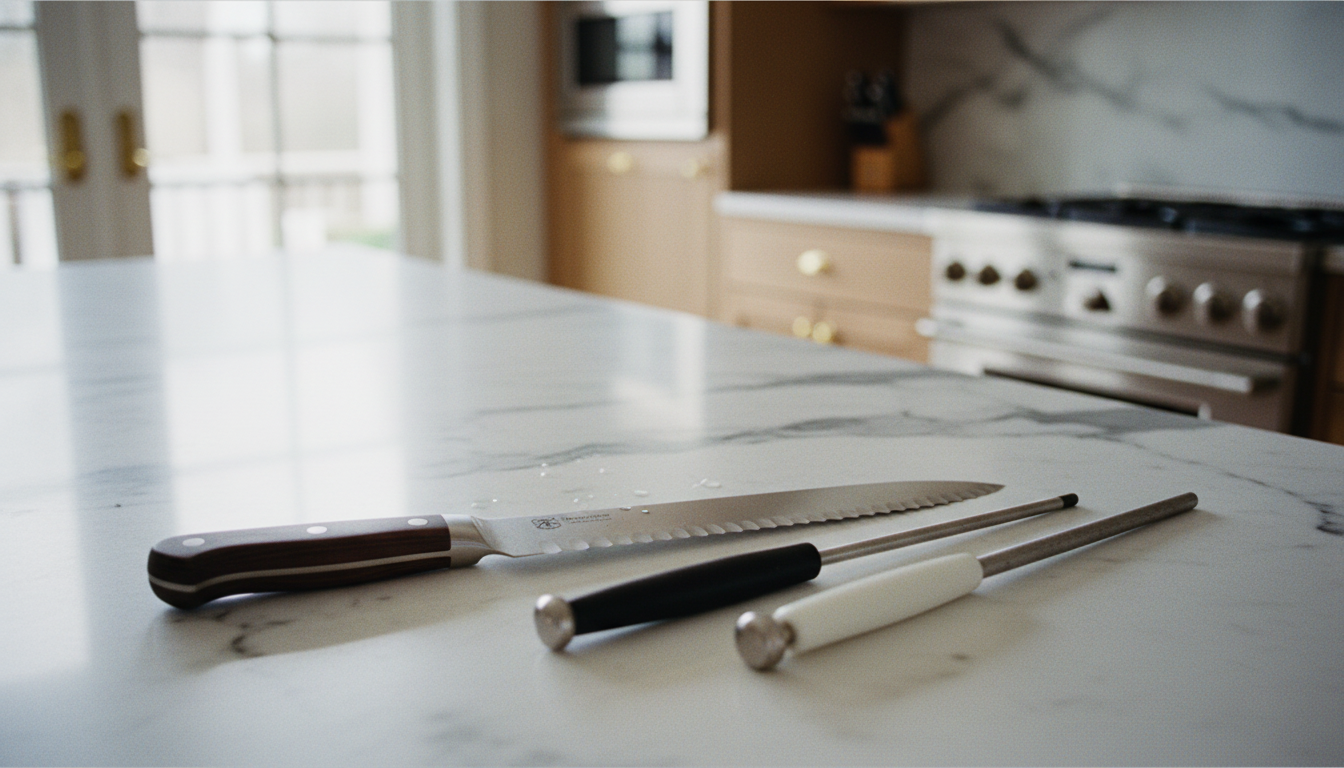
Tools for Sharpening Serrated Knives
Diamond rods reshape dull serrations when your knife struggles to cut bread, while ceramic rods maintain your edge during routine monthly touch-ups.
Tapered sharpening rods: Diamond vs. ceramic
Tapered sharpening rods come in two main materials: diamond and ceramic. Diamond rods feature an electrostatic-plated coating that removes more material - think of them as the heavy lifters when your serrations need serious help. A 600-grit diamond coating provides just enough abrasiveness to reshape dull serrations without damaging your blade's unique pattern.
Ceramic rods, on the other hand, excel at regular maintenance and finishing touches. They're gentler on your blade, removing minimal material while refining the edge. When choosing between them, let your knife's condition guide you: if it's struggling to cut through bread and leaving excessive crumbs, reach for diamond first. For routine touch-ups every few months, a quality ceramic honing rod will keep your serrated edge performing beautifully.
One important tip: make sure the rod's taper matches your serration sizes. Some diamond rods have tips that are too large for finer serrations, so check the fit before you start sharpening.
Alternative sharpening tools: Sandpaper and dowels
Sometimes you need to get creative with your sharpening tools. A wooden dowel wrapped in sandpaper makes an excellent DIY alternative when you don't have specialized rods on hand. Here's how to make it work: grab a black marker and color in your serrations - this helps you see the proper sharpening angles. Then wrap high-grit sandpaper around a dowel that fits snugly in your knife's gullets.
Work the sandpaper-covered dowel through each serration with gentle strokes until you feel a slight burr forming on the opposite side. This DIY method shines when dealing with knives that have varying serration sizes - simply choose different dowel diameters to match each gullet perfectly.
Between major sharpenings, keep your edge fresh by running a ceramic honing rod along the knife's flat side. Once you're done sharpening, don't forget to remove those burrs with a leather strop or finishing stone for a clean, sharp edge.
Selecting the right grit for your blade
Choosing the right grit for serrated knives isn't the same as selecting one for straight edges - you need a more nuanced approach. Think of grit selection like choosing sandpaper for different woodworking tasks: coarse grits (200-400) are your heavy-duty option, reserved only for fixing significant damage or chips in the serrations.
For everyday maintenance, medium grits between 700-2000 strike the perfect balance. They sharpen effectively without removing too much metal from your blade. Diamond-coated rods with 600-grit hit the sweet spot - aggressive enough to reshape dull serrations but gentle enough to preserve your blade's distinctive pattern.
When working with ceramic rods, go finer - 3000-6000 grit range. These higher grits excel at polishing and refining your edge during routine upkeep. After using diamond rods for major work, finishing with ceramic tools in the 4000-6000 range brings your serrations to their sharpest without compromising their geometry.
The golden rule? Let your knife tell you what it needs. If it's tearing bread instead of slicing cleanly, start with coarser grits. For regular touch-ups when performance just starts to dip, those finer grits above 3000 will do the job beautifully.
How to Sharpen a Serrated Knife: Step-by-Step Guide
Prepare your workspace with good lighting and a stable surface, then work methodically through each serration with a tapered rod held parallel to maintain the correct angle.
Preparing your knife and workspace
Getting your workspace ready makes all the difference when sharpening serrated knives. Start by finding a clean, well-lit spot with a stable surface - your kitchen counter works perfectly. A non-slip cutting board underneath prevents any unwanted movement while you work.
Take a moment to really look at your blade under good lighting. You'll want to check the size and spacing of those serrations, which helps you choose the right sharpening rod diameter [11]. Give your knife a quick wash and dry first, since any debris can get in the way of proper sharpening.
Set yourself up comfortably with the blade facing away from your body, and make sure you've got plenty of elbow room. Keep your ceramic honing rod and a clean cloth within arm's reach - you'll need them throughout the process [11].
Sharpening individual serrations
Now for the main event - sharpening each individual serration. First, find the beveled side of your knife (that's the side with the angled edge, while the other stays flat). Take your tapered sharpening rod and nestle it into each gullet - those spaces between the teeth - on the beveled side.
Keep the rod parallel to maintain the right angle, and give each serration 4-5 gentle strokes. Think of each scallop as its own miniature knife that needs attention [12]. Work your way methodically through each gullet, being careful not to accidentally enlarge the spaces between serrations.
You'll notice small metal burrs forming on the flat side as you work - that's completely normal and shows you're making progress [13]. Once you've sharpened all the serrations, give your knife a good wash with warm soapy water to clear away any metal particles [13].
Removing burrs and finishing touches
Those metal burrs we mentioned? They need some attention before your knife is ready for action. Using light, alternating edge-trailing strokes on your finishing stone helps break them down gently [14].
If you're dealing with stubborn burrs, here's a trick: grab a wooden block (hardwood works best), or even try jute rope, felt, or a wine cork to help work them loose [15]. Why does this matter so much? Well, a burr might make your knife feel sharp at first, but it's actually a weak spot that can fold over or break off when you start cutting, leaving you with a dull patch [15].
For that final professional touch, use a leather strop or finishing stone to polish everything smooth, keeping your angle and pressure consistent throughout [15]. Here's the ultimate test: try slicing through a piece of paper. A properly finished knife should glide through cleanly without any tearing or catching - that's when you know you've done it right.
Maintaining Your Serrated Knife's Edge
Let the serrations do the work with a gentle sawing motion, and store your knife in a dedicated block or on a magnetic strip to keep the edge sharp longer.
Proper cutting techniques to preserve sharpness
Using a serrated knife effectively requires a gentle sawing motion rather than the push-down-and-forward technique used with straight blades. This sawing approach minimizes friction and reduces the effort needed to slice through foods.
When cutting bread or other items, place them on a proper cutting board - or even a sturdy surface like a roasting pan that provides adequate grip to prevent dulling the blade. As we covered earlier, serrated knives excel because their unique design distributes cutting force efficiently.
For optimal performance, let the serrations do the work - avoid applying excessive downward pressure which can damage both the food and blade. The teeth should grip and cut through tough surfaces while preserving softer interiors, like when slicing tomatoes where the serrations cleanly pierce the skin without crushing the flesh.
Cleaning and storage best practices
Proper storage and cleaning habits significantly extend your serrated knife's lifespan. Store blades in a dedicated knife block with slots designed for serrated edges, or mount them on a magnetic strip with the blade facing upward to prevent dulling. When using drawer storage, protect the blade with a guard to avoid damage and accidents.
Never put your serrated knives in the dishwasher - the harsh detergents and high heat can damage both blade and handle. Instead, hand wash with warm soapy water and thoroughly dry before storing. Keep blades from contacting other metal objects or knives during storage to prevent the serrated edges from chipping.
For travel or temporary storage, blade guards offer essential protection for both the knife and surrounding items.
Frequency of sharpening for optimal performance
Unlike straight-edge knives that require frequent sharpening, serrated blades maintain their cutting ability much longer thanks to their specialized design. As discussed in the anatomy section, the tooth-and-valley pattern distributes wear differently than a straight edge.
While serrated knives don't need constant maintenance, they should be sharpened when you notice tearing instead of clean cuts. The traditional honing rod approach proves ineffective since the serrated edge skips across the steel, leaving valleys untouched.
For optimal performance between major sharpenings, focus on proper use and storage rather than frequent touch-ups. When sharpening is needed, use the specialized tools and techniques covered in our sharpening guide above.
Troubleshooting Common Serrated Knife Issues
Gentle pressure and good lighting help you fix minor bends yourself, but professional sharpeners have the equipment to safely handle severely damaged serrations.
Dealing with damaged or bent serrations
Bent or damaged serrations can happen when knives get dropped or stored improperly. Here's how to spot and fix these issues safely. First, check for bends by holding your knife against a light source with the blade facing away - the bright background creates a clear silhouette that reveals any wonky spots [18]. For small bends, you can often fix them yourself.
Place the blade flat on a sturdy surface with the bend facing up, then gently press down with the heel of your palm while lifting the handle [18]. Work on one bent area at a time, using minimal pressure - steel can snap if you force it [18]. Think of it like straightening a paperclip - gentle, gradual movements work best. When serrations are severely damaged or multiple teeth are bent, it's time to call in the pros.
Professional sharpeners have specialized equipment to grind down and reshape damaged areas safely [19]. Yes, your blade might end up slightly shorter, but that's better than breaking it trying to DIY a major repair [19].
Addressing uneven sharpness across the blade
Uneven sharpness happens when you accidentally give some serrations more love than others during sharpening. It's like having one super-sharp tooth and a bunch of dull ones - not ideal for clean cuts. If you have a single-beveled serrated knife, focus your sharpening on the flat side to keep everything balanced [20].
When your serrations get really worn down and flat, basic sharpening won't cut it anymore - you'll need professional re-serration to bring back those sharp teeth [20]. The key to preventing this problem? Take your time and pay attention to each serration.
Good lighting is your friend here - examine each gullet before you start and adjust your technique based on what you see [21]. Test as you go by slicing some bread. If certain areas create more crumbs or need extra pressure, those spots need more work [21].
When to seek professional sharpening services
Sometimes your serrated knife needs more help than you can give it at home. Professional sharpeners bring serious advantages to the table - they have high-end equipment and wet whetstones that won't overheat your blade and mess with the metal's temper [22]. They know exactly how to match your knife's original bevel angle while removing as little metal as possible, helping your knife last longer [22]. How often should you use their services?
If you're slicing daily, every 3-4 months keeps your knife in top shape. Weekend warriors can stretch it to 6-12 months [22]. The pros also spot problems you might miss - tiny chips, hidden cracks, or other issues that affect performance [23]. Plus, they'll share tips on keeping your knife sharp between visits [23].
At $2-4 per knife, it's worth avoiding the heartbreak of ruining your favorite blade with a DIY disaster [24]. Many services even offer pickup and delivery, so you don't have to worry about safely transporting your knives [23]. For hassle-free professional care, consider
- Serrated knives stay sharp longer than straight-edge knives because their tooth-and-valley design distributes cutting force across multiple points instead of one continuous edge.
- Use a tapered sharpening rod with 600-grit diamond coating for major reshaping work, and switch to ceramic rods at 3000-6000 grit for routine maintenance and finishing.
- Sharpen each individual serration by nestling a tapered rod into the gullet on the beveled side, keeping the rod parallel and using 4-5 gentle strokes per tooth.
- Remove metal burrs after sharpening using light strokes on a finishing stone, wooden block, or leather strop to prevent weak spots that can fold over during cutting.
- Store serrated knives in a dedicated knife block or on a magnetic strip blade-facing-up, and hand wash only to prevent damage from dishwasher detergents and heat.
- Professional sharpeners should handle severely damaged or worn-down serrations that basic sharpening cannot fix, costing $2-4 per knife and typically needed every 3-4 months for daily use.
- https://smithsproducts.com/blog/everything-you-need-to-know-about-serrated-knives/
- https://misen.com/blogs/news/serrated-knife-discover-cutting-edge-design-for-ultra-precise-slicing?srsltid=AfmBOopt9GnEV9ngAHMe6h-u5um1QbdtU1JnkwCwHX9ntTWPq6fPXTqf
- https://www.quora.com/How-is-it-that-serrated-knives-stay-sharp-longer-than-regular-knives
- https://www.knifeopedia.com/straight-vs-serrated
- https://yakushiknives.com/blogs/yakushi-blog-all-thing-knives/how-to-sharpen-serrated-knives-a-step-by-step-guide?srsltid=AfmBOop43uYbcmG1_q1jVDBGVpYlHz58zUubw-nWw6l1wPxpc5pZ2Yty
- https://blademag.com/featured/how-to-serrated-blade-sharpening-tips
- https://bpsknives.com/features-of-sharpening-serrated-knives/?srsltid=AfmBOoo9qb_aotIpij7GZLZMqTsy6-GwuZtGL-mAZ2D7HtYrC6TbZeNg
- https://www.epicurious.com/shopping/how-to-sharpen-a-serrated-knife
- https://oishya.com/journal/which-whetstone-grit-to-choose-for-sharpening-japanese-knives/
- https://lifebymikeg.com/blogs/all/choosing-the-right-whetstone-grit-for-your-kitchen-knives
- https://www.masterclass.com/articles/how-to-sharpen-a-serrated-knife
- https://www.americastestkitchen.com/articles/3321-the-best-way-to-sharpen-a-serrated-knife
- https://www.foodandwine.com/how-to-sharpen-a-serrated-knife-7152177
- https://www.reddit.com/r/sharpening/comments/n9fg8u/how_do_you_remove_the_burr/
- https://tsprof.us/blogs/news/how-to-remove-the-burr?srsltid=AfmBOoqkD3DUuBTYAhs9jKVTjDviKzHLaqPLb_JO5niyjRXh1YspBuYk
- https://www.quora.com/Whats-the-best-way-to-sharpen-knives-with-serrated-edges
- https://prochefkitchentools.com/blogs/tips/knife-storage-for-serrated-blades
- https://knifewear.com/blogs/articles/how-to-fix-a-bent-kitchen-knife?srsltid=AfmBOoqA3oGvBjLz3Wn1EvJqAwNH0KjPDcYsCQ_7jmK8qlW6DL4I4Lqx
- https://knifeaid.com/pages/knife-repair-chips-tips-and-bends?srsltid=AfmBOoqyWs_7R1TIwuzC2NNPifu-KGUSvNg8HclJnjVtiWmrC7Rl5f-K
- https://knifeaid.com/blogs/knife-mastery/sharpening-serrated-knives?srsltid=AfmBOopu8LzcXHfhF5uM4iBrLrTOjP_ZiV81JaCy5NmCt3j_NOvQsTjh
- https://imarku.net/blogs/news/how-to-sharpen-serrated-knives?srsltid=AfmBOopCmGnRqaQq9Cx_mE6ug_zblh6h-InqEtwhzCIyLtOeU7xAeFRR
- https://thestewartlumberco.com/blog/should-you-choose-diy-or-professional-knife-sharpening-services/
- https://rejuvenatedknives.com/articles/diy-vs-professional-knife-sharpening-what-you-need-to-know
- https://www.food-prep.com/how-much-do-knife-sharpening-services-cost/