
Key Takeaways:
- Stainless steel cookware is durable, versatile, and excellent for heat retention.
- The 18/10 stainless steel composition is considered the highest quality for cookware.
- Proper preheating and oil selection are crucial for preventing food from sticking.
- Mastering heat control and cooking techniques can elevate your culinary results.
- Regular maintenance and proper storage are essential for preserving your cookware's quality.
Understanding Stainless Steel Cookware
Benefits of cooking with stainless steel

Stainless steel cookware has become a staple in many kitchens due to its numerous advantages. Its durability and longevity make it a wise investment, as high-quality stainless steel pots and pans can last for decades with proper care[1]. The material's excellent heat retention and even cooking properties ensure consistent results across various dishes[2].
One of the most significant benefits of stainless steel is its non-reactive nature. This characteristic is particularly beneficial when preparing acidic foods, as it won't impart metallic flavors or discolor the ingredients[3]. The versatility of stainless steel shines through its compatibility with different cooking methods, from sautéing to baking, making it an essential tool for any kitchen[1].
For those concerned about ease of maintenance, stainless steel cookware is typically dishwasher safe and easy to clean, reducing the time and effort required for upkeep[3]. Health-conscious cooks will appreciate that high-quality stainless steel presents a safer alternative to some non-stick options, as it doesn't release potentially harmful chemicals when heated[1].
Types of stainless steel pans
Stainless steel pans come in various types, each with unique characteristics. The 300 series, particularly the 304 grade (18/8 or 18/10), is widely used due to its excellent corrosion resistance and durability[5]. For those seeking the highest quality, 316 stainless steel, also known as surgical or marine grade, offers superior resistance to acids, alkalis, and chlorides[4].
When choosing stainless steel cookware, consider factors such as the grade of steel, core material (aluminum or copper for better heat conductivity), handle construction, and compatibility with your cooktop type[4]. These considerations will help ensure you select the best pan for your cooking needs.
Composition and quality indicators
Stainless steel pans are classified based on their composition, with the most common types being 18/10, 18/8, and 18/0. The numbers represent the percentage of chromium and nickel in the alloy, respectively. 18/10 stainless steel, containing 18% chromium and 10% nickel, is considered the highest quality for cookware due to its superior corrosion resistance, heat tolerance, and durability[7].
This composition allows 18/10 steel to withstand temperatures up to 1598°F and resist degradation from acidic foods, making it ideal for cooking[8]. The high nickel content also enhances the material's luster and shine, contributing to its aesthetic appeal. When selecting stainless steel pans, look for those made with 18/10 or 18/8 steel for optimal performance and longevity in the kitchen[9].
Preparing Your Stainless Steel Pan

Cleaning before first use
Before using your new stainless steel pan, it's crucial to clean it thoroughly to remove any manufacturing residues and ensure optimal cooking performance. Start by washing the pan with hot, soapy water and a non-abrasive sponge, taking care to clean both the interior and exterior surfaces[10]. Rinse the pan thoroughly with warm water to remove all soap residue.
For a deeper clean, consider creating a paste with baking soda and water, applying it to the pan's surface, and gently scrubbing before rinsing[11]. Some manufacturers recommend boiling a mixture of water and vinegar (1:3 ratio) in the pan to remove any potential calcium buildup or manufacturing oils[12].
After cleaning, it's essential to dry the pan immediately and thoroughly with a soft microfiber cloth to prevent water spots and maintain its pristine appearance. By following these initial cleaning steps, you'll ensure your stainless steel pan is ready for its culinary debut in your kitchen.
Seasoning techniques for stainless steel
Seasoning stainless steel pans can transform them into more non-stick surfaces, enhancing their cooking performance. To season your pan, start by heating it over medium to medium-high heat for 2-3 minutes. Next, add a thin layer of high smoke point oil, such as vegetable or canola oil, to coat the entire bottom of the pan. Heat the oil until it begins to smoke, typically around 6 minutes. Once smoking occurs, remove the pan from heat and allow it to cool completely. Pour out the excess oil and wipe the pan with a paper towel, leaving a glossy sheen on the surface[13].
An alternative method involves using coconut oil instead of vegetable oil. After heating the pan, add a small amount of coconut oil, swirl it to coat evenly, and allow it to smoke. Once cooled, wipe out the excess oil. You'll know your pan is properly seasoned when you can see your reflection in its surface[14].
To maintain the seasoning, avoid washing the pan with soap after each use; instead, simply wipe it clean with a paper towel. If you must use soap, be aware that you'll need to re-season the pan afterward. This seasoning technique can significantly reduce sticking and make cleanup easier, though it may require occasional re-application to maintain its effectiveness.
Proper storage to maintain quality
Proper storage is crucial for maintaining the quality and longevity of your stainless steel pans. After cleaning, ensure your pans are completely dry before storing to prevent water spots and potential corrosion. Avoid stacking pans directly on top of each other, as this can lead to scratches and damage. If stacking is necessary, place a soft cloth or paper towel between each pan to protect their surfaces.
Resist the temptation to store food in your stainless steel cookware, especially acidic or salty dishes, as this can cause staining and damage to the pan's surface[15]. Instead, transfer leftovers to appropriate storage containers. When hanging pans, use padded hooks or racks to prevent scratching the handles or rims.
Keep your stainless steel cookware away from harsh chemicals or cleaning products in your storage area, as exposure to these substances can potentially damage the pan's finish. By following these storage practices, you'll help preserve the appearance and performance of your stainless steel pans, ensuring they remain a valuable asset in your kitchen for years to come.
Mastering the Preheating Process
Importance of preheating
Preheating stainless steel pans is crucial for achieving optimal cooking results and preventing food from sticking. The process involves heating the empty pan over medium heat for a few minutes before adding oil. This technique allows the metal to expand slightly, closing microscopic pores and creating a smoother cooking surface[16].
To determine if the pan has reached the right temperature, perform the 'water test' by adding a few drops of water to the pan. If the water dances slowly across the surface in a large droplet, the temperature is perfect for cooking[17]. Preheating also activates the Leidenfrost Effect, which occurs at temperatures just above 200°F, creating a non-stick surface that surpasses even Teflon-coated pans[18].
By mastering the preheating process, home cooks can achieve restaurant-quality results and fully utilize the benefits of stainless steel cookware.
The water droplet test
The water droplet test is a simple yet effective method to determine if your stainless steel pan has reached the optimal temperature for cooking. As the pan heats, its microscopic surface undergoes changes that affect its interaction with liquids. At around 200°F, a fascinating phenomenon called the Leidenfrost Effect occurs.
To perform the test, add a few drops of water (approximately 1/4 teaspoon) to the preheated pan. If the water immediately evaporates or breaks apart, the pan is not hot enough. However, when the pan reaches the ideal temperature, the water droplet will form a perfect sphere and glide across the surface like a ball of mercury, without breaking its surface tension.
This behavior indicates that the pan's surface has become so hot that it creates a thin layer of vapor beneath the droplet, causing it to hover and move freely. The water droplet test not only ensures your pan is at the right temperature but also demonstrates the non-stick properties achieved through proper preheating, surpassing even Teflon-coated pans in preventing food from sticking.
Adjusting heat levels for different cooking methods
Mastering heat control is crucial when cooking with stainless steel pans. For searing and browning, preheat the pan to around 225°F-235°F before adding oil. This temperature range ensures the Leidenfrost Effect is maintained, creating a non-stick surface superior to Teflon-coated pans. Use high smoke point oils like vegetable, ghee, avocado, or canola to prevent burning.
Once the protein is added, lower the heat slightly and allow it to sear undisturbed for 7-8 minutes for skin-on chicken or 3-5 minutes for steak, pork, or skinless chicken[18]. For delicate foods or sautéing vegetables, start with medium-low heat and add oil along with the ingredients, gradually increasing temperature.
When cooking larger proteins, be patient and wait for the food to naturally release from the pan before flipping. The initial contact with cold food will lower the pan's temperature, causing the surface pores to widen and grip the food. As the pan regains heat, these pores will narrow and release the food, indicating it's ready to flip[21].
For shallow frying, maintain oil temperature by inserting a wooden spoon or chopstick; if it bubbles, the oil is hot enough[16]. By mastering these heat control techniques, you'll be able to achieve perfect results with various cooking methods using your stainless steel cookware.
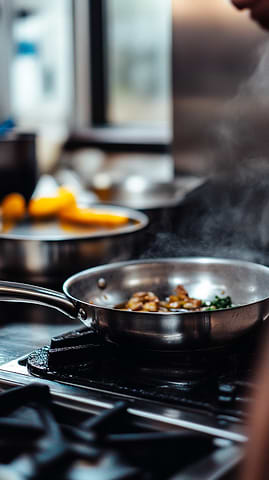
Cooking Techniques for Stainless Steel Pans
Selecting the right oils and fats
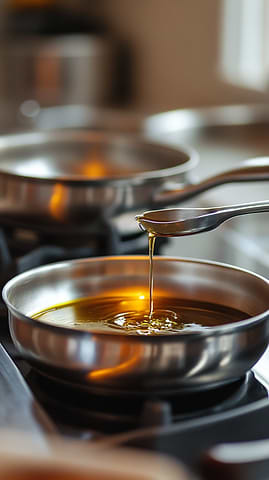
When cooking with stainless steel pans, selecting the right oils and fats is crucial for optimal results. High smoke point oils are ideal for searing and browning in preheated stainless steel pans. Vegetable oil, ghee (clarified butter), avocado oil, and canola oil are excellent choices that can withstand the high temperatures required for proper searing without burning[18].
These oils maintain their stability and don't break down or impart unwanted flavors to the food. It's important to avoid using regular butter, bacon fat, or olive oil for high-heat cooking in stainless steel, as these fats have lower smoke points and are likely to burn on contact with the hot pan surface.
For lower-temperature cooking methods, such as sautéing vegetables or making pan sauces, you can add oil along with the other ingredients and bring everything up to temperature slowly over medium-low heat[16]. This approach allows for better control of the cooking process and helps prevent sticking.
By choosing the appropriate oil or fat for your cooking method and temperature, you'll maximize the non-stick properties of your stainless steel pan and achieve superior results in your culinary endeavors.
Preventing food from sticking
Preventing food from sticking in stainless steel pans requires mastering a few key techniques. First, ensure the pan is properly preheated before adding ingredients. The 'water test' is an effective method to determine the right temperature: add a few drops of water to the hot pan, and if they form mercury-like balls that dance across the surface, the pan is ready[22].
This phenomenon, known as the Leidenfrost Effect, creates a smooth, non-stick surface[23]. Using room temperature ingredients helps maintain the pan's heat, preventing temperature fluctuations that can cause sticking. When cooking proteins, allow them to form a crust before attempting to flip; they will naturally release when ready.
For delicate foods like eggs or vegetables, adding a small amount of fat is recommended[22]. Choose oils with high smoke points, such as avocado or peanut oil, but avoid using excessive amounts[23]. By following these guidelines, even novice cooks can achieve non-stick results with stainless steel cookware, rivaling the performance of traditional non-stick pans[19].
Achieving the perfect sear on meats
Achieving the perfect sear on meats in a stainless steel pan requires mastering several key techniques. Begin by ensuring your steak is at room temperature and patted dry to remove excess moisture, which can impede browning. Preheat your pan on medium-high heat for about two minutes, then perform the water droplet test to confirm optimal temperature. When a droplet dances across the surface without immediately evaporating, your pan is ready[24].
Season your steak generously with salt and pepper just before cooking. Add a high smoke point oil like canola or grapeseed to the pan, swirling to coat the bottom evenly. Carefully place the steak in the pan, allowing it to sizzle undisturbed for 3-4 minutes to develop a golden-brown crust. Resist the urge to move the steak; if it sticks, it's not ready to flip.
Once the first side is seared, flip the steak and cook for an additional 3-4 minutes. For enhanced flavor, consider adding butter, garlic, and fresh herbs like thyme or rosemary during the last minute of cooking[25]. To achieve optimal results, some chefs recommend flipping the steak frequently during cooking, which can lead to more even heating and a reduced gray zone beneath the crust.
Use a meat thermometer to check for desired doneness, aiming for 135°F for medium-rare. After cooking, allow the steak to rest for about 5 minutes to redistribute juices before serving. For the ultimate flavor enhancement, consider pre-salting your steak for at least 40 minutes or up to overnight before cooking, which allows the salt to penetrate deeply into the meat, improving both seasoning and texture[26].
Troubleshooting Common Issues
Dealing with stuck-on food
Dealing with stuck-on food in stainless steel pans can be frustrating, but several effective methods can restore your cookware to its former glory. For everyday cleanup, start by allowing the pan to cool slightly before filling it with warm water and dish soap. Let it soak for 15-20 minutes to loosen food particles, then scrub with a non-abrasive sponge[10].
For tougher residues, try the boiling method: fill the pan with enough soapy water to cover the stuck-on food, bring it to a boil, and scrape with a wooden spoon or spatula. The heat and steam will help lift the stubborn bits[27].
When faced with burnt-on food or oil, baking soda comes to the rescue. Sprinkle a few spoonfuls over the affected area, add water to cover, and simmer until most of the liquid evaporates. This gentle abrasive action helps break down tough residues without scratching the pan's surface[10].
For particularly stubborn messes, consider the vinegar deglaze method: add equal parts water and white vinegar to the pan, heat on low while gently scraping with a wooden utensil. The acidity of the vinegar helps dissolve remaining residues, leaving your pan sparkling clean[27].
Managing hot spots and uneven heating
Managing hot spots and uneven heating in stainless steel pans is crucial for achieving consistent cooking results. To identify these problematic areas, conduct a simple experiment by placing a thin layer of water (about 1/8 inch) in your pan and heating it on high. Observe the formation of bubbles; uneven patterns indicate hot spots[28].
To mitigate these issues, opt for pans with thicker bottoms and materials like copper or aluminum, which distribute heat more evenly. When cooking, stir food more frequently and consider lowering the heat to compensate for hot spots. Understanding your pan's heat distribution is essential, as all pans have unique hot and cold spots influenced by their construction and your heat source[29].
To further enhance heat management, preheat your pan on low to medium heat for 2-3 minutes before cooking. This allows the stainless steel to expand uniformly, reducing the likelihood of food sticking to unevenly heated areas. Perform the water droplet test to confirm readiness: a single drop should produce a sizzling "TSSS" sound when the pan is properly preheated[30].
By mastering these techniques, you can overcome the challenges of hot spots and uneven heating, ensuring more consistent and enjoyable cooking experiences with your stainless steel pans.
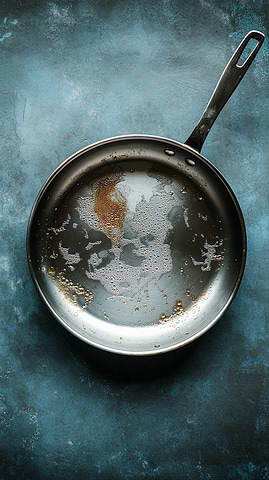
Avoiding warping and discoloration
To prevent warping, avoid subjecting your stainless steel pans to rapid temperature changes. Never plunge a hot pan into cold water; instead, allow it to cool naturally before washing. When cooking, preheat your pan gradually on medium heat rather than blasting it on high, as excessive heat can cause discoloration and potential warping[15].
Discoloration, often appearing as rainbow-like stains, can occur from overheating but is easily remedied. Create a mixture of diluted white vinegar and water, swirl it in the pan, and gently scrub with a non-abrasive sponge to restore the pan's original luster[11].
To maintain your pan's pristine condition, avoid using metal utensils that can scratch the surface, potentially leading to rust and stains. Opt for silicone, wood, or plastic utensils instead. Additionally, resist the urge to cut food directly in the pan, as this can leave permanent marks and compromise both your pan and knife[31].
By following these precautions, you'll ensure your stainless steel pans remain in excellent condition for years to come. For those looking to expand their cookware collection, our Chef's Knife is an excellent companion to your stainless steel pans, offering precision and control for all your food preparation needs.
Maintenance and Care
Proper cleaning methods after use
Proper cleaning of stainless steel pans after use is crucial for maintaining their longevity and performance. For everyday cleanup, allow the pan to cool completely before washing to prevent warping. Use hot, soapy water and a non-abrasive sponge to gently scrub the surface, avoiding harsh cleaners or abrasive tools that can damage the finish[10].
For stubborn, stuck-on food, fill the pan with soapy water, bring it to a boil, and scrape with a wooden spoon or spatula to loosen debris[11]. Alternatively, create a paste with baking soda and water, apply it to problem areas, and let it sit before scrubbing.
To remove discoloration or rainbow stains caused by overheating, wipe the pan with a mixture of vinegar and water using a soft sponge[12]. Always dry your stainless steel pans immediately after washing to prevent water spots, using a microfiber cloth for best results.
For long-term care, consider using cookware protectors when stacking pans to avoid scratches and maintain their pristine condition.
Removing stubborn stains and discoloration
Removing stubborn stains and discoloration from stainless steel pans requires a combination of effective techniques and readily available household ingredients. For rainbow-colored discoloration caused by overheating, a simple vinegar solution can work wonders. Splash some vinegar directly onto the affected area and wipe with a soft sponge, or create a mixture of one part vinegar to three parts water, bring it to a boil in the pan, then let it cool before washing with soap and water[10].
Baking soda proves invaluable for tackling tougher messes, including burnt food and oil residue. Sprinkle a few spoonfuls onto the scorched areas, add enough water to cover, and simmer until most of the liquid evaporates. This gentle abrasive action helps break down stubborn residues without damaging the pan's surface[10].
For an eco-friendly and aromatic approach, combine baking soda with lemon juice to create a paste. This method not only effectively removes stains but also leaves your kitchen smelling fresh. While it may require some elbow grease, the fizzing action of this mixture helps dissolve stains, resulting in a beautifully shiny finish comparable to commercial cleaners[32].
For particularly stubborn burn marks, create a thicker paste using baking soda and water. Apply this paste to the affected areas and scrub in a circular motion with a soft sponge before thoroughly washing, rinsing, and drying the pan[33]. By employing these methods, even the most challenging stains and discolorations can be effectively removed, restoring your stainless steel pans to their former glory.
Long-term care for lasting performance
To ensure lasting performance of your stainless steel pans, implement a comprehensive long-term care routine. Begin by establishing a habit of cleaning your cookware after each use, even if it appears relatively clean, to prevent buildup over time. When washing, use warm soapy water and a non-abrasive sponge to preserve the pan's finish.
For stubborn stains or discoloration, create a paste using baking soda and water, applying it to problem areas before gently scrubbing. To combat water spots, which can mar the pan's appearance, dry your cookware immediately after washing, preferably with a microfiber cloth for optimal results.
When cooking, avoid rapid temperature changes that can lead to warping; allow pans to cool naturally before washing, and preheat gradually on medium heat rather than high. To prevent pitting corrosion, only add salt to water after it has reached a boil. Before cooking, always preheat your pan, then add oil once it's hot to create a temporary non-stick surface.
Take care to bring refrigerated ingredients to room temperature before cooking to prevent sticking and promote even heating. By following these practices and treating your stainless steel cookware with respect, you'll ensure its longevity and maintain its gleaming appearance for years to come.
Advanced Cooking Techniques with Stainless Steel
Creating flavorful pan sauces
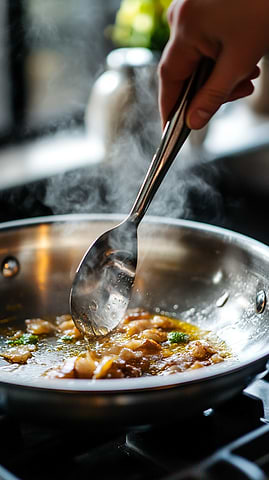
Creating flavorful pan sauces is a culinary technique that elevates stainless steel cooking to new heights. The process begins with the fond, those caramelized bits left behind after searing meat, which forms the foundation of a rich sauce. To harness this flavor, deglaze the pan with a liquid such as wine, broth, or lemon juice, scraping the bottom to dissolve the fond.
For a balanced flavor profile, consider using a combination of ¼ cup wine and ¾ cup broth. Simmer the liquid uncovered for 3-5 minutes, reducing it by half to concentrate the flavors. Enhance the sauce's richness by whisking in a pat of butter, and for added thickness, incorporate a slurry of cornstarch and water.
Aromatics like shallots, garlic, or mushrooms can be sautéed before deglazing to introduce additional depth. The versatility of pan sauces allows for endless experimentation: try a red wine reduction for steaks, a lemon-butter sauce for fish, or a balsamic glaze for vegetables. By mastering this technique, home cooks can transform simple dishes into restaurant-quality meals, making the most of their stainless steel cookware's superior searing capabilities[35][36].
Deglazing for maximum flavor
Deglazing is a culinary technique that elevates stainless steel cooking by transforming mundane meals into gourmet-level cuisine. This process involves adding liquid to a hot pan to dissolve the flavorful food remnants, or 'fond,' left after sautéing or searing. The magic of deglazing lies in its ability to capture and reincorporate the complex flavors formed by the Maillard Reaction and caramelization.
To master this technique, start by ensuring your pan is hot enough to develop a rich fond. Remove excess fat before adding just enough liquid to cover the pan's surface. Vigorously scrape the bottom with a wooden spoon or spatula to release the browned bits, incorporating them into the liquid.
While wine is a popular choice for deglazing, experiment with various liquids such as stocks, vinegars, or even fruit juices to create unique flavor profiles. Surprisingly, deglazing isn't limited to savory dishes; it can be applied to desserts by deglazing caramelized sugar with rum or brandy for a luscious sauce.
By harnessing the power of deglazing, home cooks can maximize flavor, promote resourcefulness, and elevate their culinary creations to restaurant-quality standards.
Using stainless steel for baking and broiling
Stainless steel's versatility extends beyond stovetop cooking to baking and broiling, offering unique advantages in the oven. When baking with stainless steel, preheat your pan alongside the oven to ensure even heat distribution and prevent sticking. This technique is particularly effective for creating crispy crusts on breads and pizzas. For delicate baked goods, consider lining your stainless steel pan with parchment paper to facilitate easy removal.
When broiling, stainless steel's ability to withstand high temperatures makes it an excellent choice for achieving perfectly caramelized toppings or a golden-brown finish on casseroles. To maximize browning, position the pan closer to the broiler element, but monitor closely to prevent burning.
Stainless steel's superior heat retention also allows for more even cooking when preparing dishes like roasted vegetables or baked fish. When using stainless steel for oven-roasting meats, take advantage of its ability to develop a flavorful fond by deglazing the pan afterward to create a rich sauce.
Remember that stainless steel handles can become extremely hot in the oven, so always use oven mitts when handling. By leveraging stainless steel's properties in baking and broiling, home cooks can expand their culinary repertoire and achieve professional-quality results across a wide range of oven-prepared dishes.
Conclusion
Mastering the art of cooking with stainless steel cookware opens up a world of culinary possibilities. From understanding the composition and quality indicators to perfecting preheating techniques and advanced cooking methods, this guide has provided you with the knowledge to make the most of your stainless steel pans. By implementing proper maintenance and care routines, you'll ensure that your cookware remains a valuable asset in your kitchen for years to come.
Remember, the key to success lies in practice and patience. As you experiment with different techniques and recipes, you'll discover the true versatility and potential of your stainless steel cookware. Whether you're searing a perfect steak, creating a delectable pan sauce, or baking a crispy-crusted pizza, your stainless steel pans will be your reliable partners in culinary excellence.
Ready to elevate your cooking game with top-quality stainless steel cookware? Shop now and discover our range of premium kitchen essentials designed to help you cook better and more confidently.
Stainless steel cookware offers numerous benefits for home cooks, including durability, excellent heat retention, and versatility. This guide explores the types of stainless steel pans, their composition, and quality indicators. It also provides practical advice on preparing, using, and maintaining stainless steel cookware to ensure optimal performance and longevity in your kitchen.
References
- Leaf Score. (2021). Stainless Steel Cookware Pros and Cons.
- Curated. (2021). Stainless Steel vs Nonstick Pans: Which Are Better for You?
- Kitchen Kapers. (2021). Cookware Materials and Why They Matter.
- Craft N Home. (2021). Stainless Steel Cookware.
- Food & Wine. (2021). Guide to Stainless Steel Cookware.
- Crystalia USA. (2021). 18/10 Stainless Steel, 18/8 Stainless Steel, and 18/0 Stainless Steel: What Are the Differences?
- Xometry. (2021). 18/10 Stainless Steel.
- Liberty Tabletop. (2021). What is 18/10 Stainless Steel?
- Better Homes & Gardens. (2021). How to Clean Stainless Steel Pans.
- Food52. (2021). Our Guide for Caring for & Cleaning Stainless Steel Pans.
- Martha Stewart. (2021). How to Care for a Stainless Steel Pan to Prevent Burning and Warping.
- Epicurious. (2021). How to Turn a Stainless Steel Skillet into a Nonstick Pan.
- Whole Lifestyle Nutrition. (2021). How to Cook On & Season a Stainless Steel Pan to Create a Non-Stick Surface.
- Sur La Table. (2021). How to Make Stainless Steel Cookware Last.
- The Practical Kitchen. (2021). Why Heat Stainless Steel Pans? FAQ.
- Gastro Tools. (2021). Here's How Easy It Is to Cook in a Stainless Steel Pan.
- The Intrepid Gourmet. (2019). How to Cook with Stainless Steel.
- Food Network. (2021). How to Make Stainless Steel Nonstick.
- Heritage Steel. (2021). Cooking Techniques.
- Cristel USA. (2021). How to Stop Food from Sticking to Stainless Steel Pan.
- Food52. (2021). How to Make Stainless Steel Cookware Nonstick.
- Cristel USA. (2021). 5 Steps to Cook Your Meat with a Stainless Steel Frying Pan.
- Recipes.net. (2021). How to Sear a Steak in a Stainless Steel Pan.
- Serious Eats. (2021). Perfect Pan-Seared Steaks Recipe.
- Tru Earth. (2021). How to Clean Food Stuck on Stainless Steel Pans.
- Stack Exchange. (2021). How Can I Measure the Performance of My Stovetop Pots and Pans?
- Bon Appétit. (2021). Effed It Up: Stainless Steel Pans.
- Avacraft. (2021). How to Cook in Stainless Steel Pans.
- The Kitchn. (2021). Stainless Steel Pans: Tips & Things to Avoid.
- The Kitchn. (2021). Best Method for Cleaning Discolored Stainless Steel Cookware.
- Real Simple. (2021). How to Clean Stainless Steel Pans.
- No Recipe Tonight. (2021). Heat, Oil, and Flavor: Excelling with Stainless Steel to Create Beautiful Pan Sauces.
- Pampered Chef. (2021). How to Make an Amazing Pan Sauce.