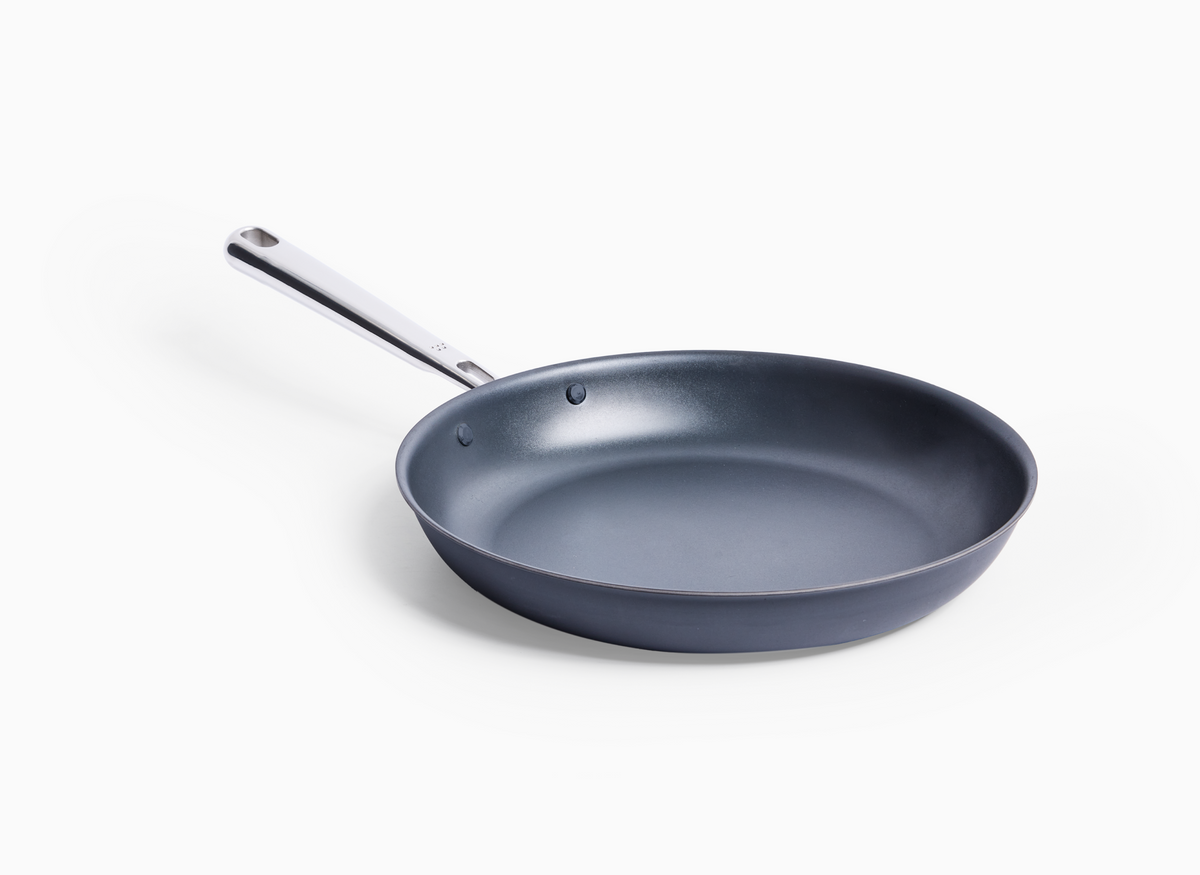
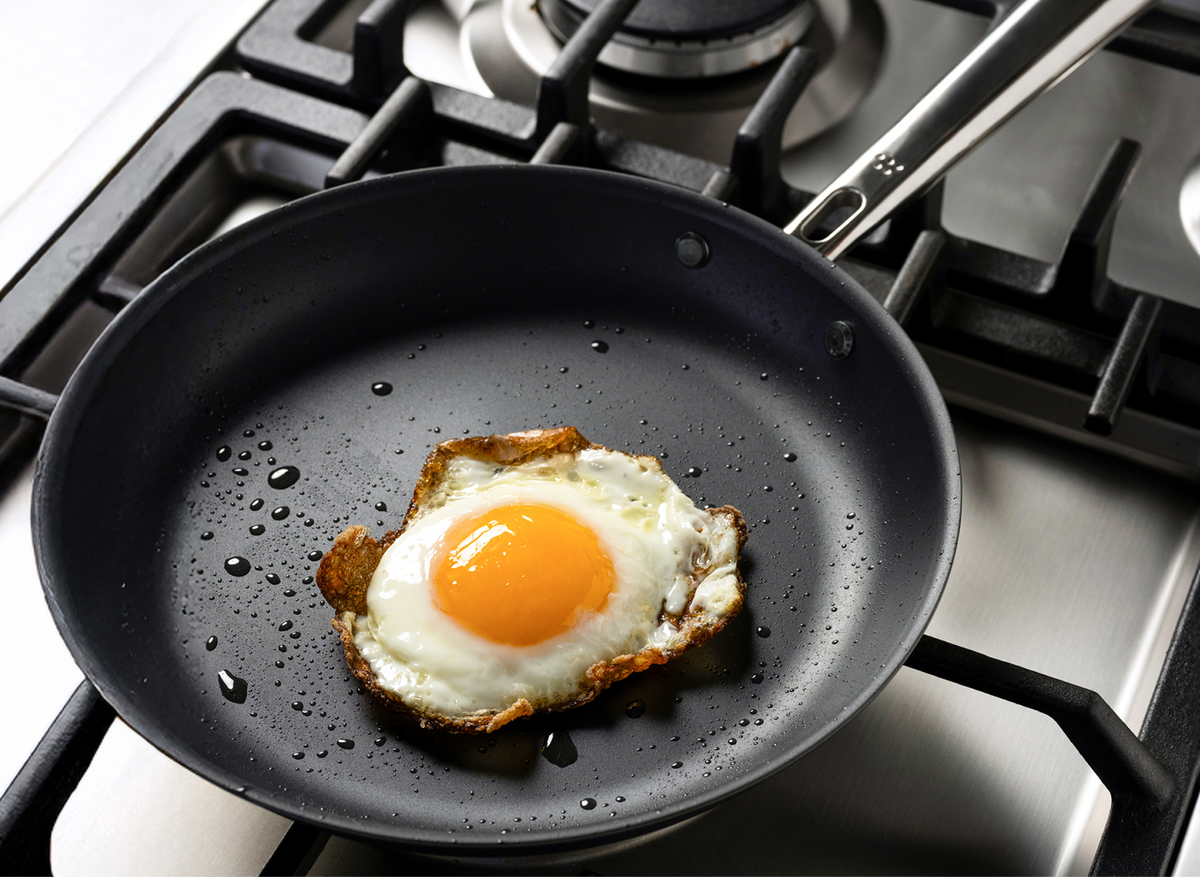
Our Carbon Nonstick™ Frying Pan is the easiest carbon steel pan you’ll ever use. If you’re ready to ditch chemical nonstick and commit to nontoxic, coating-free cookware, this is the pan for you. Its nitrided steel surface starts out naturally nonstick and gets even better as it seasons with normal cooking. The lightweight aluminum core provides fast, even heat and lifelong durability. Plus it’s safe on gas, electric, induction, oven, and grill (up to 1100°F).
Our Carbon Nonstick™ Frying Pan is the easiest carbon steel pan you’ll ever use. If you’re ready to ditch chemical nonstick and commit to nontoxic, coating-free cookware, this is the pan for you. Its nitrided steel surface starts out naturally nonstick and gets even better as it seasons with normal cooking. The lightweight aluminum core provides fast, even heat and lifelong durability. Plus it’s safe on gas, electric, induction, oven, and grill (up to 1100°F).
There are eight plastic films that can be peeled off from the bottom of the module. Start with removing two (one from each edge). Place the module on your storage surface and test by putting a knife in and pulling the knife out. The unit shouldn't move.
Depending on your surface and where you place it, you may want to remove more. (The feet use a non-permanent adhesive and are repositionable, but very sticky. Two may be all you need!)
To assemble, snap large modular pieces together at the base, and snap small modular pieces to either side of a large one. You can continue to add pieces until every one of your knives is protected!
Use the large modular pieces for blades 6 to 10 inches in length. Use small modular pieces for blades less than 6 inches in length.
CLICK HERE to watch a 1 minute video on how to use our Carbon Nonstick™ cookware
Conditioning is the best way to keep your pan in tip-top shape and as nonstick as possible. You don’t have to condition after every use (though you could), but we recommend doing it every few cooks or if you ever notice a dip in nonstickiness.
CLICK HERE to watch a 1 minute video on how to condition your Carbon Nonstick™ pan.
If your pan is heavily soiled or sticky and you’re not able to get it clean with a regular sponge and soap, you may need to give it a simple deep clean. Here’s how:
Avoid abrasive cleaners like Bar Keepers Friend, which can strip the pan down to bare metal and leave it vulnerable to rust.
CLICK HERE to watch a 1 minute video on how your Carbon Nonstick™ will change over time.
Your pan will look different over time—and that’s a good thing. After a few cooks, you may notice dark spots appear on the surface of your pan. As long as the spots are smooth to the touch, don’t try to scrub them clean! That’s your pan’s natural seasoning building up. With regular cooking over time, the entire surface of your pan will develop a dark patina—and become increasingly nonstick.
Try “conditioning” the pan: After cleaning, heat over a low flame for about 15-30 seconds— just until the pan is too hot to touch. Add a few drops of high-heat oil (no more than a dime size) and wipe all over the surface of the pan using a paper towel. Wipe until you can't see the oil. All you need is a microscopic layer—any more and the excess oil could make the pan sticky. Then just store the pan, and you’re good to go ‘til next time.
There are eight plastic films that can be peeled off from the bottom of the module. Start with removing two (one from each edge). Place the module on your storage surface and test by putting a knife in and pulling the knife out. The unit shouldn't move.
Depending on your surface and where you place it, you may want to remove more. (The feet use a non-permanent adhesive and are repositionable, but very sticky. Two may be all you need!)
To assemble, snap large modular pieces together at the base, and snap small modular pieces to either side of a large one. You can continue to add pieces until every one of your knives is protected!
Use the large modular pieces for blades 6 to 10 inches in length. Use small modular pieces for blades less than 6 inches in length.
CLICK HERE to watch a 1 minute video on how to use our Carbon Nonstick™ cookware
Conditioning is the best way to keep your pan in tip-top shape and as nonstick as possible. You don’t have to condition after every use (though you could), but we recommend doing it every few cooks or if you ever notice a dip in nonstickiness.
CLICK HERE to watch a 1 minute video on how to condition your Carbon Nonstick™ pan.
If your pan is heavily soiled or sticky and you’re not able to get it clean with a regular sponge and soap, you may need to give it a simple deep clean. Here’s how:
Avoid abrasive cleaners like Bar Keepers Friend, which can strip the pan down to bare metal and leave it vulnerable to rust.
CLICK HERE to watch a 1 minute video on how your Carbon Nonstick™ will change over time.
Your pan will look different over time—and that’s a good thing. After a few cooks, you may notice dark spots appear on the surface of your pan. As long as the spots are smooth to the touch, don’t try to scrub them clean! That’s your pan’s natural seasoning building up. With regular cooking over time, the entire surface of your pan will develop a dark patina—and become increasingly nonstick.
Try “conditioning” the pan! After cleaning, heat over a low flame for about 15-30 seconds— just until the pan is too hot to touch. Add a few drops of high-heat oil (no more than a dime size) and wipe all over the surface of the pan using a paper towel. Wipe until you can't see the oil. All you need is a microscopic layer—any more and the excess oil could make the pan sticky. Then just store the pan, and you’re good to go ‘til next time.
Carbon Nonstick™ is a carbon steel pan with an aluminum core. It’s 3-ply, meaning it has three layers: the inner layer is the aluminum core, which helps the pan heat and cool more quickly than other carbon steel pans. The top and bottom layers are nitrided carbon steel—more about nitriding in the next question.
Nitrided carbon steel is carbon steel that has been super-heated in a nitrogen-rich oven, which creates an extremely durable, corrosion-resistant, and naturally nonstick surface without the need for coatings like ceramic or PTFE.
Nitriding is completely food-safe and nontoxic, and is widely used in industries beyond cookware, including aerospace, automotive, surgical, and industrial machinery.
Carbon steel (the pan’s primary material) relies on something called “seasoning” to achieve its non-stickiness. Unlike ceramic (sol-gel) and PTFE nonstick, both of which involve special coatings, seasoning is completely natural and becomes more nonstick over time as it builds up.
The seasoning process begins the moment you start cooking with Carbon Nonstick™. Seasoning’s scientific name is polymerization: when any type of fat is heated in the pan, it chemically bonds with the metal to create a durable surface that prevents rust and improves nonstick properties. The more you cook, the more the seasoning builds up, and the better your pan gets, naturally.
Carbon Nonstick™ gets a boost from something called "nitriding," in which the pan is super-heated in a nitrogen-rich environment, which creates an extremely durable, corrosion-resistant, and virtually nonstick surface without the need for coatings. The nitrided surface gives Carbon Nonstick™ great food-release properties right out of the box and helps the seasoning build up gradually on its own, so you can get right to cooking.
We still love and use our Pre-Seasoned Carbon Steel pans! But there are some key differences between traditional carbon steel and Carbon Nonstick™.
First, Carbon Nonstick™ is lighter: a 10” frying pan weighs only 2.48 pounds, compared to carbon steel’s 3.2 pounds. It's an easier pan to hold and use on a daily basis.
Second, Carbon Nonstick™ doesn’t require seasoning. Our original Carbon Steel needs to be regularly seasoned as you use it, that seasoning can come off depending on what you cook, and sometimes the pan needs to be re-seasoned from scratch. That won’t happen with Carbon Nonstick™ because it’s nitrided, aka heated in a super-hot, nitrogen-rich oven to make it extra-hard, extra-smooth, and extra-durable, holding its seasoning better than a carbon steel pan ever could.
Third, Carbon Nonstick™ has an aluminum core, while our Pre-Seasoned Carbon Steel pan does not. In addition to making it lighter, the aluminum core helps the pan heat and cool faster. This responsiveness to temperature makes your cooking more efficient and precise, whereas our Pre-Seasoned Carbon Steel has slightly better heat retention for tasks like heavy-duty searing.
Fourth, Carbon Nonstick™ is more resistant to rust. Our original carbon steel pan isn’t nitrided, so it will rust if you don’t wash and dry it immediately after cooking. Carbon Nonstick™ can soak in the sink overnight without issues.
Traditional PTFE nonstick and ceramic pans are both made with coatings that create a pronounced nonstick effect on your pans—but they don’t last. Carbon Nonstick™ is coating-free, therefore it may not start out with the same level of easy-release cooking as traditional or ceramic nonstick. However, when ceramic and other nonstick pans gradually lose their nonstick coating (and eventually end up in the trash), Carbon Nonstick™ actually becomes more nonstick with use, as cooking oils build up on the pan’s surface (we call this naturally occurring process “self-seasoning”). So while your other nonstick pans will be useless in a matter of years, your Carbon Nonstick™ is made to last forever.
No, Carbon Nonstick™ is free of PFAS, PTFE, and PFOA. It’s made of nitrided carbon steel and with an aluminum core, and that’s it.
No. Unlike traditional carbon steel cookware, which requires multiple rounds of oiling the pan and heating it in the oven for hours, you don’t need to season your Carbon Nonstick™ pan. By simply cooking with it, you'll be seasoning it; the more you use it, the more seasoned it becomes. We call this natural effect “self-seasoning,” to differentiate from the time-consuming process of seasoning carbon steel or cast iron.
That said, if you have time, set the clean pan over low heat until it’s just hot to the touch, about 30 seconds. Add a dime-sized amount of high-heat oil to the pan and use a paper towel or lint-free cloth to rub the oil all over the inside of the pan until dry. This step speeds up the seasoning process, but it is completely optional.
Carbon Nonstick™ is not pre-seasoned. This sets it apart from our Pre-Seasoned Carbon Steel, which is pre-baked with a neutral oil to jumpstart the seasoning process. Carbon Nonstick™ does not need to be pre-seasoned because it's been nitrided, which does the same job. Instead, the pan is simply wiped down with a thin layer of neutral corn oil after nitriding. This moisturizes the pan, protects it during shipping, and makes it nice and slippery right out of the box.
We recommend going easy on the tomatoes and lemons for your first 30 or so cooks, so the pan has a little time to build up its nonstick properties. Once your pan is nicely seasoned—which you’ll be able to tell by its shiny, jet-black patina—bring on the lemons!
Whereas most carbon steel pans will lose their seasoning and rust if they're exposed to acid, a well-seasoned Carbon Nonstick™ can stand up to acid without a problem. (We find it especially useful for finishing our pasta in tomato sauce.)
Carbon Nonstick™ works on all stovetop types - gas, electric, and induction
Don’t worry! It’s totally normal to experience a bit of temporary sticking while the pan starts to build up seasoning in the first month or so. Your pan will naturally become more nonstick the more you cook with it—that’s the self-seasoning at work!
In the meantime, here are some tips if you do experience some sticking:
Your pan will self-season every time you cook in it, eventually building up a fully natural nonstick surface. But if you’re looking to speed things up, you can condition the pan after every cook (or as often as you’d like): Wash your pan as normal and set it over low heat until it’s just hot to the touch, about 30 seconds. Add a dime-sized amount of high-heat oil to the pan and use a paper towel or lint-free cloth to rub the oil all over the inside of the pan until dry.
Nope! Those spots are your pan’s self-seasoning at work, meaning your pan is well on its way to nonstick nirvana. As long as the pan feels smooth to the touch, you’re golden. (If the dark spots are raised, they’re stuck-on food and you should scrape them off.)
Nope! Unlike ceramic or coated nonstick pans, Carbon Nonstick™ has absolutely no artificial coatings that can be scratched or flaked off. Like any carbon steel pan, scratches on Carbon Nonstick™ are purely cosmetic and won’t affect your pan’s performance or safety.
If you do see a scratch on your pan, you can either buff it out with your fingers or simply keep cooking—the pan’s self-seasoning will eventually fill in the scratch over time.
Nope! It’s totally normal to experience some sticking from time to time as your pan starts to build up seasoning. Seasoning can initially develop in uneven patches across the surface of the pan, but will gradually accumulate until your pan’s surface is completely nonstick, naturally.
If you notice the surface of your pan is looking a little dull or matte in between cooks, we recommend conditioning it to help revive its nonstick power: Wash your pan as normal, then set it over low heat until it’s just hot to the touch, about 30 seconds. Add a dime-sized amount of high-heat oil to the pan and use a paper towel or lint-free cloth to rub the oil all over the inside of the pan until dry.
Nope! Those sticky spots most likely mean there was too much oil in the pan or your oil got too hot at some point. (You’ll see the same effect on your cast iron and stainless steel pans.) To clean, gently heat the pan over low heat, sprinkle some salt over the pan, then use an abrasive sponge or scrubby to buff the salt into the sticky spots; rinse and wash with hot water and soap as normal, making sure your clean pan is smooth to the touch.
For extra-stubborn sticky spots, make a paste with equal parts distilled vinegar and baking soda and bring to a boil with some water in the pan. Drain, then use a pan scraper or abrasive sponge to scrub away the sticky spots.
Nope! Any rust that shows up on your pan can easily be removed.
First, make sure it’s actually rust: Run a finger or paper towel over the suspected rust spot. If you can see a bright orange-colored residue, that’s rust. To treat small rust spots, start by scrubbing away the rust with steel wool and salt. Once the rust is buffed out and no orange residue remains, clean and dry the pan as normal, then condition it to create a protective layer against future rust.
Your pan will eventually turn a dark black/brown color all over and take on a glossy sheen, indicating it has fully developed its natural nonstick surface.
You can cook a great meal on Carbon Nonstick™ with any oil or cooking fat you like (except aerosol cooking sprays, which we don’t recommend using with any pan), though high-heat oils are the most effective at developing a nice, even seasoning on your pan. Fats with lower smoke points like butter and some olive oils are prone to burning before they have a chance to season the pan. If you prefer cooking with butter or olive oil, we recommend cleaning your pan well after cooking to remove any residue, then moisturizing the pan with a high-heat oil for the best of both worlds.
If you have a question about a specific brand or type of oil, reach out to our culinary-trained customer service team and we’ll be happy to help you out!
You can safely cook acidic foods right from the start—just know that it will take a bit longer to build up your pan’s self-seasoning. If you want to fast-track your pan’s nonstick potential, we suggest going light on tomatoes, lemons, wine, vinegar, and other acidic ingredients for the first 30 days.
Don’t worry! It’s totally normal to experience a bit of temporary sticking while the pan starts to build up seasoning in the first month or so. Your pan will naturally become more nonstick the more you cook with it—that’s the self-seasoning at work!
In the meantime, here are some tips if you do experience some sticking:
Your pan will self-season every time you cook in it, eventually building up a fully natural nonstick surface. But if you’re looking to speed things up, you can condition the pan after every cook (or as often as you’d like): Wash your pan as normal and set it over low heat until it’s just hot to the touch, about 30 seconds. Add a dime-sized amount of high-heat oil to the pan and use a paper towel or lint-free cloth to rub the oil all over the inside of the pan until dry.
Nope! Those spots are your pan’s self-seasoning at work, meaning your pan is well on its way to nonstick nirvana. As long as the pan feels smooth to the touch, you’re golden. (If the dark spots are raised, they’re stuck-on food and you should scrape them off.)
Nope! Unlike ceramic or coated nonstick pans, Carbon Nonstick™ has absolutely no artificial coatings that can be scratched or flaked off. Like any carbon steel pan, scratches on Carbon Nonstick™ are purely cosmetic and won’t affect your pan’s performance or safety.
If you do see a scratch on your pan, you can either buff it out with your fingers or simply keep cooking—the pan’s self-seasoning will eventually fill in the scratch over time.
Nope! It’s totally normal to experience some sticking from time to time as your pan starts to build up seasoning. Seasoning can initially develop in uneven patches across the surface of the pan, but will gradually accumulate until your pan’s surface is completely nonstick, naturally.
If you notice the surface of your pan is looking a little dull or matte in between cooks, we recommend moisturizing it to help revive its nonstick power: Wash your pan as normal, then set it over low heat until it’s just hot to the touch, about 30 seconds. Add a dime-sized amount of high-heat oil to the pan and use a paper towel or lint-free cloth to rub the oil all over the inside of the pan until dry.
Nope! Those sticky spots most likely mean there was too much oil in the pan or your oil got too hot at some point. (You’ll see the same effect on your cast iron and stainless steel pans.) To clean, gently heat the pan over low heat, sprinkle some salt over the pan, then use an abrasive sponge or scrubby to buff the salt into the sticky spots; rinse and wash with hot water and soap as normal, making sure your clean pan is smooth to the touch.
For extra-stubborn sticky spots, make a paste with equal parts distilled vinegar and baking soda and bring to a boil with some water in the pan. Drain, then use a pan scraper or abrasive sponge to scrub away the sticky spots.
Nope! Any rust that shows up on your pan can easily be removed.
First, make sure it’s actually rust: Run a finger or paper towel over the suspected rust spot. If you can see a bright orange-colored residue, that’s rust. To treat small rust spots, start by scrubbing away the rust with steel wool and salt. Once the rust is buffed out and no orange residue remains, clean and dry the pan as normal, then condition it to create a protective layer against future rust.
Your pan will eventually turn a dark black/brown color all over and take on a glossy sheen, indicating it has fully developed its natural nonstick surface.
You can cook a great meal on Carbon Nonstick™ with any oil or cooking fat you like (except aerosol cooking sprays, which we don’t recommend using with any pan), though high-heat oils are the most effective at developing a nice, even seasoning on your pan. Fats with lower smoke points like butter and some olive oils are prone to burning before they have a chance to season the pan. If you prefer cooking with butter or olive oil, we recommend cleaning your pan well after cooking to remove any residue, then moisturizing the pan with a high-heat oil for the best of both worlds.
If you have a question about a specific brand or type of oil, reach out to our culinary-trained customer service team and we’ll be happy to help you out!
You can safely cook acidic foods right from the start—just know that it will take a bit longer to build up your pan’s self-seasoning. If you want to fast-track your pan’s nonstick potential, we suggest going light on tomatoes, lemons, wine, vinegar, and other acidic ingredients for the first 30 days.
