
Reverse searing thick-cut ribeye--starting low in a 225 degreesF oven and finishing with a ripping-hot sear--turns an affordable home kitchen into a steakhouse by eliminating the gray band, amplifying tenderness through slow enzyme action, and guaranteeing edge-to-edge medium-rare doneness with a crusty, butter-basted mahogany shell; the article walks readers through selecting well-marbled Prime or Choice ribeyes, dry-brining overnight for a dry surface that sears in seconds, monitoring pull-temperature 15 degreesF below target, then glazing in foaming herb-garlic butter for restaurant-level flavor. Along the way it demystifies gear (wire rack, sheet pan, instant-read thermometer, cast-iron or carbon-steel skillet), timing windows that forgive mistakes, and the science of the Maillard reaction, while revealing that the gentle oven phase pre-rests the meat so you can slice and serve immediately--no waiting, no lukewarm steak--paired with bold Cabernet or Zinfandel and classic sides. Mastering this forgiving, low-smoke method means consistently juicy, tender ribeyes that outshine traditional high-heat techniques with less stress and a far bigger flavor payoff.
Understanding the Reverse Sear Method
Reverse searing thick steaks low-and-slow before a final sear delivers edge-to-edge pink perfection, a crusty crust and a forgiveness window that makes overcooking almost impossible.
Definition and principles of reverse searing
Reverse searing is exactly what it sounds like - you flip the traditional method on its head by starting low and finishing high. Instead of searing first, you'll gently cook your steak in a 200-275 degreesF oven, then finish with a blazing-hot sear. This approach gives you incredible control over how your steak cooks. Here's what makes it work: The gradual heating creates even doneness from edge to center - no more gray rings of overcooked meat around a pink middle.
While your steak slowly comes to temperature, natural enzymes work their magic, breaking down tough proteins for extra tenderness. The low heat also dries out the surface (we'll dive deeper into why this matters for searing later), setting you up for an amazing crust. The best part? You get a much bigger window to nail that perfect doneness.
With traditional methods, a few seconds can mean the difference between medium-rare and medium. Reverse searing is way more forgiving. Just remember - you need thick steaks for this technique, at least 1.5 inches. Thinner cuts will overcook before you know it.
Advantages over traditional cooking methods
So why choose reverse searing over the traditional method? Let's break down the real advantages you'll notice on your plate. First, you'll get perfectly even doneness throughout your steak. Traditional searing often leaves you with that disappointing gray band of overcooked meat around the edges. With reverse searing, it's pink perfection from edge to edge.
The texture is another game-changer. That slow, gentle heat gives enzymes time to naturally tenderize the meat - something that just doesn't happen when you blast a steak with high heat from the start. Plus, the gradual cooking dries out the surface, which means when you do sear, you'll get a crust that rivals any steakhouse. Moisture retention is better too. Traditional methods can squeeze out juices quickly, but the gentle approach of reverse searing keeps more of that good stuff inside your steak.
And here's the kicker - it's actually easier to get right. You've got a much wider time window to hit your target temperature, so there's less stress and better results. The trade-off? It takes longer. But trust us, the extra time is worth it for steaks this good.
Equipment needed for reverse searing
You don't need fancy equipment to reverse sear like a pro - just a few key tools that make all the difference. For the oven phase, grab a wire rack and a rimmed baking sheet. This simple setup lets air circulate around your steak, which helps dry out the surface for better searing later. No wire rack? In a pinch, you can prop the steak on some aluminum foil balls, but a rack works best.
When it's time to sear, you need a pan that can take the heat. A heavy-duty carbon steel pan is ideal - it handles extreme temperatures beautifully and develops better seasoning with each use. Cast iron works great too, or a thick stainless steel pan if that's what you've got. The one tool you absolutely can't skip? A good instant-read thermometer.
Forget the touch test or guessing by time - precision matters here. Look for a digital model that gives quick, accurate readings so you're not leaving the oven door open forever. If you're more of a grill person, no problem. Just set up two temperature zones - one cooler side for the initial cook and a hot side for searing. The same principles apply, just outdoors.
Selecting and Preparing the Perfect Ribeye
Choose a thick, well-marbled ribeye, dry-brine it overnight on a rack, and pat it bone-dry before a light oil and pepper coat to unlock steakhouse-level flavor and crust.
Choosing high-quality ribeye steaks
Select ribeye steaks with uniform thickness throughout - as we covered earlier, the reverse sear method works best with thicker cuts. Look for steaks with abundant marbling - those beautiful white streaks of fat running through the meat that melt during cooking, creating incredible flavor and juiciness. The meat should display a vibrant cherry-red color.
If you notice any steaks turning dark red, brown, or grey, skip them and keep looking. When it comes to grades, USDA Prime delivers the highest quality marbling, followed by Choice and Select - grab the best your budget allows, as the extra marbling really makes a difference with this cooking method. For larger ribeyes, you might want to trim excess external fat pockets before cooking.
This gives more surface area for seasoning to stick to the actual meat rather than fat you'll likely discard later. Keep in mind that a thick ribeye might go by various names at your butcher - Cowboy ribeye, Delmonico steak, Tomahawk steak, or bone-in prime rib roast are all excellent choices for reverse searing.
Proper seasoning techniques
Proper seasoning starts with dry-brining your steak overnight. Use about 1/2 teaspoon of kosher salt per pound - this simple step enhances flavor while helping create that perfect crust later. Place your seasoned steak on a wire rack in the refrigerator, leaving it uncovered.
This setup lets air circulate around the meat, naturally drying the exterior overnight. Just before you're ready for the final sear, pat the surface completely dry with paper towels, then coat with a thin layer of olive oil and freshly ground black pepper. This dry-brining technique works wonders because it draws out moisture, then the salt dissolves and gets reabsorbed, carrying flavor deep into the meat.
As we'll explore in the searing section, that dry exterior you've created becomes crucial for achieving restaurant-quality browning. There's no need for complicated spice blends or marinades - these fundamental techniques let the natural beef flavor shine through.
Bringing the steak to room temperature
While many traditional recipes insist on bringing steaks to room temperature before cooking, the reverse sear method actually works differently. Since you're starting with a low, gentle heat in the oven, there's no need to let your ribeye sit out on the counter.
In fact, starting with a cold steak can be beneficial - it gives you more control during the slow-cooking phase and reduces the risk of overshooting your target temperature. Simply take your dry-brined steak directly from the refrigerator, give it that final pat dry and oil coating, and place it straight into your preheated oven.
This approach saves time and actually helps maintain food safety by keeping the meat refrigerated until cooking begins. The gentle oven heat will bring the steak up to temperature evenly, which is the whole point of reverse searing.
The Low and Slow Cooking Phase
Slow-roast your ribeye at 225 degreesF on a wire rack until the center hits 110-125 degreesF--about 45 minutes for a 2-inch steak--then trust your thermometer, not the clock, to guarantee edge-to-edge pink perfection.
Setting up the oven for optimal results
Set your oven between 200-275 degreesF (93-135 degreesC) and position the rack in the center for even heat distribution [1]. Place your ribeye on a wire rack inside a rimmed baking sheet - this simple setup lets air circulate around the meat, helping develop that perfect crust later [1].
Pro tip: stick to the lower end around 225 degreesF for the most even cooking results [1]. As discussed earlier, this gentle heat works its magic on the meat's proteins while gradually drying the surface.
You'll want to keep your trusty digital thermometer handy throughout this phase - precise temperature monitoring makes all the difference between a perfect steak and one that's over or underdone [6].
Monitoring internal temperature
Here's where your thermometer becomes your best friend. Track the internal temperature carefully as your ribeye slowly cooks [7]. For that perfect medium-rare finish, pull your steak when it hits 110-125 degreesF - about 15 degreesF below your target serving temperature [7].
This buffer accounts for the heat from searing and prevents overcooking. A quality instant-read thermometer with a thin probe gives you accurate readings without losing precious oven heat [7]. Remember how we mentioned the reverse sear creates more even cooking?
That's happening right now - the center and edges are staying much closer in temperature than with traditional methods, eliminating that disappointing gray band of overcooked meat [7]. Skip the guesswork of touch tests or timing charts - your thermometer tells the real story [7].
Determining the ideal cooking time
Timing depends on your ribeye's thickness and how you like it cooked. A 2-inch thick steak typically needs about 45 minutes in the oven to reach 120 degreesF for medium-rare [8].
Here's the key: pull your steak when it's 15-30 degrees below your target serving temperature - this wiggle room accounts for the hot sear and natural carryover cooking [2]. For that perfect medium-rare (130-135 degreesF final), remove it at 110-125 degreesF [6].
Yes, this method takes longer than throwing a steak in a hot pan, but the payoff is worth it - you get consistent results every time, and that wider timing window means less stress about overcooking [8]. Plus, your kitchen won't be filled with smoke like traditional high-heat methods.
Reverse Sear Ribeye Steak: Unlocking Deep Flavor and Tenderness
Reverse-sear your ribeye to create a dry pellicle in the oven, then sear it in a ripping-hot, lightly oiled pan and butter-baste with thyme and garlic for a steakhouse mahogany crust that outperforms traditional methods.
Preparing the pan for the perfect sear
For the final sear, heat a heavy cast iron skillet, carbon steel, or thick
Achieving the ideal crust
The secret to that perfect steakhouse crust? It's all about surface preparation. As we discussed in the seasoning section, starting with a dry exterior is essential - that's why the overnight dry-brining technique works so well [1].
Your reverse-seared steak has a huge advantage here: the gentle oven phase has already created that coveted dry pellicle on the surface [1]. When your smoking-hot pan meets this prepared surface, magic happens. The proteins and sugars undergo the Maillard reaction instantly, creating those deep, complex flavors and that gorgeous mahogany crust [1].
Use just enough oil to coat the pan - too much will steam rather than sear. Let the steak sit undisturbed for the first 30-45 seconds to develop that initial crust, then check for proper browning before flipping [1]. This approach consistently outperforms traditional searing methods because you've eliminated the moisture barrier during the low-temperature phase [1].
Basting techniques for enhanced flavor
Butter basting takes your reverse-seared ribeye from great to extraordinary. After searing the first side for about 2 minutes, reduce the heat to medium-low and add 2-3 tablespoons of butter along with fresh thyme or rosemary and smashed garlic cloves [9]. Here's the technique: tilt your skillet slightly to pool the melting butter, then use a large spoon to continuously bathe the steak in this aromatic liquid gold [9].
The beauty of basting a reverse-seared steak? Since the surface is already dry, the butter immediately starts building flavor instead of fighting moisture [1]. Keep spooning that butter over the steak for 30-60 seconds per side - you'll see the crust deepen in color and develop even more complexity [9].
Save that flavorful butter mixture in the pan; you'll want to drizzle it over the sliced steak for an extra hit of richness [9].
Resting and Serving the Perfect Reverse Seared Ribeye
Skip the rest--slice your reverse-seared ribeye straight from the sizzling pan while it's still hot, then pair it with a bold Cabernet for a steakhouse-worthy dinner at home.
Importance of resting the steak
Here's the good news - your reverse-seared steak is ready to serve immediately after that final sear. While traditional cooking methods require a 5-10 minute rest to let juices redistribute, reverse searing handles this differently.
Since you already gave the steak time during the gentle oven phase, those muscle fibers have relaxed and the juices are evenly distributed throughout [10]. You can slice and serve right away while everything's still hot - no more lukewarm steak dinners [2].
If you do choose to rest it briefly (maybe while you plate your sides), even 2-3 minutes is plenty to ensure those flavorful juices stay put when you slice [10].
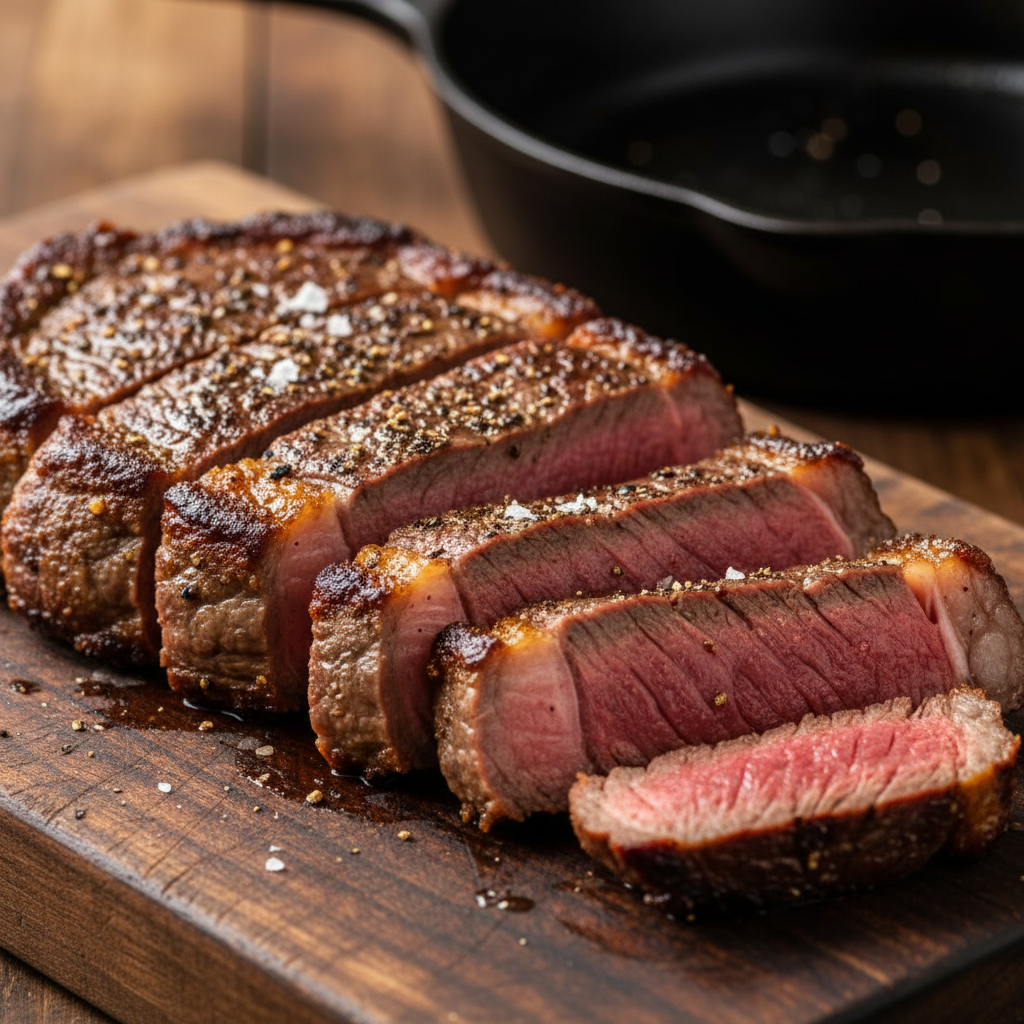
Slicing and presentation tips
When you're ready to slice, cut against the grain into even portions - this shortens the muscle fibers for maximum tenderness [11].
A sharp chef's knife makes all the difference here, giving you clean cuts that showcase the perfect pink interior.
Keep your knife properly maintained with regular
Pairing suggestions for the ultimate dining experience
Want to take your ribeye dinner to the next level? Pair it with a bold red wine that can stand up to all that beefy flavor. Cabernet Sauvignon is your classic choice - those rich, fruity notes complement the steak perfectly, while the tannins cut through the marbled fat [12].
Not a Cab fan? Try a spicy Zinfandel for something different, or go with an Argentinian Malbec for smooth, fruity notes [13]. Just remember to serve your red wine at room temperature (around 65-70 degreesF) to get the full flavor experience [13].
Round out the meal with classic sides like garlic mashed potatoes and roasted Brussels sprouts - simple, delicious, and worthy of any steakhouse [12].
- Reverse sear thick ribeye (≥1.5 in) low 225 degreesF to 10-15 degreesF below target, then sear hot for edge-to-edge pink.
- Dry-brine overnight on rack; the dried surface plus hot pan triggers fast Maillard crust without gray band.
- Pull steak at 110-125 degreesF for 130-135 degreesF medium-rare; instant-read thermometer prevents overcooking.
- No resting needed--gentle oven phase relaxes fibers so you can slice and serve immediately while hot.
- Choose USDA Prime for abundant marbling; trim external fat pockets so seasoning adheres to meat, not waste.
- Start steak cold from fridge; low oven brings it up evenly and gives a wider doneness window than room-temp starts.
- After searing, butter-baste with thyme/garlic 30-60 s per side to deepen crust and add richness.
- https://www.seriouseats.com/reverse-seared-steak-recipe
- https://jesspryles.com/how-to-cook-a-steak-with-reverse-sear-method/
- https://kosmosq.com/blogs/recipes/regular-vs-reverse-seared-steak?srsltid=AfmBOopa9wW8fGb7mw9Gq65b7R-9L1U_XHU6SCBWGPZjkoBbI2rW4_mN
- https://www.flippedoutfood.com/reverse-seared-ribeye/
- https://snsgrills.com/pages/steak?srsltid=AfmBOor7hg-gHz5UmJvXohRX3rp7joLyoowh6nm63svoYo7-yiIs9roC
- https://www.jessicagavin.com/how-to-reverse-sear-a-steak/
- https://blog.thermoworks.com/ribeye-steaks-smoked-reverse-seared/
- https://www.meatchurch.com/blogs/recipes/14684969-reverse-seared-steak?srsltid=AfmBOoqMjcKH-jNmxP0typ6VwHvs9zv551E19YLuOtXeIyBOEZiMKbUO
- https://kandmkitchenadventures.com/2021/04/18/reverse-seared-butter-basted-ribeye/
- https://chefiq.com/blogs/blog/what-is-the-reverse-sear-method-for-cooking-steak?srsltid=AfmBOoph30z8bmIWNHjvsnFIgxnHtYCuTOvflW7b5sEQi9vkEqXbWeAK
- https://www.amateurgourmet.com/blog/2023/04/reverse-seared-ribeyes.html
- https://fullglassevents.com/articles/what-wine-to-pair-with-steak-and-the-reverse-sear-cooking-method
- https://www.mychicagosteak.com/steak-university/ribeye-steak-red-wine-pairing?srsltid=AfmBOopOk1MdiKmif2iE0pKD2gqI-naoaaWD-NDrv8fuPIQjdcCc8hZ-