

Water Drop Test for Stainless Steel: 3 Heat Levels
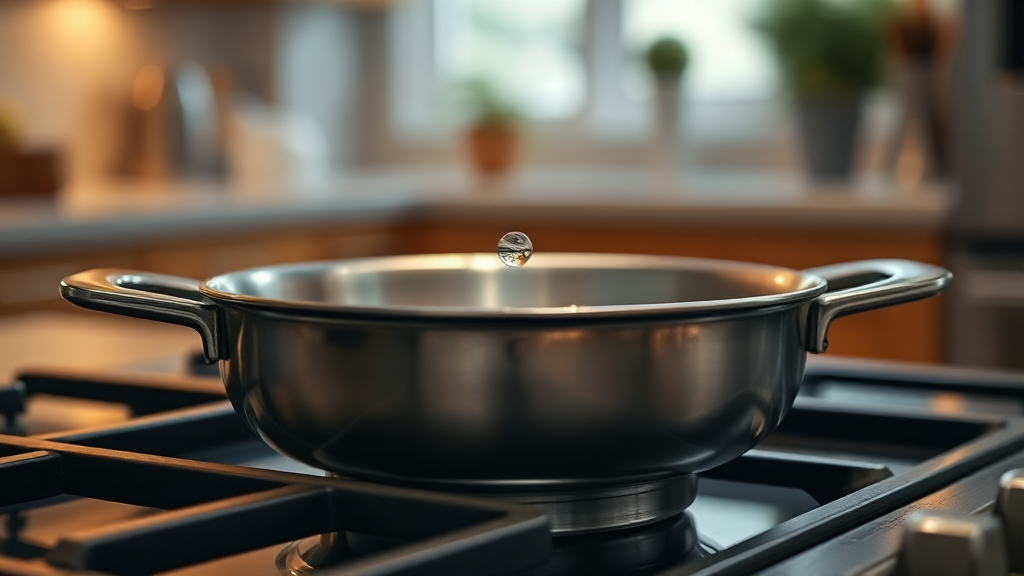
The water drop test is a reliable way to gauge the temperature of a stainless steel pan before cooking onions. By observing how a droplet behaves, you can match the heat level to your dish: low heat for softening, medium for sautéing, and high for browning.
Understanding the Water Drop Test
How to perform the test correctly
The water drop test is a quick, visual way to check whether your stainless steel pan is at the right temperature before you add food. You do not need a thermometer; you just need a few drops of water and a moment of patience. Here is the sequence that works reliably:
- Heat the empty pan. Place your dry stainless steel pan on the burner and set it to the heat level you are testing. Let it warm for about one to two minutes on medium, or until you feel the pan radiating heat[1].
- Add a single drop of water. Flick a small droplet from your fingertip or the tip of a spoon onto the center of the pan surface.
- Watch what happens immediately. The droplet's behavior tells you the temperature zone:
- Sits and bubbles slowly: The pan is not hot enough. Wait a few seconds and test again.
- Sputters and evaporates quickly: The pan is getting closer but is not yet at the searing threshold.
- Gathers into a dome and skates around: This is the Leidenfrost effect. The droplet rides on a cushion of its own steam, indicating the pan is hot enough for cooking[2].
- Shatters into tiny beads that vanish instantly: The pan is too hot. Pull it off the heat for a minute and let it cool before retesting[3].
- Wipe and add fat. Once you confirm the temperature, wipe out any remaining water with a paper towel. Then add your oil or butter. Adding fat to a cold pan breaks it down as it heats, so wait until the surface is ready[1].
This method works because stainless steel is a non-reactive surface that relies on temperature to create a natural non-stick effect. The test is more about reading the pan's response than hitting a precise number, but it gives you a consistent, repeatable cue every time you cook.
Why heat control matters for onions
Onions are mostly water, and that water content dictates how they behave on the stove. At ordinary atmospheric pressure, liquid water cannot get much hotter than its boiling point, which means wet onion slices will not brown strongly until enough moisture has evaporated[4]. If the heat is too low, the onions sit in their own liquid and steam instead of caramelizing. If the heat is too high, the edges burn before the center softens, creating a bitter taste that no amount of seasoning can fix.
Even heat distribution is just as important as temperature. A pan with a thick, conductive core spreads heat more evenly across the surface, preventing hot spots that scorch onion slices in one area while leaving others pale[5]. When onions brown gradually rather than burning in a single spot, their natural sugars develop into a deep, sweet flavor. This is the difference between a soft, sweet base for a soup and a charred, acrid mess.
Stainless steel is particularly good at this because it holds surface temperature well. Once the moisture from the onions evaporates, the pan can maintain a high enough temperature to accelerate browning without sticking[6]. The key is matching the heat level to the stage of cooking: low for softening, medium for balanced browning, and high for rapid color. Getting this right turns a simple ingredient into the foundation of a dish.
Level 1: Low Heat for Gentle Cooking
Identifying the low heat zone
Low heat is the starting point for most onion preparations. You want the pan warm enough to gently release moisture from the onions without triggering browning. Using the water drop test, the droplet will sit on the surface and bubble slowly, or evaporate with a gentle sizzle, but it will not form a skating dome[3]. This indicates the pan is below the Leidenfrost threshold, which is ideal for slow cooking.
If you are using oil, look for a subtle shimmer on the surface. The oil should move easily when you tilt the pan, but it should not smoke[7]. Smoke is a clear sign that you have moved into medium or high heat territory. For low heat, the goal is a quiet, steady warmth. You should be able to hold your hand a few inches above the pan for a full second without discomfort.
This heat level is best for dishes where you want the onions to soften completely before any color develops. It is the correct setting for mirepoix, sofrito, and the initial stage of caramelized onions. Patience is the main ingredient here; rushing the heat will cause the onions to release water and steam, which delays the softening process.
Technique for soft, sweet onions
To get soft, sweet onions on low heat, start with evenly sliced onions. Consistent thickness ensures they cook at the same rate, preventing thinner slices from burning while thicker ones remain raw[8]. Heat a thin layer of olive oil in a heavy-bottomed pan over low to medium-low heat. Once the oil is warm, add the onions and a pinch of salt. The salt helps draw out moisture, which speeds up the softening process[8].
Stir the onions every minute or two for the first ten minutes. This keeps them coated in oil and prevents them from sticking to the pan. After the initial softening period, you can reduce stirring to every few minutes. The onions will gradually turn from opaque to translucent as their cell walls break down. The time required for this stage varies based on the quantity and thickness of your slices, so focus on visual cues rather than a fixed timer.
A useful technique for this stage is to start the onions in a cold pan and let them heat up slowly with the oil. This method, popularized by chef Marcella Hazan, helps control the initial temperature and prevents the outer layers from cooking too quickly[8]. The result is a gentle, even softening that preserves the onion's natural sweetness without introducing any bitter notes.
Level 2: Medium Heat for Standard Sautéing
Recognizing the medium heat cue
Medium heat is the sweet spot for standard sautéing. It is hot enough to start browning the onions but not so hot that they burn before softening. In the water drop test, the droplet will sputter and evaporate quickly, but it will not form a stable skating dome[3]. This indicates the pan is in the 300°F to 350°F range, which is ideal for controlled browning.
If you are using oil, it should shimmer more noticeably than at low heat, and you may see a faint wisp of smoke if the pan is at the upper end of medium. The oil should move quickly when you tilt the pan, but it should not spit or crackle aggressively. If the droplet shatters into tiny beads, you have moved into high heat and should reduce the burner setting.
This heat level is where most onion cooking happens. It is the correct setting for sautéed onions, pan sauces, and the middle stage of caramelized onions. The pan should be hot enough to create a light crust on the bottom of the onion slices, which adds flavor through the Maillard reaction, but not so hot that the crust turns black.
Balancing browning and moisture
The challenge at medium heat is managing the moisture that onions release. As the onions cook, they release water, which lowers the pan temperature and slows browning. The goal is to let that moisture evaporate without burning the onions. Use a wide, shallow pan to give the moisture room to escape. A cramped pan traps steam and turns the cooking process into a stew rather than a sauté[9].
Stir the onions as infrequently as possible, just enough to prevent burning[10]. Frequent stirring releases more moisture and keeps the pan temperature down. Instead, let the onions sit in one spot for a minute or two to develop color, then stir to redistribute them. If you see brown bits forming on the bottom of the pan, add a splash of water to deglaze. This loosens the fond, which is concentrated flavor, and adds it back to the onions[10].
This deglazing step is crucial for flavor. The fond is the result of the Maillard reaction, and it adds depth to the dish. By scraping it up and stirring it into the onions, you ensure that no flavor is wasted. The onions should be tender and golden brown when they are done, with a sweet, savory taste that comes from the balance of moisture and heat.
Level 3: High Heat for Quick Browning
Detecting the high heat threshold
High heat is for rapid browning and finishing touches. It is not the right setting for starting onions, but it is useful for the final stage of caramelization or for quickly browning already softened onions. In the water drop test, the droplet will form a perfect dome and skate across the surface, which is the Leidenfrost effect[2]. This indicates the pan is above 380°F, which is deep searing territory[3].
If the droplet shatters into a swarm of tiny beads that vanish instantly, the pan is too hot. Pull it off the heat for a minute and let it cool before retesting[3]. At high heat, the oil should smoke lightly, and you should be able to feel intense heat rising from the pan. This is the zone where browning happens fast, so you need to be attentive.
This heat level is best for the final five to ten minutes of caramelized onions, when you want to push the color from golden to deep brown. It is also useful for quickly browning onions that have already been softened on low or medium heat. The key is to use it sparingly and with constant attention.
Preventing burn while achieving color
High heat is a double-edged sword. It can give you rich, deep color in minutes, but it can also turn your onions black in seconds. The secret is constant stirring and scraping. Use a heat-resistant spatula to stir the onions every 15 to 20 seconds, keeping them moving so that no single slice sits on the hot surface too long.
If you see the fond getting too dark, add a tablespoon of water to loosen it. This cools the pan slightly and prevents the fond from burning[8]. The water will evaporate quickly, and you can continue stirring. This technique, known as deglazing, is the same one used at medium heat, but it is more critical at high heat because the risk of burning is greater.
Scrape up the browned bits from the bottom of the pan and stir them into the onions. This adds flavor and ensures that the color is distributed evenly. The onions should be dark brown and tender, with a sweet, almost nutty flavor. If they start to smell acrid or taste bitter, you have gone too far. In that case, remove them from the heat immediately and use them in a dish where the strong flavor will be balanced by other ingredients.
Conclusion
Choosing the right heat for your dish
The water drop test is a simple tool that helps you match the heat level to your cooking goal. For soft, sweet onions, use low heat and let the moisture evaporate slowly. For standard sautéing, use medium heat and balance browning with moisture management. For quick browning and finishing, use high heat and stir constantly.
Here is a quick guide to help you choose:
- Mirepoix or Sofrito: Low heat. You want the onions to soften without browning.
- Sautéed Onions: Medium heat. You want a balance of softness and light color.
- Caramelized Onions: Start on low or medium heat, then finish on high heat for the last few minutes.
- Pan Sauces: Medium heat. You want to brown the onions and then deglaze with liquid.
The key is to observe the pan and adjust as needed. Stainless steel is a responsive cookware that gives you clear cues if you pay attention. Use the water drop test to check the temperature before you add the onions, and then watch how they behave as they cook. If they are releasing too much water, increase the heat slightly. If they are browning too fast, reduce the heat and add a splash of water.
With practice, you will develop an intuition for the right heat level for each dish. The water drop test is a reliable starting point, but your eyes and nose will guide you the rest of the way. The result is onions that are tender, sweet, and full of flavor, with no bitterness or burnt edges.
Frequently Asked Questions
-
How do I know if my pan is too hot for sautéing onions?
If the water droplet shatters into tiny beads that vanish instantly, the pan is too hot. Remove it from the heat for a minute and let it cool before retesting[3].
-
What is the best heat level for caramelized onions?
Start on low or medium heat to soften the onions, then finish on high heat for the last few minutes to deepen the color and flavor[9].
-
Why do onions burn on stainless steel?
Onions burn when the heat is too high, causing the edges to char before the center softens. This creates a bitter taste. Use the water drop test to ensure the pan is not above the searing threshold[3].
- A droplet that sits and bubbles slowly indicates low heat, ideal for gentle onion softening.
- A droplet that sputters and evaporates quickly signals medium heat, the best setting for standard sautéing.
- A droplet that forms a dome and skates around shows high heat, useful for rapid browning but risky if not monitored.
- https://forneau.com/en-us/blogs/news/why-food-sticks-to-your-pan-water-drop-test
- https://www.chowhound.com/2183841/stainless-steel-water-test-tip/
- https://www.heritagesteel.us/blogs/handbook/water-droplet-test-when-to-use-it
- https://edukatesingapore.com/2026/09/24/tell-me-about-cooking-how-heat-ingredients-texture-flavour-food-safety-and-recipes-work/
- https://chantal.com/blogs/recipes/does-stainless-steel-alter-flavor
- https://easternedgeflavours.com/nonstick-vs-stainless-steel-pan-guide/
- https://stainlesssteelpan.com/how-to/water-drop-test
- https://www.tastingtable.com/2201308/onions-temperature-change-bitter-fix/
- https://www.loveandlemons.com/caramelized-onions/
- https://www.masterclass.com/articles/a-guide-to-making-caramelized-onions-plus-easy-caramelized-onions-recipe