

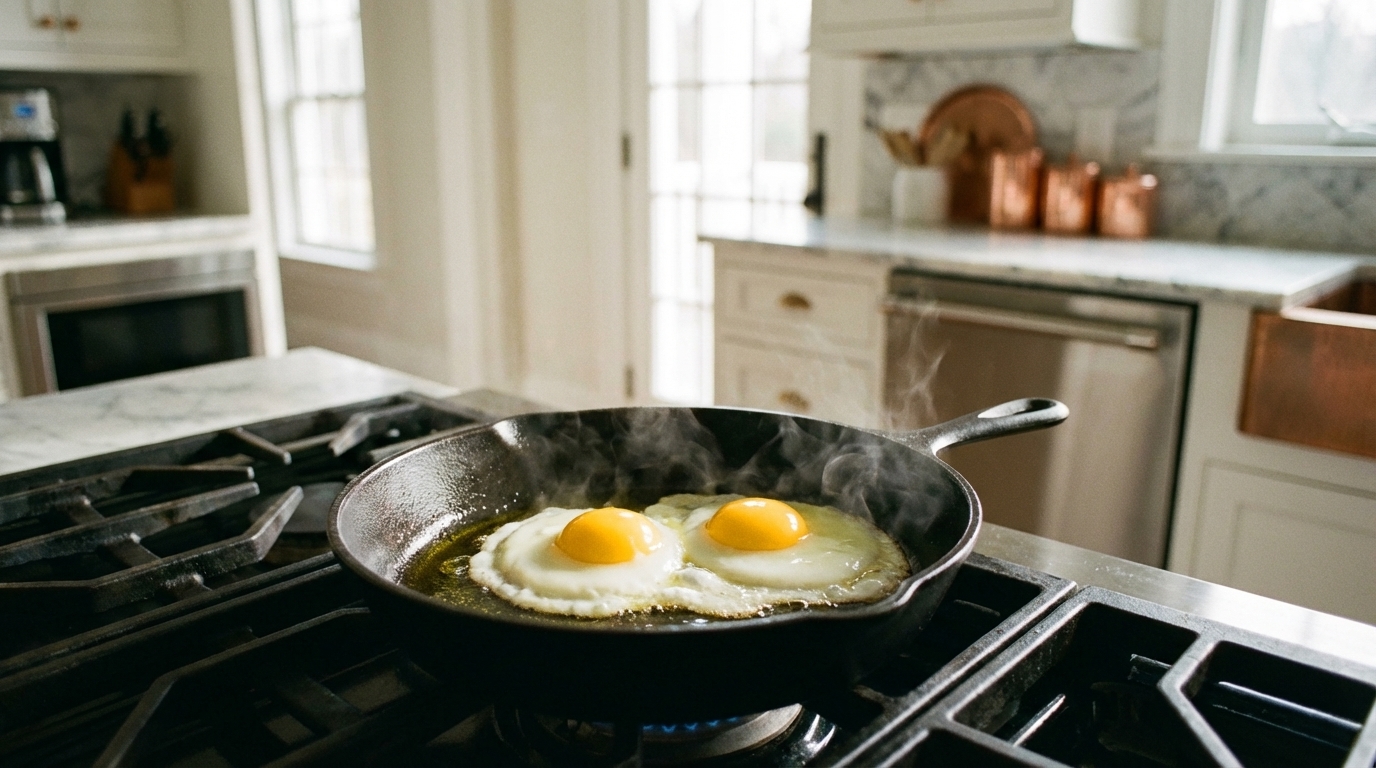
Choosing the right 8-inch pan and knowing how to use it turns two-egg breakfasts from frustrating into foolproof: the article explains how non-stick, stainless, and carbon-steel surfaces each control spread and sticking, why pre-heating to the correct temperature and using olive oil or bacon fat instantly sets the whites so they can't run, and how covering the pan off-heat uses gentle steam to finish thick, tender whites while leaving yolks runny. Readers learn that non-stick offers convenience but limited lifespan, stainless rewards patience with the Leidenfrost vapor barrier and lifetime durability, and seasoned carbon steel delivers light weight, natural low-fat release, and decades of service without micro-plastic worries. Practical fixes--scrubbing stainless with kosher salt, avoiding butter's low smoke point, and never shocking a hot non-stick pan with cold water--keep any pan cooking like new. Mastering these material, heat, fat, and timing details means consistently perfect fried eggs, less wasted oil, and pans that last years instead of months.
Material matters: Surface choices that keep whites in place
Choose your battlefield wisely: non-stick for effortless whites, stainless for lifelong whole-egg mastery with a salt-scrubbed Leidenfrost shield, or seasoned carbon steel for plastic-free, flip-friendly durability.
Non‑stick vs. stainless steel for two‑egg cooking
For two eggs, non-stick pans offer the easiest path. PTFE-coated and ceramic surfaces let eggs slide right off with minimal fat -- the coating handles the release work for you. [4] Even with non-stick, though, a touch of fat helps develop those crispy edges through the Maillard reaction and provides backup as the coating ages. [5] The downside? These coatings eventually wear out, making non-stick pans a shorter-term investment despite their convenience.
Stainless steel takes more skill but rewards you with lifetime durability. Success depends on the Leidenfrost effect -- heating the pan until water droplets dance across the surface creates an invisible vapor barrier that stops eggs from sticking. [4] Common culprits that break this barrier include pan residue, excess moisture, or too-low heat. Here's a practical fix: scrub kosher salt into your hot pan before adding oil.
This temporarily smooths out the metal's microscopic texture for better release. [4] Skip the butter for this method -- you need high-smoke-point oil since proper stainless steel temperatures will burn butter before your eggs even land. [4] One heads-up: egg whites alone will grab onto stainless steel no matter what. The yolk's natural fat content helps whole eggs glide, so save stainless for whole eggs and reach for non-stick when cooking whites solo. [4]
Seasoned cast iron and carbon steel benefits
Carbon steel brings specific advantages for egg cooking. Budget-friendly carbon steel pans often have smoother surfaces than standard cast iron, plus they're lighter -- making it easier to tilt for basting or slide eggs onto plates. [6] Both materials outlast any coated pan and won't introduce microplastics into your food as they age. [6] The tradeoff?
You'll need to maintain the seasoning. A quick oil wipe after cleaning usually does the trick, though well-seasoned pans often need nothing at all. [6] For gentle cooking, a properly seasoned carbon steel pan stays naturally non-stick at low-to-medium heat with minimal fat -- perfect when you want tender whites without crispy edges. [6] Remember, though, that your pan size matters more than material for managing oil use.
Smaller pans naturally pool fat beneath the eggs instead of letting it spread uselessly across empty space. [6]
Technique tips: Mastering the two‑egg fry without runaway whites
Preheat your carbon-steel pan to 430 degreesF with olive oil so the whites set on contact, then cover the pan off-heat to finish cooking without runaway whites or overdone yolks.
Pre‑heat, fat, and temperature timing
Temperature determines how whites behave from the moment they hit the pan. At low heat, whites cook slowly enough to stay tender without turning rubbery -- perfect for soft sunny-side up eggs where the yolk needs time to warm through. [8] Crank the temperature higher, around 430 degreesF, and the bottom of the white firms up on contact before it can spread. That instant set is exactly what keeps your whites tight and contained. [8] Your choice of fat makes a real difference here.
In a test of 42 eggs using different cooking fats, olive oil beat butter hands down for containing whites -- butter let them spread into thin, flimsy sheets, while olive oil kept whites tighter with crispier edges and better browning underneath. [7] Bacon fat took it even further, making whites fluff up around the yolk with lacy edges instead of spreading outward. [7] Here's why it works: butter contains lecithin, which helps it stick to the pan surface so eggs float on top rather than bonding to the metal. But that same slipperiness reduces friction -- if your heat isn't high enough to set whites quickly, they'll drift and spread. [8] That's why preheating matters so much. Add fat to a cold pan and it pools unevenly, dropping the surface temperature below what you need.
Give whites that opening and they'll spread before the heat can stop them. A properly preheated carbon steel pan holds temperature steady when you add cold eggs, keeping that crucial first contact hot enough to set whites on impact. [8]
Flipping, covering, and finishing tricks
The reason fried eggs are trickier than they look comes down to a temperature mismatch: whites need 180 degreesF to fully cook, while yolks start thickening at 150 degreesF and set completely at 158 degreesF. [9] Cook long enough for the whites to finish, and your yolk is already past runny. The solution?
Pull the pan off heat and cover it with a lid. Trapped steam gently cooks the egg from above while residual pan heat works from below, closing the gap between how fast whites and yolks cook. [9] You won't need to flip at all -- just perfectly set whites with a runny yolk.
Want melted cheese? Lay a slice directly on the egg before covering and it'll melt in the same pass, no extra steps needed. [9]
Care and maintenance: Keep your egg pan performing day after day
Never shock your hot egg pan with cold water, scrub it with steel wool, stack it unprotected, or use cooking spray--let it cool, gently hand-wash, buffer when storing, and rely on a quick pour of olive oil to keep its nonstick surface flawlessly smooth.
Gentle cleaning without stripping coating
The single fastest way to ruin a nonstick pan has nothing to do with cooking -- it's running cold water over a hot surface. Thermal shock warps the pan, and a warped pan loses even contact with the burner, which undermines everything the right pan size and heat management were supposed to accomplish. Let the pan cool completely first, then wash by hand with a soft sponge and mild dish soap.
Steel wool and abrasive scrubbers are off limits -- they scratch the coating and create the exact surface roughness that makes your perfectly sized 8-inch egg pan start sticking. [10] Stuck-on residue from those crispy egg edges? Here's a simple fix: add half a cup of white vinegar to some water in the pan, bring it to a brief boil, then let it cool and wipe clean. [10] One more tip that'll save your pan: skip the cooking spray. It leaves a stubborn film that builds up over time and breaks down the nonstick surface faster than regular oil ever would.
A quick pour of olive oil (remember, it gave us the best egg results anyway) will keep your pan performing like new. [10]
Proper storage and longevity hacks
How you store a cast iron or carbon steel egg pan does as much damage as how you clean it -- sometimes more. The most common mistake is stacking pans directly on top of each other, which scratches the seasoning on contact.
The fix is simple: use a buffer layer between pieces. A cotton dishcloth works great, or invest in
Conclusion
Care & maintenance: keep your egg pan performing day after day
Proper storage and longevity hacks for lasting performance
Proper storage and longevity hacks for lasting performance
How you store your egg pan matters just as much as how you cook with it. Stacking pans directly on top of one another is the fastest way to scratch a non-stick coating or dull a stainless finish, since the metal rims and handles of pans above dig into the cooking surface every time you slide one out of the cabinet. A cheap fix is slipping a paper towel, felt pan protector, or even a folded kitchen towel between each pan before stacking. It costs pennies and adds years to a coating's life.
For carbon steel and cast iron, moisture is the real enemy. Always dry your pan completely on the stovetop over low heat for a minute or two before putting it away.
Air-drying on a rack can leave trace moisture in the pores of the metal, which invites rust overnight. Once dry, a light wipe of neutral oil (a few drops rubbed in with a paper towel) keeps the seasoning supple and rust-resistant during storage, especially in humid kitchens or if the pan won't be used for a few days. Skip this step and you may open the cabinet to find dull gray spots that need re-seasoning before your next fried egg.
Non-stick pans have their own storage quirks. Hanging them on a wall rack or pot rail is ideal since it avoids pressure on the coating entirely, but if cabinet space is all you have, always store them coating-side up with a protector on top rather than nesting them coating-to-metal. Avoid tossing utensils or lids directly onto the cooking surface too; even a quick toss can create tiny abrasions that snowball into sticking problems within a few months.
Finally, resist the urge to cool a hot pan quickly by running it under cold water or setting it in a sink of water to soak.
Thermal shock can warp thin non-stick and stainless pans, and it can crack the seasoning layer on carbon steel. Let the pan cool naturally on the stovetop first, then wash and store it properly. This one habit alone prevents most of the warping and premature wear that sends people shopping for a replacement egg pan far sooner than necessary.
Gentle cleaning that preserves coating integrity
Whatever surface you've settled on for your two-egg routine, how you clean it matters just as much as how you cook on it. Non-stick coatings are the most vulnerable here: abrasive sponges, steel wool, or even the scouring side of a standard dish sponge create microscopic scratches that accelerate coating breakdown, giving whites a rough surface to grab onto instead of gliding free. Stick to a soft sponge or dishcloth with warm, soapy water, and if egg residue clings stubbornly, let the pan soak for a few minutes rather than scraping at it. The goal is to lift food away, not to polish the metal underneath.
Temperature shock is another silent threat to non-stick cookware. Plunging a hot pan straight from the stovetop into cold water for a quick rinse causes the coating to expand and contract unevenly, which over time can lead to warping and hairline cracks you won't notice until eggs start sticking in random patches. Let the pan cool to room temperature first -- it only takes a few extra minutes and can meaningfully extend the coating's working life. The same patience helps with stainless steel: washing while still hot can leave water spots and, over time, may dull the surface from repeated thermal stress.
For stainless steel, that kosher-salt scrub mentioned earlier does double duty as both a cooking aid and a light cleaning method. For tougher stuck-on bits, a paste of baking soda and water lifts residue without scratching. Avoid bleach-based cleaners, which can pit the surface over months of repeated use. Carbon steel and cast iron follow their own rulebook entirely -- skip soap altogether when possible, since it strips the seasoning layer you've worked to build. A quick hot-water rinse with a stiff brush, followed by a thorough dry over low heat and a thin wipe of oil, keeps the seasoning intact and ready for tomorrow's eggs.
Drying matters more than people expect, especially for carbon steel and cast iron, where leftover moisture invites rust spots that can pit the surface permanently. Towel-dry immediately, then set the pan on a warm burner for thirty seconds to evaporate any remaining moisture before oiling and storing. Non-stick and stainless pans are more forgiving on this front, but air-drying on a rack rather than stacking pans wet prevents trapped moisture from dulling finishes or leaving mineral spots that make future egg releases less predictable.
what size pan for 2 eggs? The 8‑inch sweet spot
Why an 8‑inch skillet delivers optimal egg‑white control
An 8-inch skillet hits the mathematical sweet spot for two eggs because it gives each white just enough room to spread and set without colliding into a single sprawling mass. Crack two eggs into a 10 or 12-inch pan and you'll watch the thin, runny portion of the whites race outward, thinning to nearly nothing at the edges while the centers stay underdone -- that's simply too much surface area chasing too little egg. Drop those same two eggs into an 8-inch surface, and the whites meet resistance almost immediately, pooling into a compact, evenly thick round that cooks through at a consistent rate from edge to yolk.
Pan geometry matters here as much as diameter. Most 8-inch skillets taper from a base of roughly 6 inches to their full 8-inch mouth, and that slight incline acts like a shallow bowl -- corralling loose whites back toward the yolks instead of letting them slide off toward the rim.
Sloped sides also make it easier to nudge stray whites back into the main body with a spatula early in the cooking process, before the proteins fully set and lock the shape in place.
Heat distribution is the other piece of the puzzle. An 8-inch cooking surface sits close enough to the burner's heat zone that most home stovetops -- gas or induction -- can maintain even temperature across the whole pan, so you don't end up with a scorched center and a pale, undercooked perimeter. Larger pans often outstrip the burner's heat ring, creating cool spots near the edges where whites turn gelatinous instead of opaque. At 8 inches, that risk mostly disappears, which is why so many recipe developers and cookware brands quietly settle on this size as their default for anything from a quick fried egg to a folded omelet for one.
Finally, consider the physical act of flipping or basting.
An 8-inch pan is small enough to maneuver one-handed, letting you tilt and swirl hot fat over the yolks for basting or execute a confident flip without the eggs sliding apart mid-air -- something that becomes far riskier once you're wrangling a heavier, wider pan. For anyone who's ever lost a yolk to an oversized skillet, that added control is reason enough to keep an 8-inch pan in permanent rotation for two-egg mornings.
How pan diameter influences heat distribution and edge containment
Pan diameter does double duty when you're cooking two eggs: it determines how much surface area your burner's heat has to cover, and it dictates how far the whites can spread before they hit a wall. An 8-inch skillet keeps both eggs close enough to the center of the heat source that the entire cooking surface reaches a consistent temperature -- no cold spots at the rim, no scorched center. Go much larger, say a 10- or 12-inch pan, and you create a wide ring of underheated space along the edges where whites pool, thin out, and turn lacy and translucent instead of setting into a cohesive round.
The sloped sidewalls of an 8-inch pan also act as a physical boundary. As the whites hit that curved wall, they climb slightly rather than continuing to spread outward, which naturally corrals the two eggs into a tidy, overlapping shape instead of two separate puddles racing for the rim. This containment effect matters most in the first thirty seconds of cooking, when the whites are still liquid enough to flow with gravity and any residual pan tilt. A too-large pan gives them nowhere to go but out, and by the time they've set, you're left trimming ragged, feathered edges instead of plating a clean double-yolk fry.
Heat distribution and containment work together here: an 8-inch diameter concentrates your stove's heat into a smaller footprint, so the pan reaches and holds cooking temperature faster and more evenly across its whole surface. That even heat means the whites set almost simultaneously from center to edge, rather than cooking unevenly with a firm middle and a still-runny perimeter. The result is a pan that does some of the timing and shaping work for you -- which is exactly why the 8-inch size has become the default recommendation for anyone frying two eggs at once.
- An 8-inch pan pools fat under two eggs, preventing runaway whites better than larger pans.
- Preheat to 430 degreesF so whites set on contact; cold pans let them spread before heat stops them.
- Olive oil keeps whites tighter than butter; bacon fat makes them fluff up with lacy edges.
- Use stainless only for whole eggs--whites alone stick; choose non-stick or seasoned carbon steel.
- After frying, cover the pan off-heat; steam finishes whites without overcooking the yolk.
- Never rinse a hot non-stick pan with cold water--thermal shock warps it and ruins performance.
- Avoid cooking spray on non-stick; it leaves a film that degrades the coating faster than oil.
- https://www.reddit.com/r/Cooking/comments/9olha9/is_there_an_ideal_pan_size_relative_to_the_number/
- https://www.solamexhome.com/your-pan-is-too-small-understanding-frying-pan-sizes-from-8-to-14-inches.html
- https://skeppshult1906.com/learn/cooking-eggs-in-the-skeppshult-egg-pan/?currency=sek&srsltid=AfmBOor-1XU-RpctcIIULHXlvCM1Y8sTuZe2Cpp5s1yysHNxxArO77E8
- https://www.nytimes.com/wirecutter/reviews/stainless-steel-egg-slide/
- https://www.seriouseats.com/best-egg-pans-8661782
- https://www.reddit.com/r/wok/comments/1l3dqpo/cast_iron_or_carbon_steel_for_cooking_eggs_using/
- https://food52.com/story/24802-how-to-fry-eggs
- https://hestancue.com/blogs/blog-recipes/how-to-cook-perfect-eggs
- https://www.americastestkitchen.com/articles/5244-for-perfectly-fried-eggs-put-a-lid-on-it
- https://food52.com/story/25458-how-to-care-for-nonstick-pans
- https://www.foodandwine.com/expert-approved-cast-iron-cookware-storage-tools-amazon-11898773
- Summary
- Material matters: Surface choices that keep whites in place
- Technique tips: Mastering the two‑egg fry without runaway whites
- Care and maintenance: Keep your egg pan performing day after day
- Conclusion
- Care & maintenance: keep your egg pan performing day after day
- what size pan for 2 eggs? The 8‑inch sweet spot
- Key Takeaways
- References