
From the rugged borderlands of Khyber Pakhtunkhwa to modern fusion tacos, this deep-dive into chicken karahi equips you to master Pakistan's iconic tomato-ginger-garlic triumph: you'll learn why a cast-iron or tri-ply kadai's curved walls and fierce, uncovered heat create the silky, oil-separated sauce that defines authenticity; how to layer bone-in chicken, crushed tomatoes, green chilies and just cumin, coriander and black pepper for maximum flavor with minimum spice rack strain; the critical bhunai reduction technique that concentrates flavors in 20-25 minutes without a lid; smart pantry swaps, lighter veggie-packed or yogurt-finished versions, and leftover reinventions like karahi pizza or breakfast scrambles; and the simple soap-free care routine that seasons your pan to last decades, ensuring every future karahi carries the smoky memories of the last.
Understanding Chicken Karahi: History and Core Ingredients
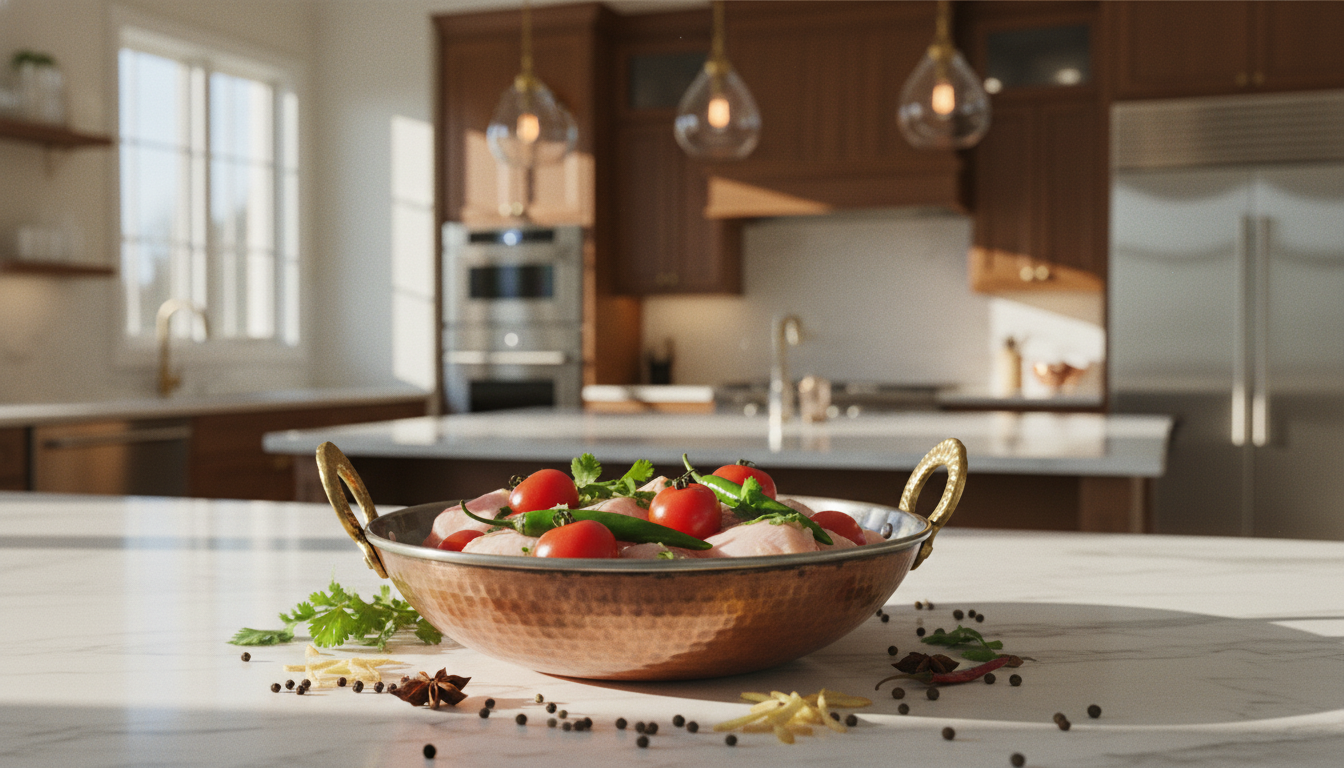
Chicken karahi builds its bold flavor on just a few essentials: tomatoes that cook into a jammy base, fresh ginger and garlic in generous amounts, and bright cilantro to finish.
Origins of Chicken Karahi in South Asian Cuisine
Chicken karahi has deep roots in Pakistan's mountainous Khyber Pakhtunkhwa province, formerly the North-West Frontier Province [1]. Born in the tribal regions near the Pakistan-Afghanistan border, this dish emerged from necessity--locals needed to cook meat quickly over open flames with just a handful of ingredients [3]. While originally made with game meat, chicken became the preferred protein thanks to its availability and quick cooking time [2].
As karahi traveled through Pakistani cities like Peshawar, Lahore, and Karachi, each region left its mark on the recipe [3]. The dish takes its name from the traditional wok-style cooking vessel--a "karahi" or "kadai"--that's essential for achieving authentic results [1]. Today, while you'll find versions throughout South Asia, the dish's Pakistani Pashtun origins shine through in every bite [1][3].
Key Ingredients That Define the Dish
At its heart, chicken karahi is beautifully simple. Fresh tomatoes form the foundation--they cook down into a thick, jammy base that defines the dish [4]. Skip the onions entirely; traditional karahi gets its pure, tomato-forward taste without them [4].
What really makes this dish sing? Generous amounts of fresh ginger and garlic--we're talking entire garlic bulbs and hefty chunks of ginger [4]. Add fresh green chilies for immediate heat and black pepper for warmth without the burn [5]. The spice blend stays minimal: just cumin, coriander, and maybe garam masala, letting those core flavors shine [5].
For the finishing touch, julienned raw ginger and fresh cilantro add brightness that cuts through the rich sauce [4]. While modern versions might include yogurt or extra vegetables, the magic of authentic karahi comes from this focused ingredient list--proof that sometimes less really is more [4].
How Regional Styles Influence Flavor
Travel across South Asia and you'll discover karahi takes on local character wherever it lands. Pakistani versions stay true to thick, spicy tomato-based sauces perfect for scooping with naan or roti. Head to Punjab and you'll find butter or cream adding richness [2]. Cross into North India and the heat mellows out, with yogurt taking a starring role [2].
But in Khyber Pakhtunkhwa--karahi's birthplace--cooks keep things pure. No onions, just that intense tomato base loaded with ginger and garlic, letting the chicken's natural flavor shine through simple spices [6][4]. Even cooking methods vary by region: some swear by slow-cooking for depth, others crank up the heat for intensity [2]. These regional touches make each version unique while keeping karahi's soul intact.
Why Chicken Karahi Remains a Kitchen Staple
What keeps chicken karahi on dinner tables across South Asia generation after generation? It's more than just taste. In Pakistani homes, karahi brings families together--the centerpiece of weekly traditions and celebrations [4]. That incredible aroma drifting through the house? It's the dinner bell that needs no ringing, drawing everyone to the kitchen before the first bite [8].
Every spoonful delivers layers of flavor: warming heat from dried chiles and black pepper, the sharp kick of fresh green chiles, that sweet-hot combo of cooked and raw ginger, all cooled by fresh cilantro [7]. Here's the beautiful part--despite these complex flavors, you don't need chef-level skills or exotic ingredients. A handful of basics and straightforward technique gets you there [4].
The magic lies in karahi's flexibility. Each cook can make it their own while respecting tradition, whether you're working with a traditional karahi pan or a trusty
Essential Kitchen Tools: Choosing the Right Kadai for Karahi Cooking
Cast iron kadais develop better flavor through seasoning and heat retention, while stainless steel offers easier maintenance and works well with tomato-based dishes.
Material Choices: Cast Iron vs Stainless Steel Kadai
Let's talk materials - your choice directly impacts your karahi's flavor and texture. Cast iron kadais excel at heat retention and distribution, crucial for developing those deep, concentrated flavors that define authentic karahi [9]. When properly seasoned, they develop a natural non-stick surface that actually improves with each use. Plus, that seasoning adds subtle flavor complexity you won't get from other materials [9].
Stainless steel kadais bring different strengths to the table. They're non-reactive with tomatoes (your main karahi ingredient), won't scratch easily, and require minimal maintenance [9]. The trade-off? They're lighter and easier to handle but don't hold heat as effectively, which can affect how well your sauce reduces and concentrates [9].
Here's what we recommend: If you're after authentic flavor and don't mind the extra care, go with cast iron. Want something more practical for everyday cooking? A quality stainless steel kadai offers excellent balance between performance and convenience [9].
Size and Shape Considerations for Home Cooking
When preparing authentic chicken karahi at home, the size and shape of your cooking vessel significantly impact the final dish. The karhai (or kadhai) is not merely a cooking tool but the namesake of this beloved South Asian dish, described as a "deep, circular-shaped cooking vessel" commonly used throughout South Asian cooking [10]. This traditional vessel resembles a wok and is specifically designed for the concentrated cooking technique required for karahi dishes.
The wok-like design distributes heat evenly--critical when cooking bone-in chicken pieces, which are recommended over boneless for authentic preparation [10]. The vessel's shape accommodates the extended high-heat cooking time (approximately 20-25 minutes) that develops the dish's characteristic intense flavors [10]. While specific dimensions vary, the karhai must be sized appropriately for your typical serving needs while ensuring proper heat circulation.
For home cooks seeking to replicate restaurant or street-style karahi, this specialized cookware is considered "essential for the cooking process," with the source emphasizing that "you have to use it, simply" [10]. Attempting to prepare this dish in standard pots significantly compromises its authenticity, as the distinctive shape directly influences cooking dynamics and flavor development.
Budget‑Friendly Options Without Compromising Durability
You don't need to break the bank for a quality kadai - just know what to look for. Stainless steel options typically run ₹1,000-2,900, and while that's more upfront, they'll outlast cheaper alternatives by years [11]. Cast iron costs more initially but think long-term: with proper care, it's the last kadai you'll ever buy [11].
Smart shopping tip: Look for triply construction (aluminum core between stainless steel layers). You'll get professional-grade heat distribution at mid-range prices, plus it works on all cooktops including induction [12]. Skip the brand names and focus on construction quality - thick walls, solid handles, and even weight distribution matter more than logos [11].
Here's the real cost consideration: Those tempting ₹800 non-stick kadais need replacing every few years, while quality stainless or cast iron lasts decades [12]. Watch for online sales and seasonal discounts to score premium materials at better prices. Remember, a good kadai is an investment in years of excellent karahi [12].
Maintaining Heat Distribution for Consistent Results
Getting heat distribution right makes or breaks your karahi. The kadai's curved shape is designed for this - the wide top lets moisture escape while the rounded bottom focuses heat exactly where you need it [10]. This design feature is why traditional kadais work so much better than regular pans for this dish.
Quick heat management tips for perfect results:
- Keep heat consistently high when cooking chicken to prevent water release [4]
- Skip the lid entirely - covering traps moisture and ruins that concentrated sauce
- Rotate your kadai occasionally on modern stovetops for even cooking [13]
- Watch your oil temperature - it should shimmer, not smoke [13]
During the tomato reduction phase, moderate your heat just enough to prevent scorching while maintaining steady evaporation [13]. The specific techniques for timing heat adjustments are covered in detail in the cooking method section below [4].
Mastering the Technique: Step‑By‑Step Chicken Karahi Method
Bone-in chicken thighs seared in shimmering oil build the deepest flavor, while keeping the heat high and pan uncovered concentrates your sauce into that addictive, thick base.
Preparing the Chicken: Trimming and Marinating Basics
Start with curry-cut chicken--that's a whole chicken chopped into 1.5-inch pieces. Go for bone-in pieces if you want the juiciest results, since bones help keep the meat tender during high-heat cooking [14]. Trim off excess fat, but keep a bit for flavor.
Here's a tip: traditional karahi skips marination entirely, but if you've got time, a yogurt marinade works wonders. Mix thick yogurt with your spices and let the chicken soak it up--this tenderizes tougher cuts and adds another layer of flavor [14]. Not essential, but definitely worth it if you're working with larger pieces [4].
Chicken thighs are your best bet thanks to their higher fat content, though breast meat works if you prefer lean. Just know it'll be slightly drier [4]. Want convenience? Boneless pieces are easier to eat, but you'll miss out on the rich flavor that bones bring to the dish [4].
Building the Sauce: Sauté, Deglaze, and Simmer Steps
Heat your oil until it shimmers--hot but not smoking. Drop in your chicken pieces and let them sizzle, building that crucial first layer of flavor [15]. Now add your fresh tomatoes (plum tomatoes work great) along with green chilies [15][17]. This is when you add your spice trinity: chile powder, red pepper flakes, and black pepper. Let them bloom in that hot oil [15].
Watch as the tomatoes break down into a thick, jammy base. You'll know you're on track when the oil starts separating from the sauce--that's your cue that the flavors have concentrated properly [15]. Some restaurants sneak in a splash of cream here. It's not traditional, but honestly? It adds a luxurious richness that's hard to resist [16].
Remember: keep the heat high and never cover your pan. You want reduction, not steaming. This technique concentrates all those flavors into the thick, intense sauce that makes karahi so addictive. A quality stainless steel pan holds heat beautifully for this high-temperature cooking.
Timing the Heat: When to Crank Up or Lower the Flame
Here's your heat roadmap for perfect karahi:
Start hot--really hot. That initial sear locks in the chicken's juices and prevents watery sauce [4]. Keep that lid off throughout cooking. Trapped steam is the enemy of concentrated flavors.
When your tomatoes hit the pan, maintain high heat and stir constantly to break them down. Now comes the waiting game: let everything reduce for 20-25 minutes, adjusting heat as needed. You'll see the magic moment when oil separates and rises to the surface, especially around the edges [18]. Pakistani cooks call this the "bhunai" phase--8-15 minutes of uncovered, high-heat cooking that transforms your ingredients [18].
After adding fresh ginger and herbs, one more blast of high heat (about 5 minutes) releases their oils without cooking them to death [18]. Pro tip: some chefs swear by a final 5-minute rest on low heat with the lid on, letting flavors mingle before serving [18].
Patience pays off here. Rush the heat or go too gentle, and you'll end up with watery disappointment instead of that rich, concentrated sauce that makes karahi legendary. As covered in our kadai section, proper heat distribution makes all the difference.
Final Touches: Garnish and Serving Tips
Time for the finishing touches that transform good karahi into unforgettable karahi. Once your sauce reaches that perfect thick, glossy consistency, kill the heat before adding garnishes.
Scatter julienned ginger over the top--it brings a bright, spicy punch that cuts through all that richness. Fresh cilantro adds color and a cooling herbal note [19]. Just toss these once right before serving to keep them fresh and vibrant.
Here's a crucial step many skip: taste before garnishing. Adjust salt or spices now--this final tweak ensures everything's perfectly balanced [19].
Serve with rice if you want something mild, or go traditional with roti or naan. The bread's perfect for scooping up that concentrated sauce [19]. It's this contrast--hot, intensely spiced karahi against cool, fresh herbs--that creates the layers of flavor we detailed in the spices section.
Flavor Building Blocks: Spices, Herbs, and Balance
Build depth through restraint by layering black pepper, fresh green chilies, and red chili powder alongside generous garlic and ginger rather than loading your spice cabinet.
Core Spice Blend for Authentic Chicken Karahi
Authentic chicken karahi gets its concentrated flavor from a surprisingly simple spice blend. Start with crushed black pepper as your foundation--it delivers that distinctive warming heat without the sharp burn you'd get from chili powder alone [4]. Add fresh green chilies for brightness and immediate heat, plus a measured amount of red chili powder or Kashmiri chili for color and deeper flavor [4].
Your base aromatics are straightforward: just 1-2 teaspoons each of cumin and coriander. That's it. Skip the turmeric--authentic karahi gets its color from tomatoes and chilies, not added colorants [4]. These spices work best when they have room to shine alongside generous amounts of fresh garlic and ginger (we're talking entire bulbs and substantial chunks, as covered in Section 1) [4].
Regional styles do vary--northern Pakistani versions keep things pure and simple, while Indian adaptations sometimes add extra warming spices [20]. But what makes karahi special is this restraint. You're creating depth through proper cooking technique, not by dumping in every spice in your cabinet [4].
Balancing Heat: Chilies, Pepper, and Aromatics
Here's how to build karahi's signature heat: layer different heat sources for complexity. Use dried chili powder for background warmth and fresh green chilies for that bright, immediate kick [19]. Black pepper brings its own warming quality--different from the sharp burn of chilies.
Make your garlic-ginger paste by crushing both together until they form a cohesive mixture. This isn't just for flavor--it actually helps moderate how you perceive the heat [19]. When cooking, bloom this paste in your hot
Fresh Herbs vs Dried Herbs: Impact on Flavor
Fresh versus dried herbs? The choice matters more than you might think. Fresh herbs give you those bright, aromatic notes that make karahi sing--especially the cilantro and mint used for finishing [21]. Dried herbs pack more concentrated flavor thanks to their intensified oils, but you'll need less--about one-third the amount (1 teaspoon dried for every 3 teaspoons fresh) [23].
Timing is everything here. Add dried herbs during the main cooking phase so they have time to hydrate and infuse properly. Save fresh herbs for the end to preserve their delicate flavors [21]. Some herbs just don't work dried--cilantro and mint lose their magic completely, so always use fresh for garnishing [23].
For best results: use dried cumin, coriander, and garam masala during cooking for consistent background flavor. Fresh ginger, garlic, and cilantro bring those bright top notes that make great karahi [21]. Pro tip: rub dried herbs between your palms before adding them--this releases the trapped oils and wakes up their flavor [23].
Adjusting Salt and Acidity for a Perfect Finish
Getting salt and acidity right transforms good karahi into something exceptional. Add salt early with the tomatoes--this builds flavor throughout cooking instead of just sitting on top [24]. Hold off on acid adjustments until you add the garam masala near the end.
Fresh lemon juice works better than lime here--it brightens without the bitterness some people get from lime [24]. Added too much acid? Don't reach for more salt. A tiny pinch of sugar brings everything back in balance [24]. Remember, tomatoes already bring plenty of acidity, so taste before adding more sour elements [24].
Here's a finishing secret: crush dried fenugreek leaves (kasuri methi) between your palms just before serving. This adds a subtle complexity that ties the salt and acid together perfectly [24]. Your final taste check should reveal layers of flavor--complex but not overwhelmingly salty or sour [24].
Planning to serve with raita? Bump up both salt and acidity slightly in your karahi since the cooling yogurt will mellow these flavors when eaten together [24].
Variations and Modern Twists on Classic Chicken Karahi
Swap boneless chicken for bone-in pieces, use canned tomatoes, and rely on pantry staples like cumin and chili powder to make authentic chicken karahi on busy weeknights.
Quick Chicken Karahi with Pantry Staples
Let's make chicken karahi work with what's in your pantry right now. Swap bone-in chicken for boneless pieces--they'll cook faster on busy weeknights while still soaking up those bold flavors [25]. Out of fresh tomatoes? Grab that can of crushed tomatoes from your pantry for an equally delicious base [27].
For spices, keep it simple. Black pepper, cumin, coriander, and chili powder deliver authentic karahi flavor without requiring a special shopping trip [26]. Don't have a traditional karahi? Your trusty skillet or Dutch oven works perfectly well [26].
Health‑Focused Version: Less Oil, More Veggies
Want to enjoy karahi without the guilt? Here's how to lighten it up while keeping all that incredible flavor. Cut your oil down to just one-third of what traditional recipes call for--you'll still get proper spice searing without the excess [4]. Those tomatoes you're using? They'll release plenty of natural moisture to keep everything juicy.
For a leaner protein option, try boneless chicken breast instead of thighs. Just keep that heat high during cooking to lock in tenderness [28]. Now here's where it gets interesting--load up on vegetables. Bell peppers bring natural sweetness, spinach melts right into the sauce, and cauliflower becomes a flavor sponge for all those spices. Toss these veggies in during the last 5-7 minutes to keep them vibrant and nutrient-packed.
The key to success? Stick with the traditional bhuna method (as covered in our technique section). High heat, no added water--let those tomatoes and vegetables create their own sauce [28]. This technique ensures your spices develop deep flavor even with less oil. For a creamy finish without the calories, swap that final oil drizzle for a spoonful of yogurt. You'll get richness plus gut-healthy probiotics.
Fusion Ideas: Chicken Karahi Tacos or Pasta
Ready to take your karahi global? Its bold tomato base and concentrated spices make it perfect for fusion experiments. For karahi tacos, cook your chicken the traditional way--with tomatoes, ginger-garlic paste, green chilies, black pepper, and garam masala [29]. Once that oil separates (you know you've nailed it), shred the chicken and pile it into warm tortillas. Top with fresh cilantro and julienned ginger, then add a cooling dollop of raita or tzatziki for that hot-cool contrast fusion tacos do so well [30].
The secret to great fusion? Keep these three essentials from traditional karahi: lots of tomatoes, generous aromatics, and that concentrated cooking method that builds incredible depth [29]. Tacos work brilliantly here because they naturally balance savory proteins with acidic elements and fresh garnishes--exactly what makes karahi sing [30].
Want karahi pasta instead? Use that same flavorful base, then fold in al dente pasta right at the end. The pasta soaks up all those concentrated flavors while adding satisfying texture. Think of it as East meets West in the most delicious way possible.
Using Leftovers Creatively in New Meals
Don't let those karahi leftovers go to waste--transform them into something completely new. Here's a game-changer: spread that leftover chicken over naan or flatbread for an instant gourmet pizza. Mix some karahi sauce into your pizza sauce for extra depth, pile on cheese and veggies (onions and bell peppers work great), then bake until bubbly. A final drizzle of garlic mayo ties it all together [31].
Taco Tuesday gets a Pakistani twist when you stuff those shells with leftover karahi. Add your favorite taco fixings--guacamole, garlic mayo, lettuce, cheese, and hot sauce--for a fusion feast that'll have everyone asking for the recipe [31].
My personal favorite? Morning karahi scramble. Fold that shredded chicken and its concentrated sauce right into your eggs for a protein-packed breakfast that beats plain scrambled eggs any day. These creative leftover ideas do more than prevent waste--they give you exciting new meals without extra cooking effort.
Caring for Your Kadai and Maintaining Quality Cooking Gear
Skip soap when cleaning your kadai--just use warm water and a soft cloth to preserve the natural oils that build seasoning and improve cooking over time.
Cleaning a Seasoned Kadai Without Stripping Flavor
You'll want to clean your kadai in a way that preserves the natural oils and flavors that build up over time. Here's the good news--skip the soap! It strips away that valuable patina (the natural oil coating) that gives your kadai its non-stick properties and adds depth to your dishes [32]. Just rinse with warm water and use a soft cloth or brush to remove food particles.
Got stubborn bits stuck on? Add a splash of hot water to your kadai and heat it briefly--this loosens everything up for easy wiping [32]. Remember, the high heat from cooking already sterilizes the surface, so soap really isn't necessary [32]. For those really stuck-on pieces, try gently heating the kadai to make removal easier [32]. A metal scraper works great for tough spots without harming your seasoning--just steer clear of harsh scouring pads that could damage the patina [32].
Once clean, dry your kadai right away with a clean cloth to prevent rust, then rub in a thin layer of cooking oil to maintain that beautiful seasoning [32]. Pro tip: tuck a paper towel inside before storing to catch any moisture [32].
Re‑Seasoning Tips for Long‑Term Performance
Your kadai gets better with age--developing flavors that make each karahi taste even more authentic. But when food starts sticking or cooking unevenly, that's your cue to re-season.
Start by cleaning your kadai thoroughly, then heat it until it's completely dry. Now apply a thin, even coat of cooking oil all over--inside and out [33]. Heat your oiled kadai over medium flame until you see a bit of smoke. This opens up the metal's pores to absorb the oil properly. Let it cool completely, then wipe off the excess oil with a paper towel, leaving just a barely-visible film [33].
Acidic dishes like tomato-based chicken karahi can wear down seasoning over time, so this maintenance is especially important after cooking them [33]. If you're making spice-heavy dishes regularly, monthly re-seasoning keeps your kadai performing at its best. Here's the beautiful thing--every time you cook traditional karahi with its rich spices and concentrated technique, you're actually adding flavor layers to your cooking surface [33]. It's like your kadai has memory!
Storing the Cookware to Prevent Rust and Damage
Smart storage keeps your kadai rust-free and ready for your next cooking adventure. After cleaning and drying thoroughly (crucial step!), slip a paper towel inside to catch any lingering moisture [34]. This simple trick protects the metal surface from rust--especially important since kadais are "thick, circular, metal cooking pots, similar to a wok" that need proper care [34].
If you're making chicken karahi regularly, good storage habits help maintain that seasoning between uses, preserving those built-up flavors. Find a dry spot in your kitchen cabinet, away from any humidity sources. Your kadai works hard for "curries, sautéing vegetables, and especially deep frying," so it deserves careful storage to keep performing well [34].
Trust us--taking a few extra seconds to store your kadai properly means it'll reward you with authentic flavors every time you fire up that next batch of karahi [34]. Consider investing in quality storage solutions to protect your valuable cookware.
When to Upgrade: Signs Your Kadai Needs Replacement
Knowing when to say goodbye to your kadai keeps your cooking safe and your karahi delicious. For cast iron pieces, if you're seeing deep rust that won't budge even with vinegar and baking soda treatments, it's time [35]. A warped or cracked bottom is another dealbreaker--you need even heat distribution for proper karahi cooking [35].
With stainless steel kadais, watch for corrosion spots that keep coming back after cleaning. This means the protective layer has failed [35]. Safety first--loose or broken handles make handling a hot, heavy kadai dangerous [35].
Non-stick kadais need replacing when you spot significant scratches exposing the metal underneath. These can release harmful substances during the high-heat cooking karahi demands [35]. If food sticks constantly despite proper seasoning and oil use, your cooking surface has had it [35].
Bottom line? A well-maintained kadai should last for years. But when these issues pop up and start affecting your cooking or safety, it's time to upgrade [35]. Quality cookware is an investment in better meals and safer cooking.
- Karahi originated in Pakistan's Khyber Pakhtunkhwa, using only tomatoes, ginger, garlic, chilies and minimal spices.
- Use bone-in chicken, high heat, no lid, and cook until oil separates for the concentrated sauce.
- Cast iron kadai gives best flavor; stainless is low-maintenance but heats less evenly.
- Layer heat with black pepper, fresh and dried chilies; skip turmeric and onions for authentic taste.
- Re-season cast iron after acidic dishes; clean without soap and store dry to prevent rust.
- https://en.wikipedia.org/wiki/Chicken_karahi
- https://foodrecipepp.muragon.com/entry/17.html
- https://www.karakoramrestaurant.com/blog/karahi-story-and-history-a-purely-pakistani-culinary-treasure
- https://fatimacooks.net/chicken-karahi-recipe-pictures-tips-authentic/
- https://www.177milkstreet.com/recipes/pakistani-chicken-karahi-spicy-tomato-chicken-curry
- https://chefcookingresort.com/the-ultimate-guide-to-chicken-in-pakistani-cuisine-a-flavorful-expedition-across-regions/
- https://www.americastestkitchen.com/articles/6095-chicken-karahi-is-a-feeling
- https://www.sliceofculture.com/a-pakistani-recipe-chicken-karahi/
- https://sonucookware.com/blogs/news/how-to-choose-a-kadai-for-cooking
- https://kitchenofdebjani.com/2024/01/karahi-chicken-restaurant-style-kadai-chicken-recipe/
- https://misen.com/blogs/news/everything-you-need-to-know-about-kadai-types-uses-and-care?srsltid=AfmBOorpF4rqof6_ERhTevREvufCr2l8552r6M-ah0REe0s3RL1r7ebq
- https://shop.ttkprestige.com/blog/post/buying-guides/how-to-choose-the-perfect-kadai?srsltid=AfmBOorU9vnPfZf8A85gsH-0uxKBKx04gCRNYnhV5oh9YFVp_naw8zyQ
- https://www.indianhealthyrecipes.com/kadai-chicken/
- https://myfoodstory.com/karahi-chicken/
- https://www.americastestkitchen.com/recipes/15176-chicken-karahi
- https://glebekitchen.com/karahi-chicken-indian-restaurant-style/
- https://www.foodnetwork.com/recipes/chicken-karahi-recipe-1939492
- https://rookiewithacookie.com/chicken-karahi-recipe/
- https://cookwell.com/recipe/pakistani-chicken-karahi
- https://www.emmasroadmap.com/pakistani-chicken-karahi-recipe/
- https://jillhough.com/fresh-herbs-dried-herbs-which-to-use-when-and-why/
- https://www.mccormick.com/blogs/how-to/settling-the-dried-herb-vs-fresh-herb-debate-once-and-for-all
- https://cucina-antica.com/blogs/blog/37132037-dry-herbs-vs-fresh-herbs-advice-from-chef-neil
- https://pipingpotcurry.com/chicken-karahi/
- https://www.teaforturmeric.com/chicken-karahi/
- https://ikneadtoeat.com/easy-chicken-karahi-recipe/
- https://kellyscleankitchen.com/2024/02/01/chicken-karahi/
- https://theshaziablog.com/chicken-karahi/
- https://www.foodfusion.com/recipe/highway-style-afghani-chicken-karahi/
- https://lineupcook.com/blog/fusion-taco-dinner-recipes-global-flavors
- https://www.kannammacooks.com/how-to-season-your-iron-dosa-pan/
- https://www.sonisfood.com/2016/02/karahi-chicken.html
- https://ministryofcurry.com/chicken-karahi/
- https://www.cookut.com/en/blog/how-often-should-you-replace-your-pots-and-pans-