
Learn how to clean your oven effectively using natural ingredients like baking soda and vinegar while avoiding harsh chemicals. Regular maintenance every three to six months keeps buildup manageable and makes deep cleaning faster and easier.
Preparing for Oven Cleaning
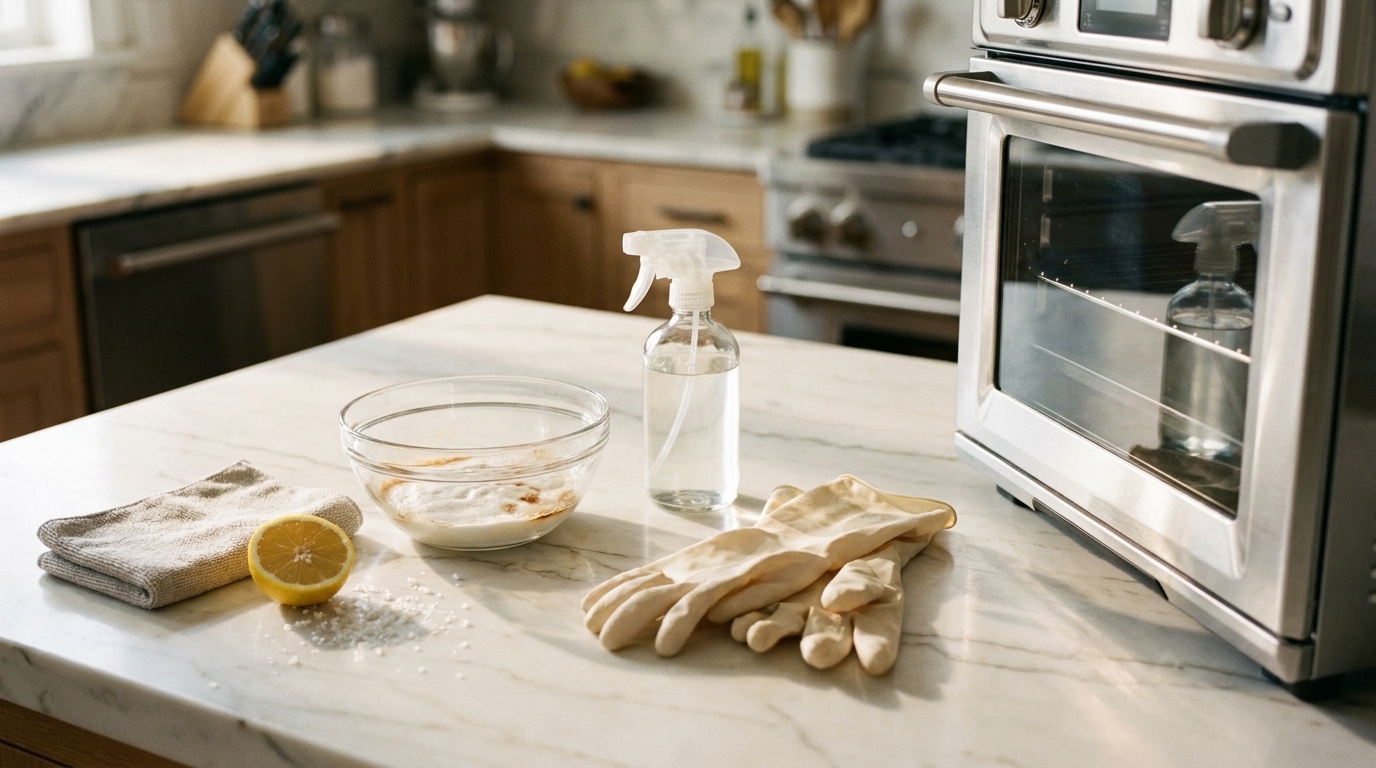
Gather baking soda, white vinegar, rubber gloves, and microfiber cloths before opening your oven door to keep the process efficient and safe.
Gathering necessary supplies and materials
Before you start cleaning your oven, gather everything in one place: baking soda, white vinegar in a spray bottle, a rubber or plastic spatula, a kitchen sponge or natural-fiber scrub pad, and microfiber cloths [1]. If you want a faster process, a plant-based degreaser and a mineral-based abrasive powder can replace the baking soda and vinegar combination with comparable results [2].
Skip commercial oven cleaners -- they contain chemicals like sodium hydroxide and butoxydiglycol that can cause skin burns and respiratory irritation, and they leave behind residues that produce odors the next time you use your oven [1]. Having your supplies staged before you open the oven door keeps the process efficient and avoids any mid-task scrambling.
Safety precautions and protective gear
Even with natural cleaning agents like baking soda, wearing rubber gloves is worth it -- baking soda paste can dry out skin during longer cleaning sessions, and any contact with stronger cleaners can cause redness, peeling, and burns. [3] If you reach for any commercial cleaner, safety glasses and a face mask become non-negotiable, since fumes can irritate airways and cause coughing or shortness of breath even at brief exposure levels. [3] Ventilation matters regardless of what you're using: open a window or run your range hood fan before you start and keep it going throughout the process. [4] Children and pets should stay out of the kitchen until you've finished wiping and the space has fully aired out. [4]
Removing oven racks and loose debris
Pull out all oven racks before applying any cleaner -- this applies whether you're cleaning manually or running a self-cleaning cycle. [5] High self-clean temperatures (some reach 900 degreesF) can warp or discolor racks that are built for normal cooking heat, not sustained extreme heat. [5] Once the racks are out, use a damp sponge or cloth to wipe away loose crumbs and grease from the oven floor and walls before adding any cleaning solution. [5] This keeps loose debris from turning into a muddy paste mid-clean, which makes every step after it noticeably faster.
Natural Cleaning Solutions
Baking soda paste, vinegar spray, and alternatives like hydrogen peroxide or lemon juice tackle oven grime without synthetic chemicals.
Creating a baking soda paste
Mix one cup of baking soda with two tablespoons of water until you have a thick, spreadable paste -- double the batch for larger ovens. [6] To boost grease-cutting power, replace one tablespoon of water with one tablespoon of dish soap that contains a degreaser. [6] Baking soda and vinegar shouldn't be combined directly into the paste -- the two work better applied in sequence, with vinegar used as a follow-up spray after the paste has done its job. [7] Keep the paste away from heating elements and gas vents to avoid damaging those components. [6]
Mixing vinegar and water solution
White vinegar for oven cleaning doesn't need to be diluted -- pour it directly into a spray bottle and apply it undiluted. [8] Once you've wiped away the bulk of the baking soda paste, spritz vinegar over any remaining residue; it reacts with the leftover baking soda and foams gently, which loosens what the paste didn't fully dissolve. [8] One combination to avoid: don't mix vinegar with bleach, hydrogen peroxide, rubbing alcohol, or ammonia -- use it on its own. [8] If you run out of white vinegar, citric acid powder works as a substitute: dissolve one tablespoon in one cup of hot water, spray it on greasy surfaces, and let it sit for at least 30 minutes before wiping. [9]
Alternative eco-friendly cleaning agents
Options beyond baking soda and vinegar include hydrogen peroxide, lemon juice, and salt -- all of which cut oven grime without synthetic chemicals. A blend of 3 tablespoons baking soda, 1 tablespoon hydrogen peroxide, and 1 tablespoon liquid dish soap ranked as the runner-up in an eight-cleaner comparison test, making it a reliable backup when baking soda alone isn't breaking through heavy buildup [10].
Lemon juice combined with cornstarch and a small amount of dish soap can handle moderate grease as well, though it requires heating the mixture to thicken before application [10]. For light surface residue, rubbing half a lemon dipped in salt directly across the oven floor gives mild abrasion without any prep work [10].
How to Clean Your Oven: A Complete Step-by-Step Guide
Let the baking soda paste sit overnight to soften burnt-on residue, then wipe and spray with vinegar for a final clean.
Applying the baking soda paste
Spread the baking soda paste across all interior surfaces -- walls, base, and door glass -- using gloved hands or a spatula to work it into corners and heavily soiled spots. [8] Gloves give you more control than a sponge for reaching tight areas, and they keep grime from getting under your nails during a longer application. [8] The paste will darken and turn brownish as it makes contact with grease -- that's expected; focus on even coverage and apply a thicker layer anywhere buildup is heaviest. [8] Keep the paste clear of heating elements and gas vents, since contact with those components can cause damage. [7]
Letting the solution sit overnight
The baking soda paste needs at least 12 hours to work through grease and loosen burnt-on residue -- overnight is the standard. [8] The longer it sits, the more it softens what's stuck, which translates directly to less scrubbing on your end. [11] Leaving it on before bed means you can wipe it down first thing in the morning; starting in the morning means planning the wipe-down for late afternoon or evening. [7] While the paste works, use the time to soak your oven racks separately so both are ready to reassemble at the same time. [8]
Wiping and rinsing the oven interior
Start with a damp cloth or sponge to wipe out as much dried baking soda paste as possible -- a plastic or silicone spatula helps lift residue from corners and tight spots where cloth can't reach. [8] Spray white vinegar over any remaining baking soda residue; it foams on contact, which loosens what the cloth didn't fully pick up. [8] Do a final wipe-down with a clean damp cloth, adding more water or vinegar as needed until no residue remains -- a quality microfiber kitchen towel picks up fine baking soda powder better than paper towels at this stage. [11] Let the oven dry fully before replacing the racks. [11]
Tackling Stubborn Stains and Grease
Vinegar foam reacts with baking soda residue to loosen stubborn spots, and repeating the spray-and-wait cycle tackles even the toughest burnt-on patches.
Using vinegar spray to lift residue
For spots that didn't fully release during the initial wipe, targeted vinegar spray does the work.
Spritz undiluted white vinegar directly onto any area where baking soda residue or grease remains -- the acid reacts with the alkaline baking soda and foams on contact, which physically loosens the bond between the residue and the oven surface. [8] Let the foam sit for a minute or two before wiping, which gives it time to work through the grime rather than just coating it. [7] For the most stubborn patches, repeat the spray-and-wait cycle two or three times before wiping -- a plastic scraper can help lift anything that still doesn't move. [12]
Scrubbing techniques for tough spots
For spots that still resist after the vinegar foam cycle, tool selection matters more than effort.
A nonscratch scrubbing sponge handles most oven wall residue without damaging the enamel surface, while a mineral-based abrasive powder -- applied with a stiff scrub brush -- delivers extra cutting power on oven door glass, where baked-on splatters tend to bond most aggressively. [13] Work in short strokes and change direction frequently, since many stubborn patches release more readily when approached from a different angle. [12] Steel wool and metal scrubbers are worth avoiding on any interior oven surface -- they scratch the finish and create rough patches where grease re-accumulates faster. [14]
Addressing burnt-on food and spills
Burnt-on food that survives the overnight treatment needs a second pass: mix the paste thicker -- about cake-icing texture -- press it directly onto stubborn spots, and leave it for another 8 to 12 hours before wiping. [1] For fresh spills, sprinkle dry baking soda over the area while the oven is still warm, let it sit for 15 minutes, then wipe clean before the residue bonds to the surface. [1] Very heavily soiled ovens may need two or three full treatment cycles before the surface fully clears -- and unlike the self-clean setting, which can bake residue on further in some cases, repeated baking soda applications won't damage the oven surface or produce fumes. [1]
Maintaining a Clean Oven
Wipe spills while the oven is still warm to prevent baked-on residue from hardening and requiring extra scrubbing effort later.
Regular cleaning schedule and tips
For most home cooks, cleaning the oven every three to six months keeps buildup from reaching the point where it requires serious effort to remove. [16] If you use your oven daily -- roasting, baking, braising -- aim for four to five cleans per year rather than the standard two. [15] Tying each cleaning to a seasonal kitchen reset (spring, pre-holiday, and mid-year if needed) makes it easier to stay consistent without relying on memory. [15] Wiping up fresh spills as soon as the oven cools is the single most effective habit for keeping deep cleans manageable -- dried, baked-on residue always takes more time to address than a fresh spill does. [16]
Preventing future buildup and stains
Preventing buildup comes down to how quickly you respond to spills.
Wiping the oven interior while it's still slightly warm -- not hot -- makes fresh grease easier to lift than residue that has cooled and hardened; this single habit cuts the effort required at your next deep clean. [12] Spot-treating splatters between scheduled cleans keeps residue from layering into the kind of buildup that resists a standard overnight baking soda treatment. [17] If your oven has a porcelain enamel interior, acidic spills from tomato-based sauces or citrus are worth addressing immediately -- acid can etch enamel if left sitting on the surface. [12]
Quick clean methods between deep cleans
Between deep cleans, a spray bottle of warm water and a small amount of dish soap is the most practical maintenance tool -- a quick spritz on walls and door glass after cooking, then a wipe-down, keeps splatters from layering into buildup. [18] If your oven has a steam clean setting, use it for between-clean refreshes: it runs at lower heat than the full self-clean cycle and loosens surface residue quickly, so the wipe-down after takes only a few minutes. [12] For spots that start to crust between scheduled cleans, heating the oven to 250 degreesF after applying the soapy water solution helps loosen them without needing baking soda or an overnight wait. [18]
- Baking soda paste needs 12+ hours to work; overnight treatment softens burnt-on residue for easier removal.
- Mix one cup baking soda with two tablespoons water; apply thick paste to all interior surfaces, avoiding heating elements.
- White vinegar spray reacts with baking soda residue and foams on contact, loosening stubborn patches without chemicals.
- Avoid commercial oven cleaners containing sodium hydroxide and butoxydiglycol--they cause skin burns and respiratory irritation.
- Clean your oven every 3-6 months; wipe fresh spills while the oven is warm to prevent buildup.
- Steel wool and metal scrubbers scratch enamel surfaces; use nonscratch sponges or mineral-based abrasive powder instead.
- Wear rubber gloves, ensure ventilation, and keep children and pets out until the space fully airs out.
- https://www.armandhammer.com/en/articles/clean-oven
- https://ecomaids.com/get-your-oven-holiday-ready-easy-eco-friendly-oven-cleaning-guide/
- https://www.poison.org/articles/using-oven-cleaners-safely-211
- https://www.vaporclean.co.uk/are-oven-cleaning-fumes-dangerous-7
- https://www.goodhousekeeping.com/home/cleaning/a70769545/how-to-clean-an-oven/
- https://www.thespruce.com/how-to-clean-oven-with-baking-soda-11896598
- https://www.ovenclean.com/blog/homemade-oven-cleaner-clean-your-oven-with-baking-soda-and-vinegar/
- https://www.thekitchn.com/how-to-clean-an-oven-cleaning-lessons-from-the-kitchn-201191
- https://www.thespruce.com/how-to-clean-oven-with-vinegar-11896272
- https://brendid.com/worlds-best-oven-cleaner-8-homemade-natural-oven-cleaners-tested/
- https://www.bettycrocker.com/how-to/equipment/clean-oven-with-baking-soda
- https://www.whirlpool.com/blog/kitchen/how-to-clean-an-oven.html
- https://www.thekitchn.com/cleaning-the-oven-thats-never-been-cleaned-liveblogging-the-kitchn-cure-fall-2013-195641
- https://wellnessmama.com/natural-home/natural-oven-cleaning/
- https://pressroom.geappliances.com/news/from-grime-to-shine-the-ultimate-guide-to-cleaning-your-oven
- https://www.seventhgeneration.com/blog/how-to-clean-your-oven
- https://www.thecleaningauthority.com/blog/how-to-clean/how-to-clean-the-oven-and-keep-it-clean/
- https://www.nytimes.com/wirecutter/guides/how-to-clean-an-oven/