
Learn how to restore a dry cutting board by understanding why wood cracks, then rehydrate and seal it with mineral oil and beeswax in just three days. Regular conditioning prevents future damage and extends your board's lifespan by years.
Why Wooden Cutting Boards Dry Out and Crack: Understanding the Root Cause
Uneven moisture loss causes wood to shrink unevenly, creating internal stress that splits the grain--regular oiling prevents this damage.
How moisture loss causes wood to shrink and split
Wood is hygroscopic -- it constantly absorbs and releases moisture depending on its surrounding environment. [1] Once moisture drops below the fiber saturation point, shrinkage begins, but not uniformly: tangential shrinkage (along the growth rings) can reach 6-12%, while radial shrinkage runs only 3-6%, and those competing forces generate internal stress. [1] The surface dries first, shrinking and pulling against a wetter core that hasn't moved yet -- that tension is what splits the wood. [2] On a cutting board, this plays out as hairline cracks along the grain that deepen over time if the board isn't regularly conditioned with oil.
Common environmental factors that accelerate drying (humidity, heat, dishwasher use)
Three conditions speed up moisture loss faster than regular use: low ambient humidity, direct heat exposure, and dishwasher cycles.
Dishwashers run at temperatures up to 140 degreesF, which degrades wood's cellular structure and breaks down the adhesive bonds in laminated boards -- that's why boards delaminate and crack after just a few cycles. [4] Storing a board near an oven, heating vent, or in direct sunlight produces the same rapid, uneven drying that fractures the surface. [4] Low-humidity environments -- particularly common in winter when indoor heating runs continuously -- pull moisture from wood faster than it can stabilize, compounding the internal shrinkage stress that eventually splits the grain. [3]
Step 1: Clean and Assess Your Cutting Board Before Treatment
Wash all surfaces thoroughly to prevent uneven moisture absorption and warping, then assess cracks by width and depth to determine whether oiling, glue repair, or replacement is needed.
Safe cleaning methods for wood without damaging the grain
Warm water and mild dish soap handle everyday cleaning -- scrub with a sponge, rinse, and dry right away with a clean towel. [5] Washing all surfaces (top, bottom, and sides) prevents uneven moisture absorption; cleaning only the face you cut on causes the board to swell asymmetrically, which leads to warping -- a risk on any wood board, whether edge-grain or end-grain. [7] For persistent odors from garlic or onions, sprinkle coarse salt over the surface, rub with a halved lemon, and let the mixture sit for 15 minutes before rinsing with warm water. [6] Always re-oil after a salt-and-lemon treatment, since the process draws moisture from the wood. [6]
How to identify crack severity and determine if professional repair is needed
Not all cracks call for the same response -- width, depth, and location determine whether oiling, a glue repair, or full replacement is the right move.
Hairline surface cracks under 1/8 inch wide respond well to mineral oil treatment; as the wood rehydrates, fibers swell and often close the gap on their own. [9] Cracks wider than 1/8 inch, especially those running the full length of the board, signal structural compromise and need food-safe wood glue and clamping before any conditioning. [9] A board showing large through-cracks, severe warping, persistent odors after deep cleaning, or visible mold has passed the point of practical repair and should be replaced. [8] [9]
Step 2: Rehydrate and Oil Your Cutting Board in 3 Days
Apply mineral oil generously to saturate dry wood, then seal with beeswax for lasting protection that prevents moisture damage.
The rehydration process: water soak timing and wood absorption science
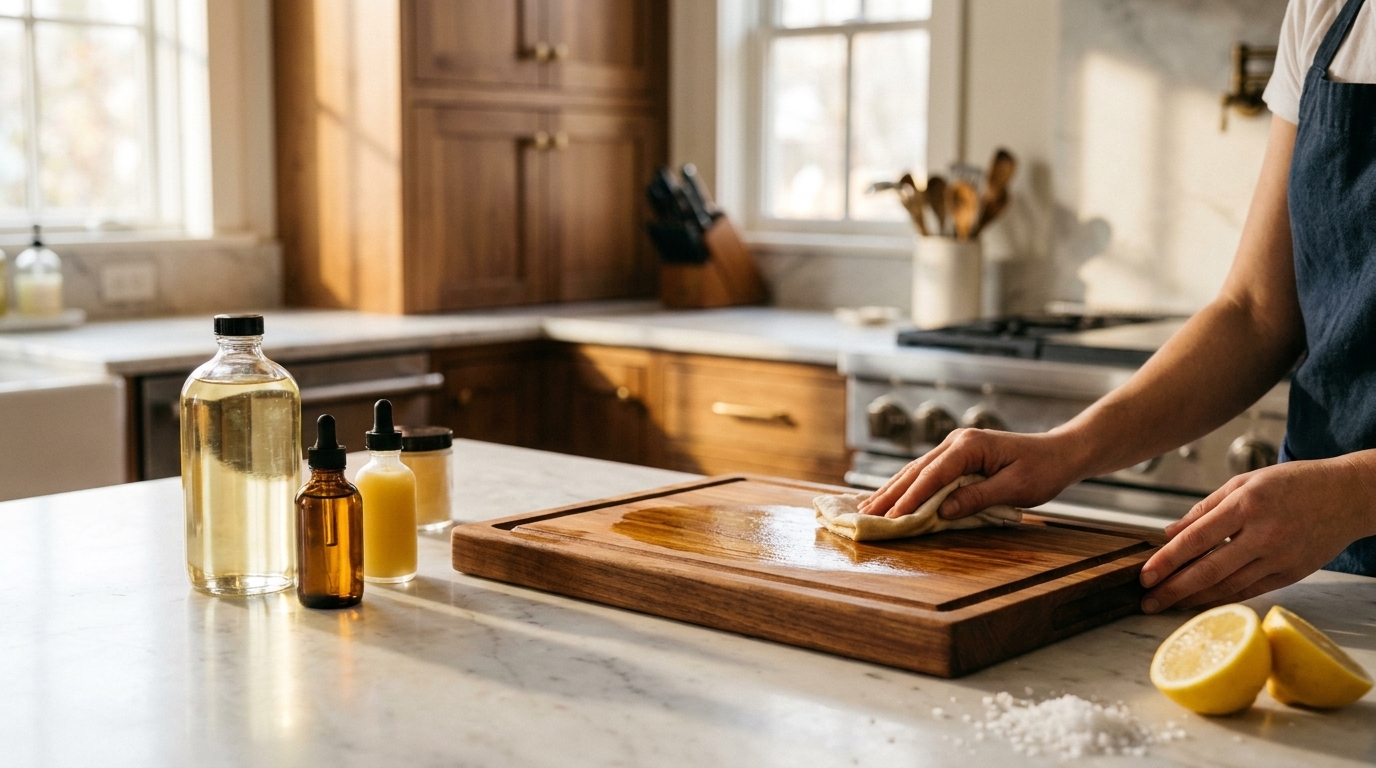
A severely dry board needs more oil than a standard maintenance coat -- apply mineral oil generously, give it about five minutes, and check whether the wood has pulled it in; for a very dry board, repeat this two to three times to saturate any thirsty spots. [10] Once you've applied the oil, stand the board upright (or flat on its feet if it has them) and let it penetrate overnight before wiping off any excess residue. [7] To gauge whether the wood has absorbed enough, use the water bead test: sprinkle a few drops on the surface -- if they spread rather than bead up, the board needs another coat. [10]
Choosing the right oil and application technique for lasting results
Mineral oil is the standard choice for conditioning wood boards -- it's odorless, tasteless, and won't go rancid the way cooking oils like olive or vegetable oil do over time. [7] Apply it with a paper towel using even strokes across the entire surface, including the sides and bottom, to prevent uneven absorption. [7] Once the oil has fully absorbed overnight, follow with a food-safe beeswax or beeswax-mineral oil blend to seal the surface -- slightly warming the wax first helps it spread more evenly and penetrate a bit deeper. [7] Wax seals the surface layer while mineral oil feeds the wood fibers underneath, so both steps together give you lasting protection rather than just a temporary fix. [11]
Step 3: Fill Cracks and Seal for Long-Term Protection
Weekly oiling for the first month, then monthly maintenance, keeps repaired wood from drying out and cracking again.
Food-safe repair options for small to medium cracks
For cracks between 1/8 and 1/4 inch wide, food-safe epoxy fills gaps durably without shrinking or reacting with food surfaces. [12] Apply it with a toothpick or small spatula, overfill slightly to account for settling, then sand flush once cured -- typically around 24 hours. [12] To seal the repaired area, a diluted food-safe finish like salad bowl varnish works well: thin it enough that it absorbs directly into the wood's pores rather than sitting on the surface, and stop adding coats once the wood stops pulling the finish in. [13] Stabilize the board with at least one mineral oil coat before applying any filler so the wood isn't drawing product unevenly into dry spots.
Maintenance schedule to prevent future drying and cracking
A consistent oiling schedule is the most effective way to keep a restored board from drying out again.
Oil once a week for the first month, then shift to monthly -- or whenever the board looks dry to the touch -- and increase frequency during winter when low indoor humidity pulls moisture from the wood faster than usual. [7] Use the water bead test to gauge when the board needs attention: sprinkle a few drops on the surface and if they spread rather than bead up, the board needs another mineral oil coat before adding wax. [7] When the board isn't in use, store it on its feet or propped upright on one edge so air can circulate underneath and moisture doesn't pool below the surface. [14] Can a Cracked Wooden Cutting Board Be Repaired?
When to Fix vs. Replace
Structural damage assessment: salvageable cracks versus irreparable splits
Cracks that penetrate the full thickness of the board -- rather than sitting on the surface -- create bacterial pathways that filler can't reliably seal; bacteria can migrate through filler and the surrounding wood grain back to the cutting surface. [7] A professional woodworker can disassemble a laminated board, remove the damaged section, and reassemble it, but the repaired board will be smaller in at least one dimension, and the cost often rivals buying a new board. [7] Boards showing mildew, soft or discolored wood along a crack, or structural warping that sanding can't correct have reached the point where the wood itself is compromised -- not just the surface -- and replacement is the more practical call. [7]
Cost-benefit of restoration versus investing in a new high-quality board
Restoration makes the most financial sense on a thick hardwood board -- maple, walnut, or cherry -- that originally cost $100 or more and still has sound structure.
Mineral oil, food-safe wax, and wood glue together cost under $20, making a full restoration far cheaper than replacing a board that, when well-maintained, can last a decade or longer. [15] Budget acacia or thin laminated boards under $50 are a different calculation: the wood is typically thinner, the glue joints less robust, and the material more prone to repeat splitting, so replacement often makes more practical sense than investing time in repair. [16] If you're starting over, a well-made end-grain hardwood board earns back its higher upfront cost through durability -- the boards that hold up longest in testing tend to be the ones built from large, precisely joined hardwood pieces rather than cheaper materials. [15]
Common Mistakes That Worsen Dry and Cracked Cutting Boards
Wrong oils go rancid inside wood fibers, and standing water causes the same warping that dishwashers do--proper drying and storage prevent both.
Why dishwashers, excessive water, and improper oils damage wood faster
Using cooking oils -- olive, vegetable, or peanut -- seems practical, but all three contain fatty acids that break down inside wood fibers, eventually going rancid and embedding persistent odors into the board. [18] Standard coconut oil causes the same problem, solidifying on the surface rather than penetrating the grain; fractionated coconut oil, which has its fatty acids removed through distillation, is the plant-based exception that actually absorbs into wood effectively. [18] Leaving water standing on the surface -- or soaking the board in the sink -- causes the same uneven fiber swelling that dishwasher cycles produce, just more gradually, and repeating either habit accelerates the warping and cracking that regular oiling is meant to prevent. [17]
How to avoid soap residue and storage mistakes that cause repeat drying
Rinsing the board thoroughly after washing matters more than most people realize -- soap residue left on the surface builds up over time and interferes with oil absorption during conditioning. [19] Once rinsed, dry the board immediately with a clean towel rather than leaving it flat on the counter, where pooled water underneath accelerates warping from the bottom up. [7] Always stand the board upright -- or flat on its feet if it has them -- so air circulates on all sides before you put it away, and make sure it's completely dry before storing, since packing away a damp board is one of the most consistent causes of mildew collecting along the edges. [7]
- Wood shrinks unevenly when moisture drops, creating internal stress that splits the grain along growth rings.
- Dishwashers and direct heat cause rapid moisture loss that degrades wood structure and breaks laminate adhesive bonds.
- Hairline cracks under 1/8 inch close on their own as mineral oil rehydrates the wood fibers.
- Mineral oil penetrates wood; cooking oils go rancid and embed odors, so use mineral oil or fractionated coconut oil only.
- Weekly oiling for one month, then monthly maintenance with the water bead test prevents future cracking and warping.
- Cracks wider than 1/4 inch or boards with mold, severe warping, or soft wood around splits should be replaced.
- https://pmc.ncbi.nlm.nih.gov/articles/PMC10422486/
- https://www.davidcondonwoodcraft.ie/post/wood-moisture-why-bowls-crack-as-they-dry?srsltid=AfmBOoo3rGxr591Bh5Yt8l8VSznXpsuGA6MVSDv0bnUy2E52AXT4sIw1
- https://koppenhouse.com/blog/wood-cutting-board-splitting/
- https://lifetips.alibaba.com/kitchen-hacks/wood-cutting-boards-in-dishwasher
- https://www.bonappetit.com/story/how-to-clean-a-wooden-cutting-board?srsltid=AfmBOooM1n4ytAUHsvxEzmD-9RUwv-bPkn33kgV1kkbiPu9rQcabO3U_
- https://www.johnboos.com/blog/complete-guide-to-caring-for-your-wood-cutting-board?srsltid=AfmBOoqWnnFEnyxctaFgt0hRSLuKB_S_D0iXhib_RLqOJ1fG3178kbWZ
- https://www.nytimes.com/wirecutter/guides/how-to-clean-wood-cutting-boards/
- http://www.fsis.usda.gov/food-safety/safe-food-handling-and-preparation/food-safety-basics/cutting-boards
- https://www.curbly.com/clean-wood-cutting-board
- https://www.seriouseats.com/how-to-season-and-maintain-a-wood-cutting-board
- https://beaverwoodcare.com/blogs/news/ultimate-guide-to-cutting-board-oil-and-wax-the-best-food-safe-kitchen-products-for-2025
- https://www.lumberjocks.com/threads/anyone-have-a-successful-solution-to-filling-holes-and-cracks-in-end-grain-cutting-boards.353873/
- https://thewoodwhisperer.com/articles/cutting-board-finish/?srsltid=AfmBOorDKF6onVlUXRtVA-UcbtV7CPzOr6nf7VGHkJdOfyXOBuf9pv4O
- https://theboardsmith.com/pages/care-and-use?srsltid=AfmBOooY08YwU3QsnjDGA-cyuwmecy9GhJPiqr0XES0uhvRwrBQOvyvw
- https://www.seriouseats.com/best-wooden-cutting-boards
- https://www.tastingtable.com/1887360/why-dont-need-expensive-cutting-board/
- https://superclean.sg/blog/can-you-put-wood-cutting-boards-in-the-dishwasher/
- https://www.foodrepublic.com/1342937/oil-avoid-clean-buff-wood-cutting-boards/
- https://ziruma.com/pages/5-simple-steps-to-clean-and-maintain-your-wooden-cutting-board?srsltid=AfmBOoqy5d9JCkHVvzPeisrNs3iQUvMtIPvDmyBhDmG8H2DUs0gLeLtj
- Summary
- Why Wooden Cutting Boards Dry Out and Crack: Understanding the Root Cause
- Step 1: Clean and Assess Your Cutting Board Before Treatment
- Step 2: Rehydrate and Oil Your Cutting Board in 3 Days
- Step 3: Fill Cracks and Seal for Long-Term Protection
- Common Mistakes That Worsen Dry and Cracked Cutting Boards
- Key Takeaways
- References